
Overview
How to read this guide
This guide has two parts.
Part I — Designing an experiment describes the four systems of a Carrier experiment. Each chapter starts with the research problem that the system solves. Then it gives the parts that Carrier supplies and the decisions that you make. Each chapter has short builder clips and examples.
Part II — Operating the platform describes how to run a study: start an experiment, monitor participants, export data and manage accounts. Read the related chapters of Part I first.
The appendices have a glossary, the type-by-role matrix, and quick references for segment types and trigger types.
Help inside Carrier: the dashboard, the page of each experiment and the builder have a Help button. Help opens this guide, the tutorials, a short tour and the latest updates in a new tab, so your work stays open. In the builder, Help first shows the sections of this guide for the item that you selected: a segment, a chamber, a chamberline or the experiment. The segment settings, the Script Builder, Variables and the Feed Builder each have a Docs link to their section. A researcher with no experiments sees Getting started on the dashboard, and Carrier offers the tour. The tour has four stops on the dashboard, five in the builder and five on the page of the first experiment. Carrier shows each part one time. Skip tour stops the tour. Help → Take the tour starts it again.
Overview
The four systems
A Carrier experiment has four systems. Each system answers one design question:
| System | Question | What it gives you |
|---|---|---|
| Chamberlines, chambers, segments | What is the path of a participant through the study? | Conditions, groups of participants, and the activities of each group. |
| Roles | Who takes part, and what do they do? | Three roles: communicator, mediator and processor. A person, an LLM chatbot or a scripted chatbot can have any role. |
| Variables | What do we know about each participant, and how does it change their path? | Values that stay with a participant. Use them to filter matches, to show or hide content, and to put personal text in instructions. |
| Triggers | What do chatbots do, and when? | Rules that tell each non-human participant when to speak or act. |
The figure shows the first system:
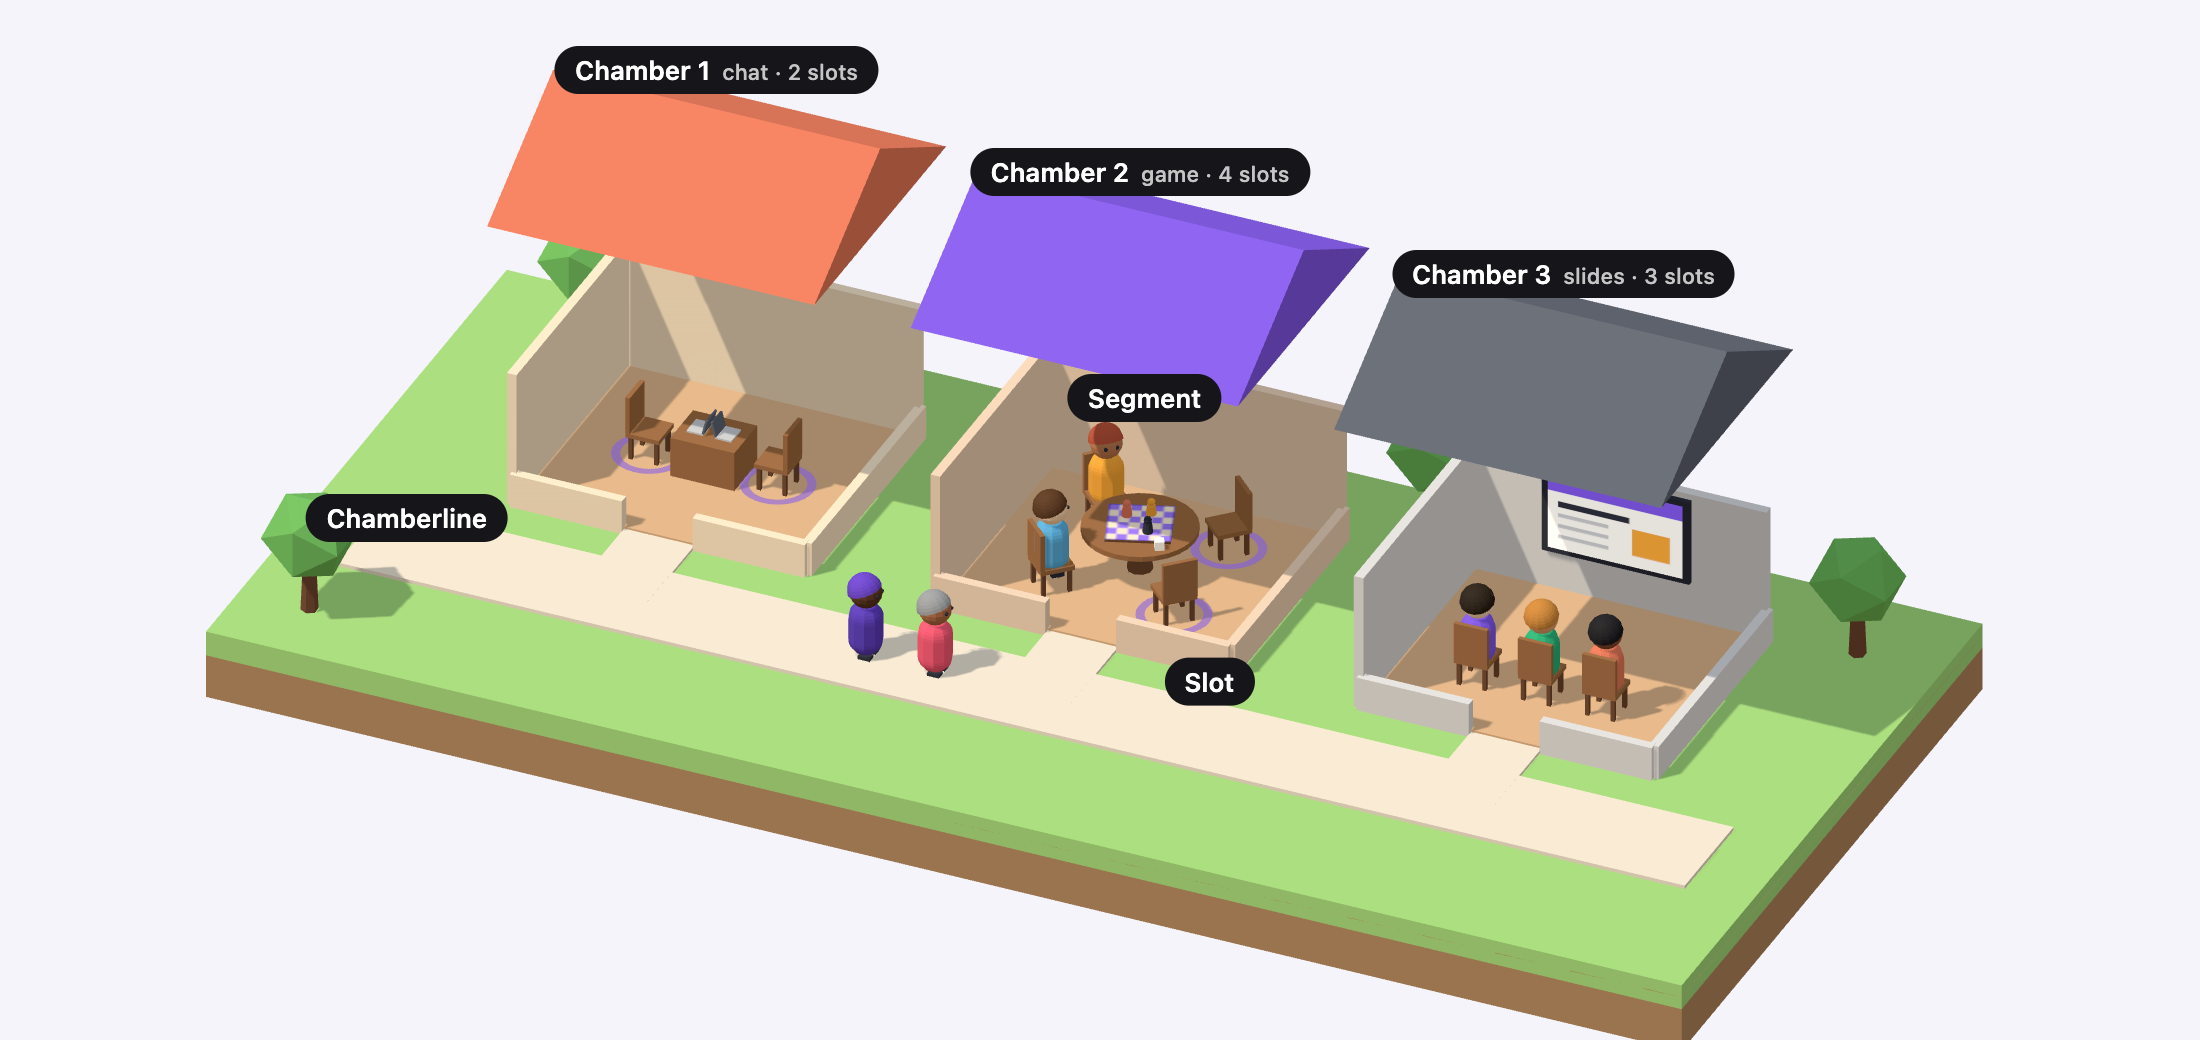
- Chamberline. One condition. Each participant stays on one chamberline.
- Chamber. Carrier matches a group of participants in a chamber. The group stays together until the chamber ends.
- Slot. A position for one participant. Each chamber has its own number of slots. A chamber starts when all of its slots are full.
- Segment. An activity in a chamber, for example a chat, a game or slides. A group can do several segments, one after the other.
- The next chamber. When a chamber ends, each participant goes to the next chamber on their chamberline. Carrier matches a new group there.
Variables and triggers are not in the figure, because they apply at all levels. Variables stay with each participant from chamber to chamber. Triggers control the chatbots in each chamber.
The chapters start with the structure, then the participants, then the information, then the behaviour. Each chapter uses the chapters before it. After you read all four chapters, you can read each chapter alone.
Overview
A note on terminology
Each Carrier term is close to a research term:
| Carrier term | Closest research term |
|---|---|
| Chamberline | A condition (an experimental arm) |
| Chamber | A group of matched participants, for a period of time |
| Segment | An activity or a phase in a chamber |
| Slot | A position in a chamber for one participant |
| Run | The full path of one participant through the experiment |
| Chatroom | A live chamber: the copy of a chamber for one matched group |
| Variable | A value for a participant, from a survey, an assignment or the system |
| Trigger | A rule (a condition and a response) for a non-human participant |
These matches are approximate. Appendix A gives the full definitions.
Overview
A note on non-human participants
Carrier has two types of non-human participant. They are different in what they can do, how reproducible they are, and which designs they are good for.
- LLM chatbots use a language model from OpenAI, Anthropic or Google. At each turn, the model gets the conversation and a system prompt, and it writes one chat message. That message is all that it does. Its replies are natural, but they are different in each session. Use an LLM chatbot when it must read the conversation and reply freely. With Agent (provider-managed) memory, OpenAI or Anthropic keeps the conversation on its servers, and Carrier does not send it again at each turn. It is still only a language model: it has no tools, files or web access.
- Scripted chatbots send replies that you write before the study. Each one has a set of triggers (§5), for example: “when a participant says X, send one of these three sentences”. It does nothing else. With one reply per trigger, a probability of 1 and a fixed delay, a scripted chatbot gives the same output for the same input in each session. (Carrier selects reply variants, probabilities and delay ranges at random.) Use a scripted chatbot when its behaviour must be reproducible and the same for all participants.
Both types can have any of the three roles (§3). A scripted chatbot in the processor role operates as an LLM processor (see §3.5). The type-by-role matrix in §3.1 and in Appendix B shows which types fit which roles.
In this guide, “chatbot” means an LLM chatbot or a scripted chatbot. The
builder calls each non-human participant an “agent”
(participantType: 'agent'). In this guide, that word means the same
thing. It is not a third type.
Intervention actions: a mediator can disable the input of a participant, enable it again, send a private prompt, ask for attention or highlight a message (§3.4.3). A human mediator does this on the screen. A scripted chatbot mediator does this with the Mediator action of a trigger (§5.5.1). At present, an LLM chatbot mediator can only broadcast.
Chamberlines and Chambers
A chamberline is a condition. A chamber is a matched group. The activities inside a chamber are the subject of §2.
§1 · Chambers
1.1 The shape of a Carrier experiment
All Carrier experiments have the same three levels:
- When a participant opens the experiment link, Carrier puts the participant on one chamberline. The chamberline is the participant’s condition.
- A chamberline is a sequence of chambers. A chamber is a small group of participants: people, chatbots, or both. Carrier matches the group one time, at the start of the chamber. The group stays together until the chamber ends.
- A chamber is a sequence of segments. A segment is one activity, for example a chat.
Each level controls one thing:
- A chamberline sets the condition. A participant sees one chamberline only.
- A chamber sets the group. In a chamber, the group does not change.
- A segment sets the activity. In a segment, the activity does not change.
§1 · Chambers
1.2 Chamberlines: the unit of condition
1.2.1 Why chamberlines
A chamberline is one condition of your study. It is the full sequence of steps that a participant goes through.
- Make one chamberline for each between-subjects condition. Example: one chamberline for high anonymity and one for low anonymity.
- Carrier puts each participant on one chamberline at the start. The participant stays on it until the end.
- For a within-subjects comparison, put the chambers for each manipulation in sequence on one chamberline.
1.2.2 Assigning participants to chamberlines
Set the assignment method in Experiment Settings → Chamberline Assignment. There are four methods:
| Method | What it does | When to use it |
|---|---|---|
| Random | Carrier puts each new participant on a chamberline at random. The Selection Weight of each chamberline sets its chance. Carrier draws the chamberline one time for each participant. | Simple between-subjects studies. This is the default. |
| Counterbalance | Carrier keeps the number of participants on each chamberline equal. You select the strategy, as for a counterbalance variable (Randomized blocks is the default). With Balance within, Carrier balances the chamberlines separately for each value of a different variable, for example a band of a pre-survey rating. | You need the same number of participants in each condition, also inside each group of an attitude or another trait. |
| Variables-based | Carrier reads one variable. A table of rules gives the chamberline for each value. If no rule matches, Carrier selects a chamberline at random and records this as a fallback. | The condition depends on an answer from the participant (for example, their native language), or on a random-pick or counterbalance variable. |
| Fixed | Carrier puts all participants on the same chamberline. | Pilots and demonstrations, or a study of one condition only. |
Random and Counterbalance use the variable system. Carrier puts the id of the
chamberline in a variable, assigned_line, which Chamberline Assignment
sets. You can use it in text, in conditions and in the export, as any other variable.
A study that used Counterbalance before this change keeps the earlier method
(Fewest runs) until you select a different strategy. The new
strategy also counts the participants that the earlier method put on a chamberline.
Carrier draws the chamberline one time for each participant. If you restart a
participant from the dashboard, the participant gets the same chamberline again.
The global pre-survey runs before Carrier assigns the chamberline. Thus, you can use any answer from the global pre-survey in a rule (see §4.3.1).
1.2.3 What a chamberline holds
A chamberline has a name, a sequence of chambers and, if necessary, assignment criteria. It has no other settings. Give each chamberline a clear name. Then the list of names and chambers in the builder shows the design of the full experiment.
A new experiment has one chamberline. The researcher clicks “Add Chamber Line” to add a second one. The researcher clicks the name of each chamberline and changes the names to “High Anonymity” and “Low Anonymity”. Then the researcher clicks the empty canvas to open Experiment Settings, and sets Chamberline Assignment to “Random”. Each chamberline can now hold chambers.
§1 · Chambers
1.3 Chambers: the unit of matched group
1.3.1 Why chambers
A chamber is a group of participants that stays together. When a participant enters a chamber, Carrier matches the participant with the other participants of that chamber. The group does not change until the chamber ends.
Many interactive studies need the same partner for more than one task. Examples: a discussion and then a joint ranking, or a chat and then a rating of the other person. Put these tasks in the same chamber, so that the same participants do them. At the end of a chamber, the group stops. The next chamber matches a new group from the participants who are ready for it.
1.3.2 Matching at the start of a chamber
Carrier matches participants one time, at the start of each chamber:
- A participant finishes the previous chamber. (For the first chamber, the participant finishes the global pre-survey.)
- The participant waits in the matching pool.
- When there are sufficient participants for all of the chamber’s slots, the chamber starts.
A slot is one position in the chamber. Each slot has a type (human, LLM chatbot or scripted chatbot) and a role (communicator, mediator or processor; see §3). A human slot can also require a variable value. Example: one slot for a participant who says they are a novice, and one for an expert. §4 describes matching on variables.
Each chamber has a Matching Timeout (120 seconds by default). If the group is not complete before the timeout, Carrier does the On Matching Timeout action of the chamber:
- End session with message: Carrier shows the Timeout Message and ends the participant’s session. This is the default.
- Proceed without match: the participant enters the chamber without a full group.
A timeout of 0 means that the participant waits with no limit. The researcher sets these values; the participant cannot change them.
1.3.3 What a chamber holds
A chamber has these settings:
- A name and an identifier. The dashboard and the export use them.
- Slots. Each slot has a role and a type.
- A sequence of segments (see §2). The communication channel (
text,audioorvideo) is a setting of the chat segment, not of the chamber. - A pre-survey and a post-survey (optional). Each participant sees the pre-survey before the chamber and the post-survey after it.
- A maximum participant count. This is the total number of slots.
Caution: At present, chamber pre-surveys and post-surveys do not operate correctly in the participant’s browser. Do not use them. For measures before or after a manipulation, put a survey segment in the chamber (see §2.11).
Chamber surveys are different from the global surveys of the experiment. Each participant sees the global pre-survey one time, at the start, and the global post-survey one time, at the end. Use the global surveys for consent and demographics.
Using the global pre-survey as a consent form
The global pre-survey can end a participant’s session. To add a rule:
- Open Experiment Settings → Global Surveys.
- Under the questions of the pre-survey, find Pre-Survey Completion Conditions. Click Add Condition.
- Set the If field (the name of a question), the operator and the value.
- Write the message that the participant sees. If necessary, add a redirect URL, for example the “returned” link of a recruitment platform.
- Set how Carrier records the exit. A new rule records it as Declined consent. The dashboard and the export show this outcome separately from screen-outs.
A typical consent rule is: if consent ≠ yes, end the session.
- Make the consent question required, so that the participant cannot skip it.
- Carrier checks the rules each time the participant goes to the next page. Thus, a refusal on the first page ends the study on that page.
- Carrier checks a rule only after the participant answers its question.
- A participant who refuses does not enter a chamber or the matching pool. Carrier keeps the answers on the participant’s run. Thus, the export shows that the participant saw the form and refused.
- A rule can only end the session. To send participants to different conditions, use chamberline assignment (§1.2.2).
- The global post-survey and the chamber surveys do not have rules. If a chamber needs a survey that can end the session, use a survey segment.
Under Global Surveys, the researcher adds a required single-choice question with the name consent. The choices are “I agree” and “I do not agree”. The researcher clicks Add Condition and writes the rule: if consent ≠ I agree, end the session with a message. Record as already shows Declined consent. The tutorial Use the pre-survey as a consent form shows all of the steps, what participants see, and the dashboard.
The researcher selects a chamber and changes its name to “Deliberation” in the configuration panel. Then the researcher drags Human Participant from the Library into the Communicators lane of the chamber two times. The chamber card now shows two participants. (To add a slot, drag an entity into a role lane. There is no “add slot” button. The communication channel is a setting of the chat segment, not of the chamber; see §2.15.)
§2 describes segments: the activities of a group in a chamber, and the settings of each. §3 describes roles.
Segments: the system
A segment is one unit of activity. A matched group does one activity at a time. This page gives the full list of segment types, the standalone and embedded display modes, and the timing rules. The next four pages tell you how to configure each of the fifteen types.
§2 · Segments
2.1 The segment system
The segments of a chamber are its timeline. The participants are already matched when the first segment starts. They then go through the segments together, in order. Each segment is one activity, for example a slide, a conversation, a vote, a ranking, a video or a short survey. Each segment has its own timing and transition rules.
Make each segment small. For example, a “thirty-minute deliberation” study is usually not one chat segment of thirty minutes. It is a sequence of segments:
- A slide that gives the topic.
- A timer that gives participants time to think.
- A chat segment for the deliberation.
- A ranking segment that records the answer of the group.
- A short survey.
You configure each segment separately, and Carrier records each segment separately. You can skip, repeat or replace one segment and not change the others.
§2 · Segments
2.2 The catalogue of segment types
Carrier has fifteen segment types. The Compatible with AI column shows the types in which a non-human participant can take part. A non-human participant is an LLM chatbot or a scripted chatbot. Non-human participants can take part in the conversation types and the choice types. They cannot take part in the types for reading, listening, waiting or attention checks, because these types give them nothing to do. The Embeddable column shows the types that can show on top of a chat (§2.3).
| Type | What participants do | Compatible with AI | Embeddable |
|---|---|---|---|
instruction | Read formatted instructions and click Continue. | — | ✓ |
slide | Look at a deck of slides that you make, one slide at a time. | — | ✓ |
media | Watch a video clip or listen to an audio clip. | — | ✓ |
pdf | Read a document. The document can show next to a live chat. | — | ✓ |
timer | Wait. A countdown can show or not show. | — | — |
survey | Answer a Survey.js questionnaire in the segment. | — | ✓ |
input | Write a free-text answer. | ✓ | ✓ |
selection | Choose from a set of options. | ✓ | ✓ |
ranking | Drag items into an order. | ✓ | ✓ |
chat | Talk in real time with the other participants in the chamber. | ✓ | — |
social | Use a mock social feed. Participants can comment, reply, like or vote, and follow. | ✓ | ✓ |
shop | Use a mock online store. Participants look at products, read reviews and add products to a cart. They check out to continue. | ✓ | — |
task | Do a custom interactive task. An agent can send its text answer. | ✓ | ✓ |
process | Wait while the server runs an LLM step between activities. No agent takes part. | — | — |
attention-check | Do an attention check. The check uses a survey or the camera. | — | — |
Each type has its own reference section, from §2.6. Each section tells you what the participant sees, what the type is for, and all the parameters in its configuration panel.
§2 · Segments
2.3 Standalone and embedded segments
Usually a segment uses all of the participant's screen while it runs. This is a standalone segment. It starts at its position in the chamber timeline. It runs until it is complete or until its time ends. Then the next segment starts.
You can also set most segment types that are not chat to run embedded in a chat segment. An embedded segment shows on top of the chat. Participants can vote, rank, write, watch a clip or read an instruction and stay in the conversation. The chat continues to record messages during this time. The embedded segment shows only when its start trigger occurs.
The activity replaces the chat on the screen. The chat is not visible while the activity runs. The chat shows again when the activity ends.
The activity shows on top of the chat. New messages continue to arrive. The group answers and stays in the discussion.
selection segment in the two display modes. Only the embedded
mode keeps the chat on the screen. This is the purpose of the embedded mode.
These segment types can be embedded: selection, ranking,
pdf, social,
input, task, slide, instruction,
media and survey. The other types always run standalone,
and the builder does not show the option for them. These types are chat,
attention-check,
timer, process and shop. You cannot embed a
chat in a chat, because the chat is the parent.
An embedded segment belongs to the chat that is directly before it in the timeline. Other embedded segments can be between the two. If no chat is before an embedded segment, participants never see it. Thus Validate and activation refuse the experiment. On screens narrower than 900 px, Carrier shows every segment as standalone. Thus the layout stays correct on a phone.
Use an embedded segment when the activity is part of the conversation and must not stop it. Two examples:
- Periodic polling during a deliberation. Participants vote at three times: after one minute, after three minutes and after five minutes. They continue to talk between the votes. Each vote is a different embedded
selectionsegment. Each has a different Start Trigger. - Pacing a ranking activity to chat progress. Show a ranking only when the conversation has given enough items to rank. For example, show it after a set number of chat messages. Or show it a set time after the chat starts.
An embedded segment has three more parameters than a standalone segment:
| Parameter | What it does |
|---|---|
| Start Trigger | Sets when the embedded segment shows in the parent chat. The options are Immediate, Time-based (after X seconds), Message count (after X messages) and After previous segment ends. The last option can add a delay after the previous embedded segment. |
| Stop Trigger | Sets when the embedded segment closes. The default is Participant action (submit/next). The other option closes it after a set number of seconds. |
| Completion Behavior | Sets what occurs when the embedded segment is complete. Dismiss removes it, and the chat continues. End chat segment ends the parent chat. Lock keeps it on the screen but stops all input. Minimize makes it a small pill. |
A chat segment with one or more embedded segments has one more transition mode, Embedded complete. This mode ends the chat when every embedded segment is complete. Use it when the chat must end after the group votes, ranks or reads the instruction, and not after a fixed time.
A start trigger can fail to occur. For example, participants may never send the number of messages that a Message count trigger needs. For this condition, set the optional Fallback timeout on the chat. The chat then ends after that time.
An attention-check segment always runs standalone. Other activities can
need the full attention of the participant. For these activities, keep the
Display Mode at Standalone. The activity then uses the full screen,
the same as a standalone survey or instruction.
The researcher selects a chat segment in a chamber. They add a selection segment directly after it in the segment timeline. They set the display mode of the selection segment to “Embedded (overlay on chat)”. They set the start trigger to “after 60 seconds”. They set the completion behavior to “Minimize”. The timeline now shows the selection segment indented under the chat. A small badge on it shows its start trigger.
§2 · Segments
2.4 Inline and split view
An embedded segment can show in the chat in one of two layouts. You select the layout in the Embedded Layout setting.
Inline shows the embedded segment as a card in the list of messages. The card shows at the position that the chat had when the card started. The card scrolls with the messages. Use this layout for a short activity, for example a vote or a one-line question.
Split puts the chat in a column at the side. The embedded segment
gets its own pane next to the chat. Nothing scrolls away. Participants read, watch or
work in one pane, and they talk in the other pane. Use this layout when material must
stay on the screen, for example a document or a shared task. Only the
pdf segment uses Split by default. Its purpose is to let participants
read a document and talk about it.
The card is in the list of messages and scrolls away with them. Use it for a short activity, for example a quick vote or a one-line question.
The chat moves to a column, and the activity gets its own pane. Nothing scrolls away. Use it for material that must stay on the screen.
For Inline, Card width and card height set the size of the card. Card width is a percentage of the chat area, and the default is 75 %. Card height is a percentage of the visible chat, and the default is 35 %. For Split, the Content pane width setting sets the width of the pane, and the default is 75 %.
An incorrect embedded segment does not cause an error when you save. Carrier shows a different layout. Thus the participant sees a different screen from the screen that you expect:
- Split without a chat parent falls back to inline. The split pane needs a chat segment. If the embedded segment does not come after a chat, Carrier shows it as Inline and does not tell you.
- Narrow viewports fall back to standalone. On a screen narrower than 900 px, the embedded segment uses the full screen. It does not show on top of the chat. Thus a participant on a phone sees a different sequence from a participant on a laptop.
- Mediators and observers see the standalone form. Only the participants who do the activity see the embedded segment on the chat. Mediators and observers see the segment in their own observation panel.
§2 · Segments
2.5 Timing, transitions, and participant pacing
Each segment has its own timing and transition rules. These rules set how long participants stay on the segment and how they go to the next segment. The four most important parameters are:
- Max Duration — the maximum time that the segment can run. If you do not set it, the segment has no time limit.
- Min Duration — the minimum time before a participant can go to the next segment. Use it to make participants stay on a segment for a minimum time. For example, an instruction slide can say “read for at least 30 seconds before continuing”.
- Warning Time — the time before an automatic advance at which Carrier shows a warning. Use it in long segments, so that the transition is not a surprise.
- Transition Mode — the rule that sets how participants go to the next segment:
| Mode | Description |
|---|---|
| Auto | The segment ends automatically when the duration ends. |
| Manual | Each participant goes to the next segment when they click Continue. |
| Sync | The segment ends only when every participant in the chamber is ready. All participants go to the next segment at the same time. |
| Host | No Continue button shows. Participants see “The researcher will move everyone on”. The researcher moves the group on from the chatroom view on the dashboard (§6.3). |
| Embedded-complete | (Chat segments only) The chat ends when every embedded segment is complete. |
The transition mode is an important decision. A sync transition keeps the group together. But the slowest participant sets the speed of the group, and this can be a problem in long studies. A manual transition lets each participant go at their own speed. But on a chat segment, it can stop the chamber from working as a group. A host transition is most useful in pilot tests. The researcher moves the group through the timeline and finds pacing problems.
Presentation segments
These five segments show content and ask no question: a slide deck, an instruction, a media clip, a PDF and a timer.
§2 · Segments
2.6 The slide segment (deck)
A slide segment is a deck. A deck is an ordered
set of slides. The participant sees the slides one at a time. This is the
difference from instruction: an instruction is one screen to
read and accept; a slide segment is a sequence of screens. Put a study
brief with a Continue button in an instruction segment
(§2.7), because its editor is better for
long text. Put a stimulus that uses four screens in one slide segment, not in four
segments. For example: a scenario, a chart, the manipulation, and the question.
- The participant sees one slide in the activity area. The usual chamber items are around it: the segment progress indicator, the countdown clock and the participant list in the sidebar. The chamber settings control these items.
- A Next button is below each slide, but not below the last slide.
- A Back button is next to it on each slide after the first. This button shows only if the segment allows the participant to go back. By default, it does not.
- On the last slide, the segment's own Continue button replaces Next. Thus one click leaves the deck and the segment.
- The chamber progress indicator counts segments, not slides. There is no slide counter. The participant does not know how many slides remain, because this knowledge changes how carefully they read the first slides.
- If a slide has a minimum dwell time, its button is disabled. The text “Available in 12s” counts down next to it.
- A slide has nothing to submit. The participant reads or watches, and then continues.
You make the slides in the Deck Builder. This is a modal window. You open it from the segment configuration panel. The left column is the slide list, where you add, copy, move and delete slides. The right pane shows the layout settings and the blocks of the selected slide.
A block is one item of content of one type:
- a heading;
- a text block in Markdown, written in the same full-screen editor that
the
instructionsegment uses; - an image or video from the experiment image library or from a URL;
- an html block that Carrier adds to the page as you wrote it (after the safety filter in the caption below).
The blocks show in the order of the list. Carrier does not save changes to the experiment until you click Save deck.
<h2>Round 1 — the proposal</h2>
<p>Your group has <strong>£10,000</strong> to allocate between three bids.</p>
<blockquote>{{var.first_name}}, you have been asked to speak first.</blockquote>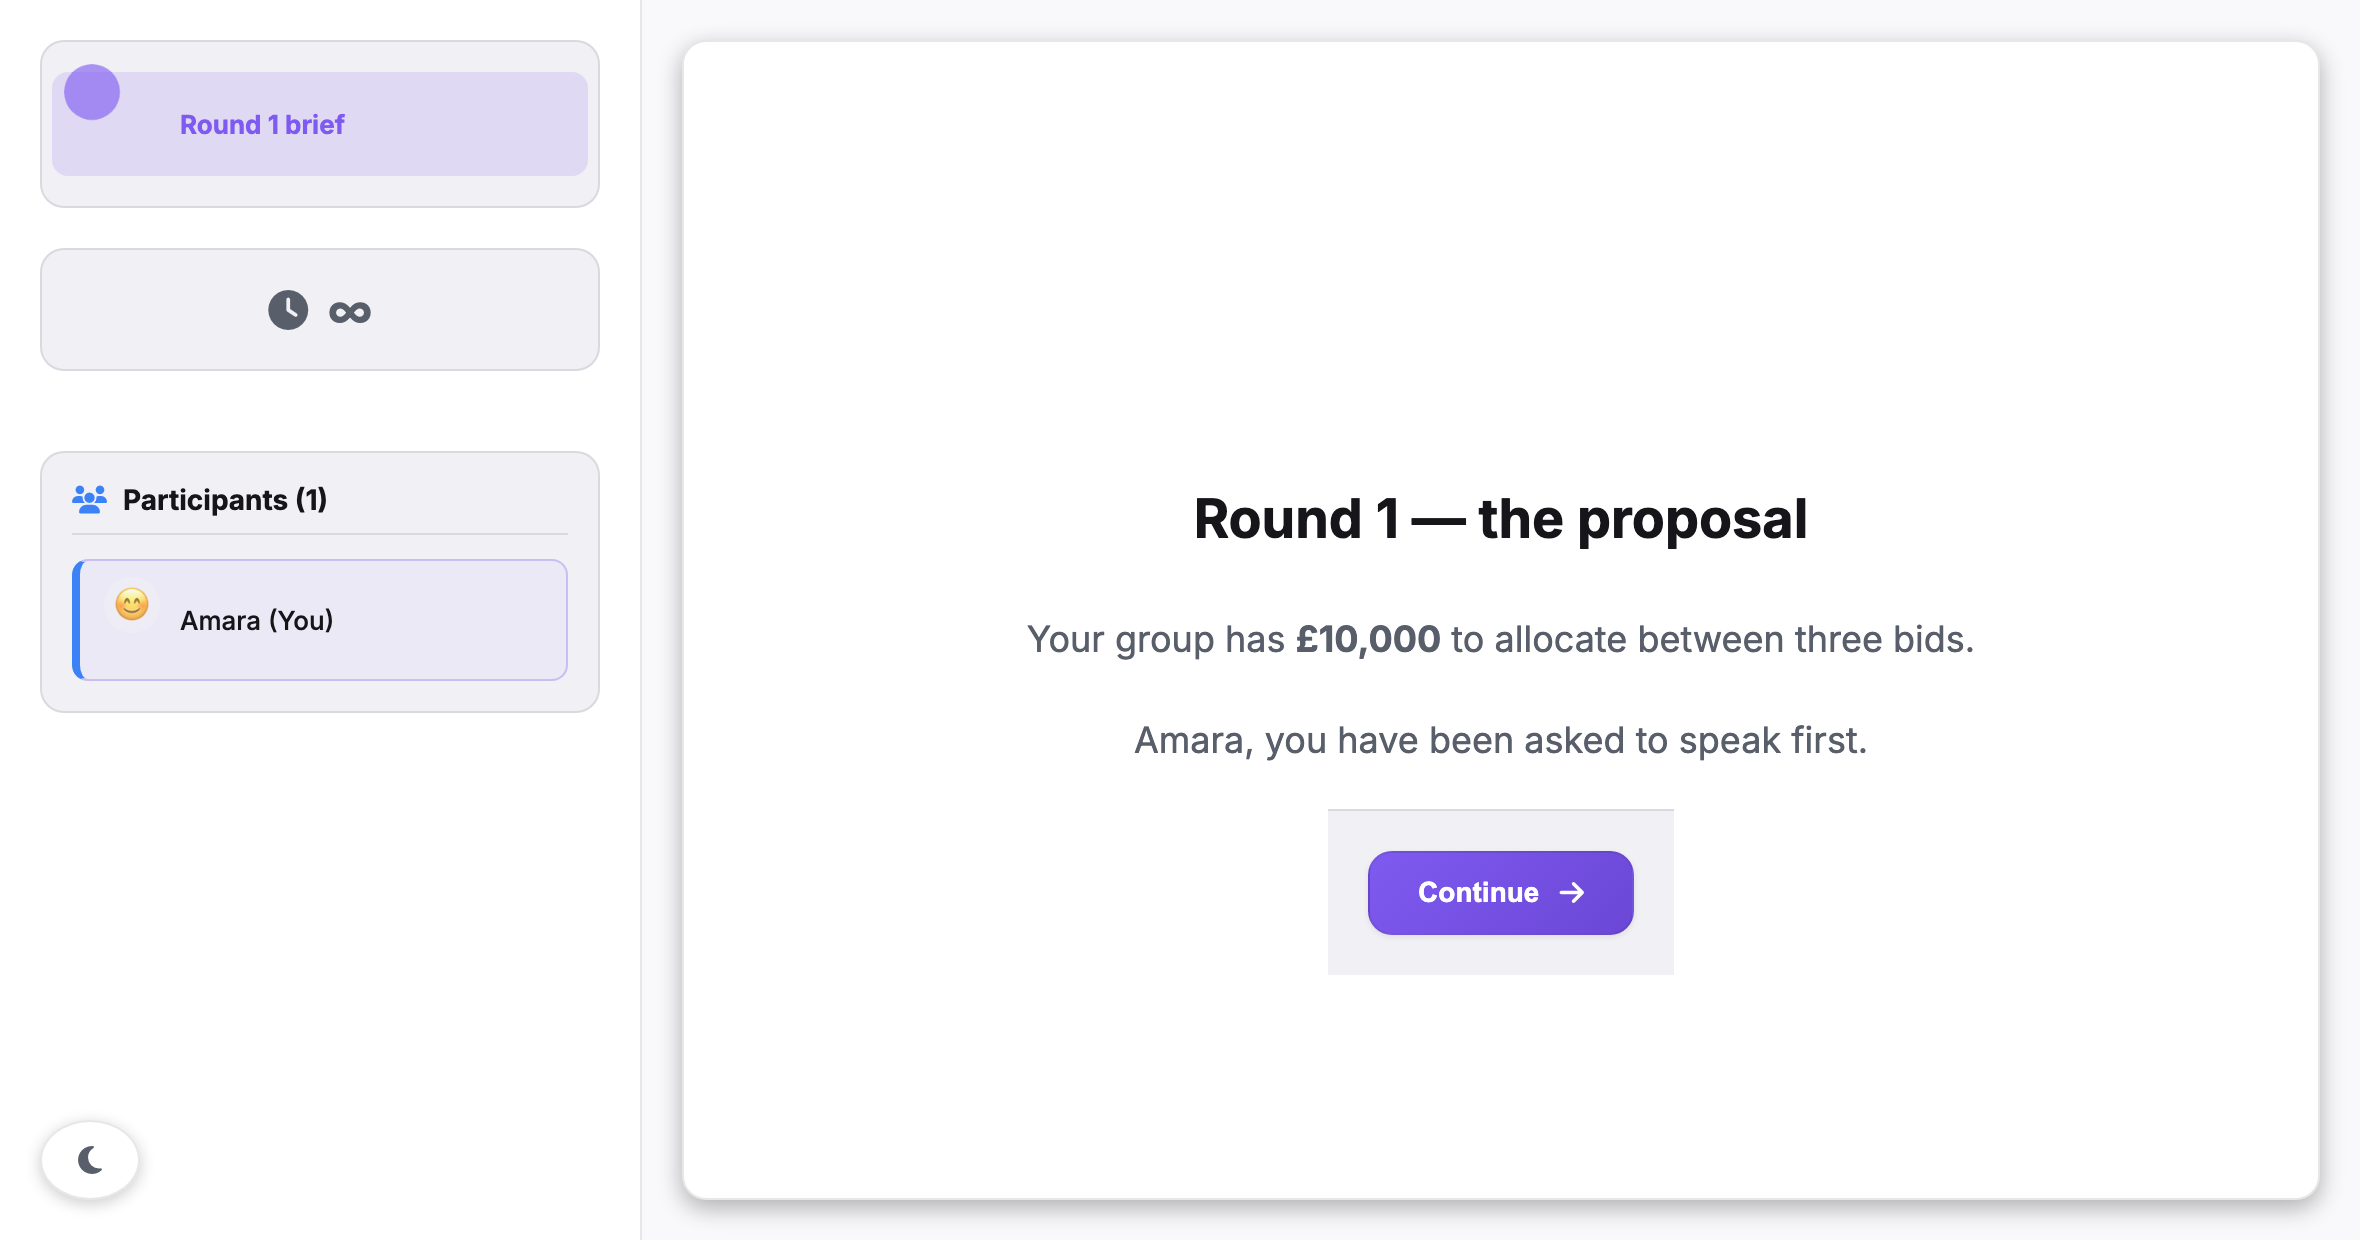
{{var.first_name}} shows the value of this participant. The
slide has Align: centered, so the <blockquote> is
centred like the other text. The slide alignment also controls the text in it.
This deck has one slide, so there is no Next button. The
Continue button comes from the transition settings of the segment. The
sidebar (segment name, duration, participant list) is part of the chamber, not
of the slide. Carrier filters HTML blocks for participants and removes unsafe content,
for example scripts. It adds the prefix user-content- to the ids that
you write.
You can use {{var.X}} tokens in heading, text and HTML blocks
(see §4.5). Carrier fills the tokens for
each participant when the segment starts, block by block. Thus one deck can give a
personal briefing to each participant in the sample. Carrier fills the tokens of
all slides at that time, not when the participant gets to each slide. A token on
slide five shows the value from the start of the segment.
Two settings are on the segment. You set all other deck settings for each slide in the Deck Builder.
| Parameter | What it controls |
|---|---|
| Open Deck Builder | Opens the modal window where you make the deck (config.slides). The text below the button shows the deck size, for example “4 slide(s) · 11 block(s)”. Carrier does not save changes from the modal until you click Save deck. Cancel and a click outside the modal both discard the changes. |
| Allow participants to go back | Shows a Back button next to Next on each slide after the first (config.allowBack). It is off by default, because a second view of a stimulus can change a controlled sequence. If you set it on, the data still shows each return. The view log records each visit as a separate entry. |
| Per slide · Layout | Stacked puts the blocks in one column. Media left and Media right put the first image or video block in a pane next to the other blocks. Below 900 px, the panes stack. If a slide has no image or video block, Carrier shows it as stacked, with no empty pane. |
| Per slide · Width | Column (a reading column with a maximum width, the default) or Full width (from edge to edge). |
| Per slide · Align | Centered (the default) or Left. This setting moves the block column and also aligns the text in it. The Content Alignment of the instruction segment is different: it moves the column but does not align the text. |
| Per slide · Background | A CSS colour or an image URL for the full slide area. A colour becomes the background colour. A URL becomes a cover image. Carrier ignores a value that is not a colour and not an http(s) URL. |
| Per slide · Minimum dwell (seconds) | Keeps the button of this slide disabled until the time is complete. “Available in…” counts down next to the button. On a slide before the last, it controls Next. On the last slide, it controls the segment Continue button. The time starts when the slide shows and applies to this slide only. The segment Min Duration is a different setting: its time starts when the segment starts, and it controls when the participant can leave the segment. On the last slide, both settings control the same Continue button. The participant waits for the longer of the two. Carrier does not add them together. |
| Per slide · Advance when the clip ends | Shows only on a slide with a video block. When the clip ends, the deck goes to the next slide. On the last slide, the segment ends. First, Carrier waits for the minimum dwell of the slide. On the last slide, it also waits for the segment Min Duration. These are the same rules as for the buttons. If this setting is off, the clip stops and the participant clicks to continue. |
| Block · Heading | One line of text at level H1, H2 or H3. Carrier escapes the text, so tags show as text, not as formatting. |
| Block · Text | Markdown, in the same full-screen editor that the instruction segment uses. The editor has a formatting toolbar, a live preview and an Insert variable picker. The picker lists each experiment variable as {{var.key}} in two groups: Available here and Not yet defined (grey). Carrier calculates this availability for the exact position of this segment. |
| Block · Image / Video | A URL and an alt text. The alt text becomes the alt of the image. Next to the URL field are a list of the experiment image library and an Upload… button that adds files to the library. The social feed segment uses the same library (§2.16). A file that you upload in one place is available in both. Carrier shows only http and https URLs. For other URLs, the participant sees Invalid media URL. in place of the stimulus. A block with no URL shows No media URL configured. |
| Block · HTML | Carrier adds this HTML to the participant page without escaping the tags. Thus an <img>, a table or a vignette with inline styles shows as you wrote it. Carrier first removes unsafe content (see the caption above), so an <iframe> does not show. Use this block when a screen must have a specific appearance. When Carrier converts a slide from before decks, the old HTML content goes into an HTML block. |
| Display Mode | Standalone (the slide replaces the screen) or Embedded (a card in a running chat). Carrier stores it as config.displayMode. When you select Embedded, the start, stop and completion trigger fields show. The Timing & Transition card does not show, because the triggers control an embedded slide. |
| Timing · Duration and Transition · Mode | These are shared fields, but they are important here. The end of the deck does not end the segment. The duration and the transition mode end it. There is one exception: a last slide with a video that is set to advance when the clip ends. See §2.5. |
A slide segment has no Data Sharing control and no results display. These show only on segments that collect a response from the participant. A deck collects no response, but it records how the participant moves through it.
Each slide change writes a view log to the segment submission. The log has one entry for each visit. Each entry has the slide id, the slide position, the time of entry, the time of exit and the dwell time. The times are in milliseconds from the segment start. A slide that the participant sees two times has two entries. Thus you can count the returns under Allow participants to go back.
The submission also has slidesViewed, deckSize and
deckCompleted. The last value records if the participant
got to the last slide and left it. All of these values are in the Segment
Submissions section of the data export
(§6.5). The log is a JSON string in the
data of the submission.
A slide segment from before decks continues to work with no change. At run time,
Carrier reads it as a one-slide deck. Its old content becomes
one block. Its old layout becomes the new width and alignment. There
is no migration, and you do not have to save it again. The old fields stay in the
database, and the segment configuration panel tells you this. When you save the
segment from the Deck Builder, the segment gets a slides array, and
Carrier stops reading the old fields.
2.6.1 Standalone and embedded display
A slide is standalone by default. You can also embed it in a chat segment, because the builder shows the Display Mode list for this type. An embedded slide uses the inline layout by default. In this layout, the slide is a card in the message stream, with its own Continue button. You can pin the card to the top of the chat while it is active. The other layout, split, puts the content in a pane next to the live chat.
Two conditions apply:
- The embedded segment must come immediately after its chat segment in the chamber timeline. The builder uses this position to find the parent chat.
- On screens narrower than 900 px, Carrier ignores the embedded setting and shows the slide standalone. A participant on a phone sees a full-screen slide, but a participant on a desktop sees a card in the chat. Think about this difference before you use an embedded slide as a controlled stimulus.
A deck in a card works as it does on the full screen. Each slide replaces the last slide in the card. The Continue button of the card stays hidden until the last slide. Thus one click cannot skip the deck. The embedded triggers replace the Timing & Transition controls, as the table above says. The minimum dwell of each slide is a Deck Builder setting, so it works in both modes.
The researcher drags Slide onto the chamber timeline. They write the slide content. They add a {{var.condition}} token from the variable picker. They set the transition so that the segment ends when the participant clicks. This recording is from before the Deck Builder. Thus the content and the variable picker are in the configuration panel, not in the editor of a text block. The timeline and transition steps have not changed.
§2 · Segments
2.7 The instruction segment
An instruction segment shows one block of formatted text and one
button. You write the text in Markdown, and Carrier shows it formatted. Headings,
lists, emphasis, links, inline code, tables and rules all show correctly. By
default, the text is in a column 800 px wide, centred horizontally. If the
text is short and does not scroll, it is also centred vertically.
One primary button is below the text. Its label is “Continue”, but you can change it. The button is disabled until the pacing conditions of the segment are true. If you set a button delay, the label counts down the seconds: “Continue (5s)”, “Continue (4s)”. Thus the participant sees that the wait is intentional and that the page works.
Use this segment when the participant must read something and accept
it. Examples are the study brief, a consent-style introduction, the task
instructions before an interactive segment, or text that is different for each
condition. The difference from slide is the shape, not the content.
An instruction is one screen, and the segment ends when the participant
accepts it. A slide segment is a deck of screens
(§2.6).
The instruction segment also controls the button. You can change its label and set a delay before it becomes active. Thus the click can cost the participant a measured number of seconds, so it is not automatic.
Carrier fills {{var.X}} tokens in the text for each participant before
it shows the text. Thus one instruction segment can show different text for each
condition. You do not have to copy it for each chamberline (see
§4.5). Carrier fills the tokens when the
participant enters the segment, and again if the participant reloads the page. It
does not update them at other times. If a variable changes during the segment, the
text on the screen does not change.
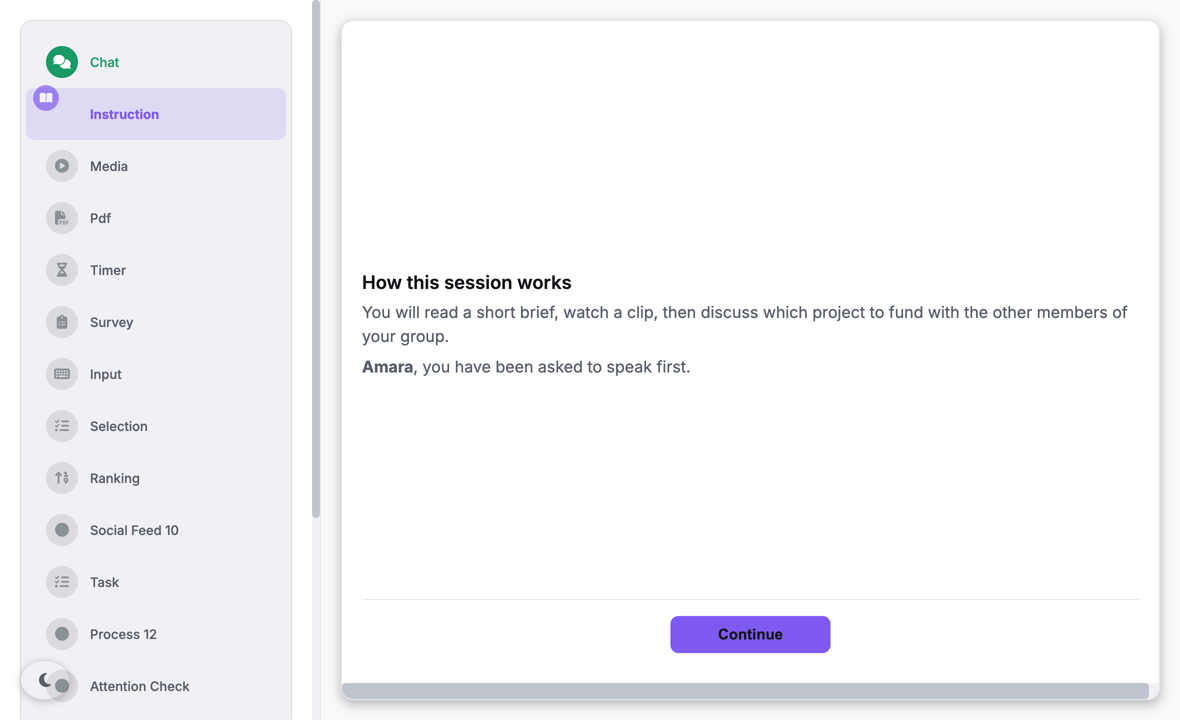
{{var.first_name}} shows the value of this participant.
| Parameter | What it controls |
|---|---|
Instruction Content (Markdown) | The body text. The configuration panel shows a preview of the content (or “No content yet”) and an Edit content button. This button opens a full-screen editor. The editor has a formatting toolbar: bold, italic, heading, link, bullet list, numbered list, quote, inline code, image, table and horizontal rule. It also has an Insert variable picker. The edit pane and the preview pane are side by side. On a narrow screen, they become Edit and Preview tabs. Carrier keeps the changes only when you click Save. Cancel discards them. |
Content Alignment | Center (the default) or Left. This setting moves the full text column on the screen. It does not change the text alignment in the paragraphs. |
Content Width | Narrow (800 px, the default), Medium (1000 px) or Wide (full width). The button row has the same width, so the button aligns with the text. |
Show continue button · Button Text | Whether the button shows, and its label. By default, the button shows, with the label “Continue”. During a button delay, the countdown text starts with this label. |
Button Delay (seconds) | A fixed wait before the button becomes active. The wait starts when the segment shows. Use this control to make a minimum reading time. It stays visible when the segment is embedded. The Timing & Transition card does not. |
Require scroll to bottom before proceeding | Keeps the button disabled until the participant scrolls to the end of the text. If the text fits on the screen, there is nothing to scroll, and the button becomes active immediately. Thus this checkbox gives reading time only for long text. For a minimum time with text of any length, use Button Delay or a minimum duration. |
Min Duration (Timing & Transition) | A shared field, with a special effect here. The button becomes active only when three conditions are true. The button delay is complete. The scroll requirement is complete. The minimum duration is complete. During the minimum duration, the hint “Available in 0:42” shows next to the button. |
The instruction segment is standalone by default and fills the screen. You can also set it to embedded, so that it shows over a live chat. An embedded instruction uses the inline layout by default: a card in the message stream. In the split layout, the text fills the main area and the chat is in a side panel. Use split for a briefing that participants read while they talk.
In the embedded mode, the button delay and the disabled-button logic continue to work in the card. The usual embedding rules apply. The segment must come immediately after a chat segment in the timeline to become its child. On screens narrower than 900 px, Carrier shows the segment standalone.
The researcher drags Instruction from the Library onto the chamber timeline. They click Edit content to open the Markdown editor. They write a short brief with the toolbar. They add a {{var.condition_label}} token from Insert variable, and the preview pane updates. They save. They set Button Text to “I have read this”. They set Button Delay to 5 seconds, so the participant cannot click immediately.
§2 · Segments
2.8 The media segment
A media segment shows one player in the full width of the content
area. The player is a video, an audio bar, or an embedded YouTube or Vimeo frame.
The shared Continue button is below it. Like on all segments, this button
does not show when the transition mode is auto and early advance is off.
Then the clip is the full screen, and the segment ends by its own rules.
Use this segment to make a stimulus clip a separate step in the timeline, not part of a slide. Examples are a news clip before a discussion and an audio prompt for each participant. Other examples are a recorded briefing before a task and a debrief video at the end of a chamber.
Because it is a separate segment, it has its own timing, its own transition rule and its own row in the timeline. Thus the exposure time to the stimulus is part of the design. You do not have to calculate it from the dwell time of a slide. The segment records no response. Carrier records only the start and the end of the segment, not play, pause or seek events. The segment gives exposure, not measurement. Put the measurement in a segment after it.
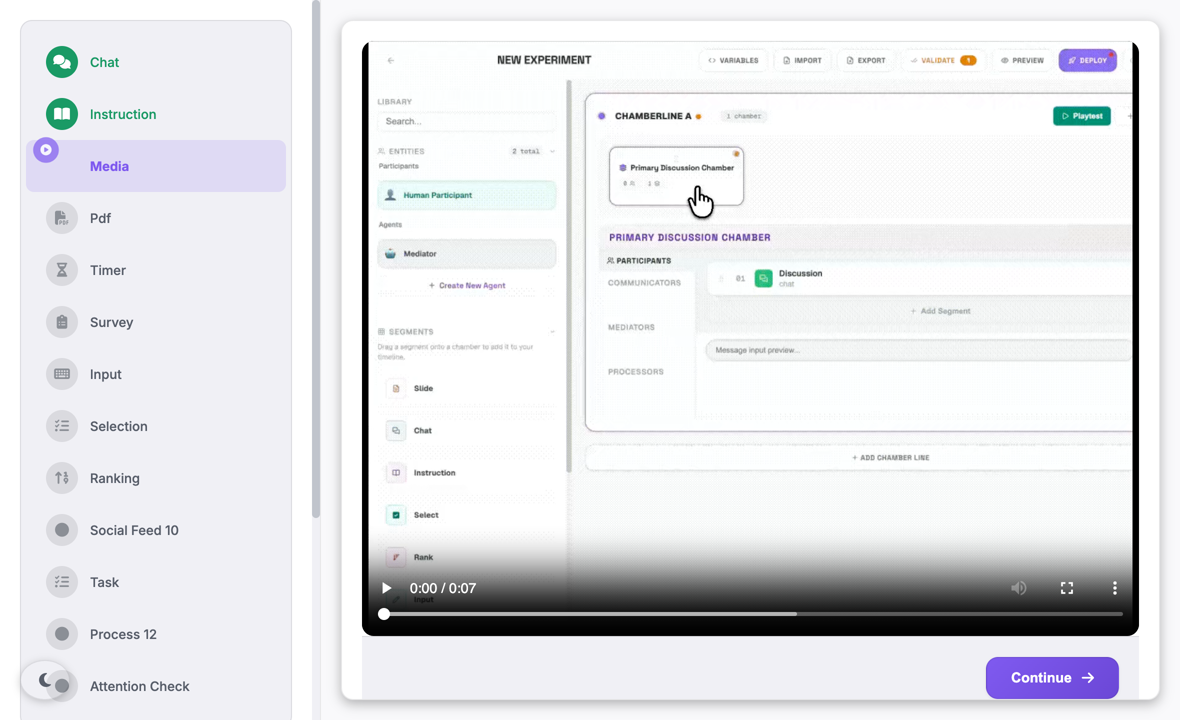
| Parameter | What it controls |
|---|---|
Media Type | Video (the default), Audio, YouTube or Vimeo. For Video and Audio, Carrier makes a browser player for the URL. For YouTube and Vimeo, Carrier makes a plain iframe with a minimum height of 400 px. The two embed types use different code, not only a different appearance. See the boxes below. |
Media URL | The address of the clip. You can paste a URL, or upload a clip so that Carrier hosts it. A URL must be available over http(s), for example from a lab web server, an institutional store or a CDN. When you enter a YouTube or Vimeo link, Carrier changes it to the embed form. Thus you can paste the usual watch?v= address from the browser address bar. If an external URL is incorrect or expired, the player is empty and shows no error. |
Upload Media File | For video and audio only. Carrier stores the clip under a random file name on its own domain. The maximum size is 10 MB. If the experiment is not saved, Carrier saves it first. Carrier finds the format from the bytes of the file, not from its name. It then sets Media Type to match, so an audio file cannot go into a video player. A hosted clip cannot expire or move during the study. An external URL can. |
Poster Image URL | An image that shows before the clip starts. For video only. An audio player has no area for it, and YouTube and Vimeo use their own thumbnail. It applies in standalone and embedded display. |
Autoplay | On by default. Tells the browser to start the clip when the segment shows. Browsers do not start a clip with sound until the participant has interacted with the page. When this occurs, Carrier shows a start button on the player. See the box below. |
Loop playback | Off by default. Starts the clip again when it ends. Use it for a short background stimulus. You cannot use it with an end of segment at the end of the clip. |
Show player controls | On by default. Shows the control bar of the browser: play, pause, position and volume. |
Allow participants to pause | On by default. If you clear it, Carrier starts the clip again each time a participant pauses it. Thus the stimulus plays from start to end, also when the control bar is visible. It has no effect on the pause that the browser makes when a clip ends. For video and audio only. |
Captions URL | A WebVTT file that becomes the default captions track. For video only. It applies in standalone and embedded display, so the captions stay if you change the display mode. If the VTT file is on a different domain, its host must also send CORS headers. |
Display Mode | Standalone (replaces chat) or Embedded (overlay on chat). When embedded, you also select Inline or Split. See below. |
Transition → Mode (shared field, special meaning) | For a hosted video or audio clip, the mode auto makes the segment advance when the clip ends. Carrier waits for the end event of the player, and then continues. If you set a minimum duration, Carrier waits for it first. An embedded card closes in the same way. There is no separate checkbox for this. The slide setting “Advance when the clip ends” has no effect on a media segment. |
The segment can be standalone or embedded. Standalone is the default. An embedded segment uses the inline card by default. The split layout puts the clip in the content pane and the live chat next to it. Use split when participants watch the clip while they discuss it.
The embedded segment has the same rules as the other embedded types. It must come
immediately after its chat segment. It uses the shared embedded start, stop and
completion settings. On screens narrower than 900 px, Carrier shows it
standalone. A media segment collects no response. Thus it has no Data
Sharing, results display or anonymity controls.
There is no shared clock and no synchronisation event. The clip of each participant starts when their segment shows, and it plays at their speed. Thus two people in the same chamber do not see the same frame at the same time. If your design needs this, you must make it yourself. Use a fixed segment duration, a timer before the clip, and a clip that is short enough that the difference is not important.
Autoplay is a request, not an instruction. Browsers do not
start a clip with sound until the participant has interacted with the page.
When the browser refuses, Carrier shows a start button on the player. Thus
the participant can always start the clip, also when Show player
controls is off. Carrier never mutes the clip to start it. A stimulus
that plays with no sound, and that nobody sees, is worse for the data than a
stimulus that has not started. To prevent the start button, put an
instruction segment before the media segment. Its Continue
click is the interaction that the browser needs.
Only this segment can advance at the end of a clip. The configuration panel does not show this behaviour. It needs a hosted video or audio clip and the transition mode auto. Two configurations prevent it. Each needs a duration or a Continue button as a fallback. The builder shows a warning for both when you set them:
- YouTube and Vimeo. The embed is a plain iframe and sends no data to Carrier. Thus an embed with an auto transition and no duration never advances. Give each embed segment a duration, or use a manual transition.
- Looping clips. A looping clip never gets to its end, so the end event never occurs. You cannot use loop and the end-of-clip advance together.
Embedded display does not prevent it. An embedded clip closes its card by the same rule as a standalone clip. Its embedded stop rule, its duration and the Continue button of the card also close the card.
The researcher drags Media onto the chamber timeline. They keep Media Type as Video and paste the URL of the clip. They set the transition mode to Auto and clear the duration. Now the segment ends when the clip ends.
§2 · Segments
2.9 The PDF segment
Use a pdf segment for a stimulus that is too long or too complex
for a slide. Examples are a vignette, a news article, a policy brief
or a paper. The segment has three display forms:
- Standalone: the document fills the segment area, with a Continue button below it.
- Split (the default): the document is in the main pane, and the live chat is next to it. Thus participants can discuss a text that stays on the screen.
- Inline: the document is a card in the message stream.
The location of the document controls what the segment can measure. Carrier shows an uploaded document in its own reader. The reader has page and zoom controls. It also has a hidden text layer, so selection, find-in-page and screen readers work. Carrier shows a linked document in the PDF viewer of the browser, in a plain frame. The two look the same to the reader. Only an uploaded document gives page data (§2.9.1) and annotation (§2.9.2).
Each pdf segment records a reading trace. If
annotation is on, it also collects the highlights and notes of the
participant. These are submitted data, and other participants in the chamber can
also see them if you allow it. Thus this panel has no Data Sharing controls, but
annotation has its own sharing control.
This data shows exposure and reaction, not comprehension. The trace can show that a page was on the screen for eleven seconds. An annotation can show that the participant marked a passage. Neither shows that the participant understood it. You still need a comprehension question.
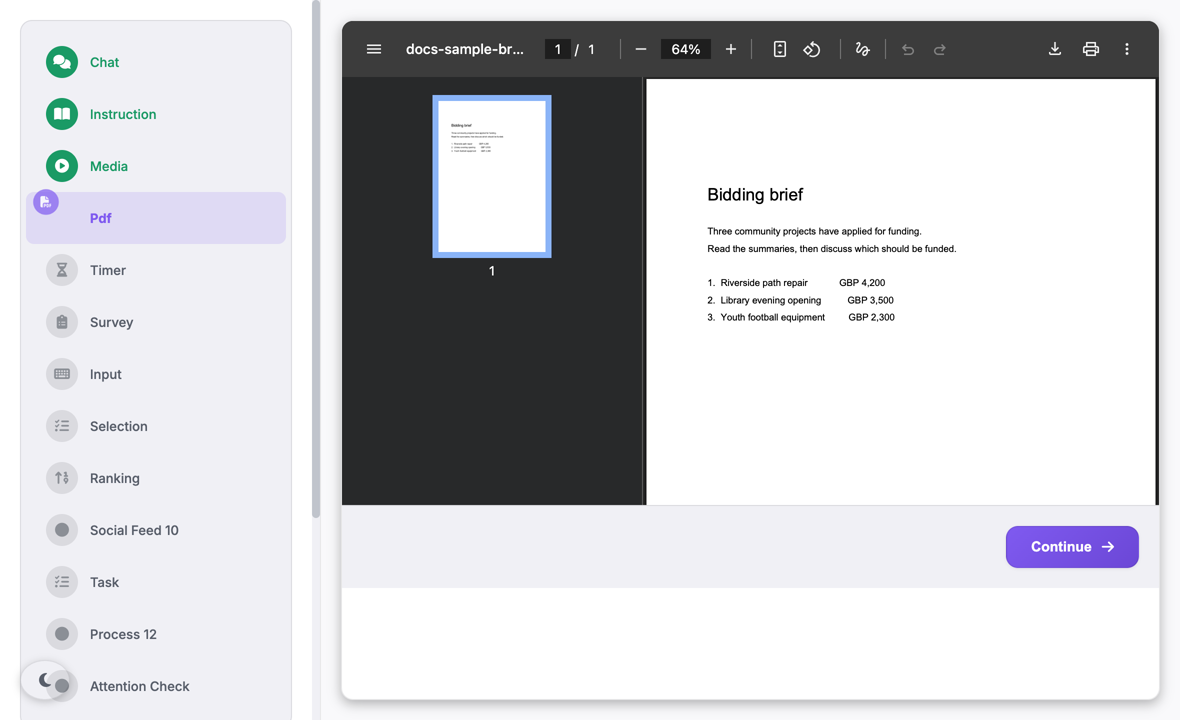
| Parameter | What it controls |
|---|---|
| PDF URL | The address of the document. Carrier accepts only http: and https:. The address also selects the reader, and thus the data (§2.9.1). Check this URL asks the Carrier server if the address gives a PDF and if its host allows embedding. |
| Participant Preview | The document in a frame, live in the builder. If a host does not allow embedding, the preview is blank. The preview always uses a frame. Thus an uploaded document shows here in the viewer of the browser, not in the Carrier reader. |
| Upload PDF | Sends a file from your computer to Carrier. Carrier replaces the PDF URL with the hosted path /uploads/pdfs/<uuid>.pdf. If the experiment is not saved, Carrier saves it first. The maximum size is 25 MB. Carrier checks the first bytes, so it refuses a file that is not a PDF. The stored name is a new random identifier, so nobody can guess the address. An upload gives the page-level trace and annotation. |
| What this segment will record | Read-only. Tells you which of the two record types in §2.9.1 this segment gives, for the current PDF URL. It updates when the URL changes. |
| Display Mode | Standalone (replaces chat) or Embedded (overlay on chat). All controls below this row show only when the mode is Embedded. |
| Embedded Layout | Inline (card in chat) or Split (content + side chat). When you change it, the panel shows different size controls. |
| Start Trigger | When the document shows during the parent chat. The options are immediate, after N seconds, after N chat messages, or after the previous embedded segment ends. The last option has an optional delay in seconds (0 starts immediately). |
| Stop Trigger | When the document closes. The options are participant action or an automatic close after N seconds. A document has nothing to submit, so the participant action is a click on Continue. |
| Completion Behavior | What occurs when the document closes. The options are dismiss, end chat segment, lock (stays on the screen but does not respond), or minimize to a pill. Use end chat segment when the chat must stop after the reading. |
| Show Continue button on the card | Whether the participant can close the document. If you clear it, the document stays next to the chat as a reference panel. It stays until the stop trigger occurs or the parent chat ends. Embedded segments have no Timing and Transition cards. Thus this checkbox is the only way to get this behaviour. |
| Content pane width | Split layout only. The part of the row for the document pane: 30–90% in steps of 5 (default 75). The chat column uses the remaining part. |
| Card width · Card height | Inline layout only. The width is a percentage of the chat area (40–100%, default 75). The height is a percentage of the visible chat area (20–90%, default 35). For a document, 35% is very short. Make it much larger, or use the split layout. |
| Pin to top while active | Inline layout only. Keeps the card at the top of the chat while the segment is active. Thus it stays visible when messages scroll below it. Carrier removes the pin when the segment is complete. |
| Timing · Transition | A new standalone PDF segment has no duration and the transition manual. Thus participants read at their own speed. When the segment is embedded, the Start / Stop trigger controls above replace both cards. |
You can embed the pdf type. It is the only segment type
that is embedded and split by default. The split reader is the usual use, and the
standalone document is the special case. Two conditions apply:
- The split layout needs a chat parent. Carrier looks for a live chat segment to put next to the document. If there is no parent chat, Carrier logs a warning and shows the inline card.
- On screens narrower than 900 px, Carrier shows all embedded segments standalone. A participant on a phone reads the document at full width and does not see the chat next to it.
2.9.1 What each source records
In the builder, an upload and a link look the same, because both fill the PDF URL field. But they give different data, and no setting can change this. Carrier serves an uploaded document from its own domain. Thus Carrier can get the bytes and draw the pages itself. It knows which page is on the screen, how far the participant scrolled, and when the participant changed the zoom.
A linked document is on a different server. To get it, Carrier needs a CORS header from that server, and publishers almost never send one. Thus the viewer of the browser shows the document. This viewer does not send the page, scroll position or zoom to the page around it. This is a limit of the browser, not of Carrier. Thus one segment can give one of two record types, and each record tells you its type:
| Recorded | Uploaded document | Linked document |
|---|---|---|
renderer · source | Always present for both types. renderer is pdfjs or iframe. source is hosted or linked. Thus an analysis of a study with both types can always identify them. It does not have to use missing columns as a sign. | |
dwellMs | The time from the start of the segment to the moment the participant continues. The start time comes from the server clock, so it stays correct after a reload. | |
visibilityBreaks · totalVisibleMs | Each period when the participant changed to a different tab or minimised the window, as {hiddenAtMs, shownAtMs} pairs. Also the dwell time without these periods. A participant who reads a different tab does not read the stimulus. | |
documentPages | The number of pages in the document, so you can calculate coverage. | null |
pagesViewed | Each page that showed on the screen, in sequence, with returns. [1, 2, 3, 2] shows a participant who went back. | null |
pageDwellMs | The total time each page was on the screen, with all returns added together. | null |
maxScrollDepth | The largest part of the document that the participant got to, from 0 to 1. | null |
zoomChanges | The number of times the participant changed the zoom. Many changes can show that the document is difficult to read at its size. | null |
| Highlights & notes | Recorded when Annotation is on (§2.9.2). There is one row for each mark, with the quoted text, the optional note, and the participant who made it. | Not available: there is no text layer to select. |
fallbackReason | Usually null. If Carrier cannot read an uploaded document, the participant gets the viewer of the browser, not a blank pane. This field then gives the reason (load-failed). Such a record has source: hosted but renderer: iframe. Filter on this, because this hosted document gave no page data. | |
For a linked document, the page-level fields are present and empty, not missing. Thus all participants in a mixed study have the same columns. A blank value means “not available for this document”, not “lost”. The builder tells you the record type of a segment while you make it.
Carrier writes the trace continuously while the participant reads. Thus the data is not lost if a participant stops the study during the document. Carrier writes it again when the participant continues. Both copies go to the export, in Segment Submissions and Segment Data.
Thus, upload the file. A link cannot give page-level data or annotation, with any other settings. An upload also prevents the frame failure below. But Carrier draws the document, so you do not get the page thumbnails, search box and print button of the browser viewer. The participant can still select text, use find-in-page, and use a screen reader.
Most publishers, journals and news sites do not allow other sites to show their documents in a frame. Such a document shows as an empty frame with no error. The participant sees blank space in place of the stimulus, and the browser cannot find the problem. Thus Carrier asks its own server. Check this URL, next to the PDF URL field, gets the headers of the document. It tells you if the host allows embedding, if the address gives a PDF, and if the server can get to it. The Participant Preview below shows what a participant sees. Sometimes the server cannot get to the URL, for example a lab computer behind a firewall. Then it tells you that it could not do the check. This is not a refusal. If the licence allows it, upload the file. A hosted file always shows, cannot move or expire during the study, and is the only type that gives a trace or annotation.
2.9.2 Annotation
Participants can mark the document. They select a passage to
highlight it. They can also attach a note, unless
you turn notes off. Annotation is off by default
(config.annotation.enabled is false at the start), so
existing segments do not change. You turn it on for each segment with three
controls: Allow participants to highlight text, Allow notes attached
to highlights and Sharing. For a linked document, the three controls
are disabled, and a note tells you to upload the file. The reason is the same as
in §2.9.1: a linked document has no text layer to select.
The third control, Sharing, sets who sees the marks of a participant. It is the most important control. Private shows the marks only to their author. Shared within chamber shows them live to the chamber, with the name of the author and a colour for each participant. Carrier gives the colours, and the participants cannot select them. Thus two participants cannot both use yellow, and you can always see who made a mark. Shared marks are attributed and read-only: a participant can edit or delete only their own marks.
This is not a display option. A participant does not have to open a shared note. It stays in the margin next to the passage while the document is on the screen. Thus, under shared sharing, nobody can read the stimulus without also reading the opinions of the other participants. This is a social-influence manipulation. Use it only as an intentional part of the study design.
On screen
- A hint is always below the page controls of the reader: Select any text to highlight it, and add a note. The tools show only after a selection. Without the hint, a participant who does not know this cannot find the tools.
- When the participant selects text, a Highlight button shows next to the selection. A selection across a page break gives one mark on each page.
- Notes show next to the document, so the participant does not have to click. Each note is a card in the margin, at the same level as its highlight. A line in the colour of the author connects the card to the highlight. The name of the author is on the card.
- If cards are in the same position, they stack. Sometimes the margin is too narrow for a card. For example, the split layout leaves approximately 126px. Then the card becomes wider and goes over the outer edge of the page. It uses the margin first, to cover as little text as possible.
- A highlight with a note has a mark in the document. A click on a card opens its note again. A highlight with no note has a small marker to add one. Only the author gets these controls.
Each mark stores these fields: annotationId, participantId,
displayName, page, rects,
quotedText, the optional note, the given
color, and createdAtMs / updatedAtMs /
deletedAtMs. The rectangles are fractions of the page.
Thus a mark stays correct after a zoom or in a window of a different size.
The times are in milliseconds from the start of the segment on the server. The
reading trace uses the same start. Thus an annotation and the page dwell times are
on one timeline. When a participant removes a highlight, Carrier does a
soft delete. The row stays, with deletedAtMs set,
because a removed mark is also data.
In the CSV and Excel export, annotations have their own Annotations
section, with one row for each mark. In the JSON export, they are in
pdfAnnotations for each chatroom. An annotation records that a
participant marked a passage and what they wrote. It does not show that they
understood it.
The researcher adds a pdf segment after a chat segment. They upload a document from their computer, so Carrier hosts it. The PDF URL field shows the hosted path. They set Display Mode to “Embedded (overlay on chat)”. They set Embedded Layout to “Split (content + side chat)”. They move the content pane width to 70%. They clear Show Continue button on the card. Now the document stays next to the chat until the chat ends.
§2 · Segments
2.10 The timer segment
A standalone timer segment removes all other content from the
activity area. It shows one centred card. The card has a line of text and a
countdown. The default text is “Please wait...”, and you can change
it. The countdown decreases each second, in the form that Countdown
Format selects.
The usual segment items stay around the card: the progress indicator, the participant list and the chamber clock. The visibility settings of the chamber control them. By default, there is no Continue button. A timer with Auto and no early advance shows no navigation. The participant waits, and the segment ends. If the participant reloads the page or reconnects, Carrier calculates the remaining time from the start time on the server. Thus a reload does not start the wait again.
A timer controls pacing. It does not measure. It records nothing, accepts no input, and gives agents nothing to do. Use it to add time on purpose:
- a short pause after matching, before a discussion starts;
- a fixed delay between reading a case and a decision about it;
- a pause that lets slower members of the chamber complete an earlier activity;
- an interval between repeated measures.
Two other tools are often better. If you need “at least thirty seconds on
this page”, set Min Duration on the segment of that page. It gives a
minimum time with no maximum (§2.5). If
the participant waits for the server to calculate something, use a
process segment. It ends when the work is complete, not when a clock
gets to zero.
The type configuration panel has four controls. Two shared fields outside it do the important work. The participant sees the effect of each one.
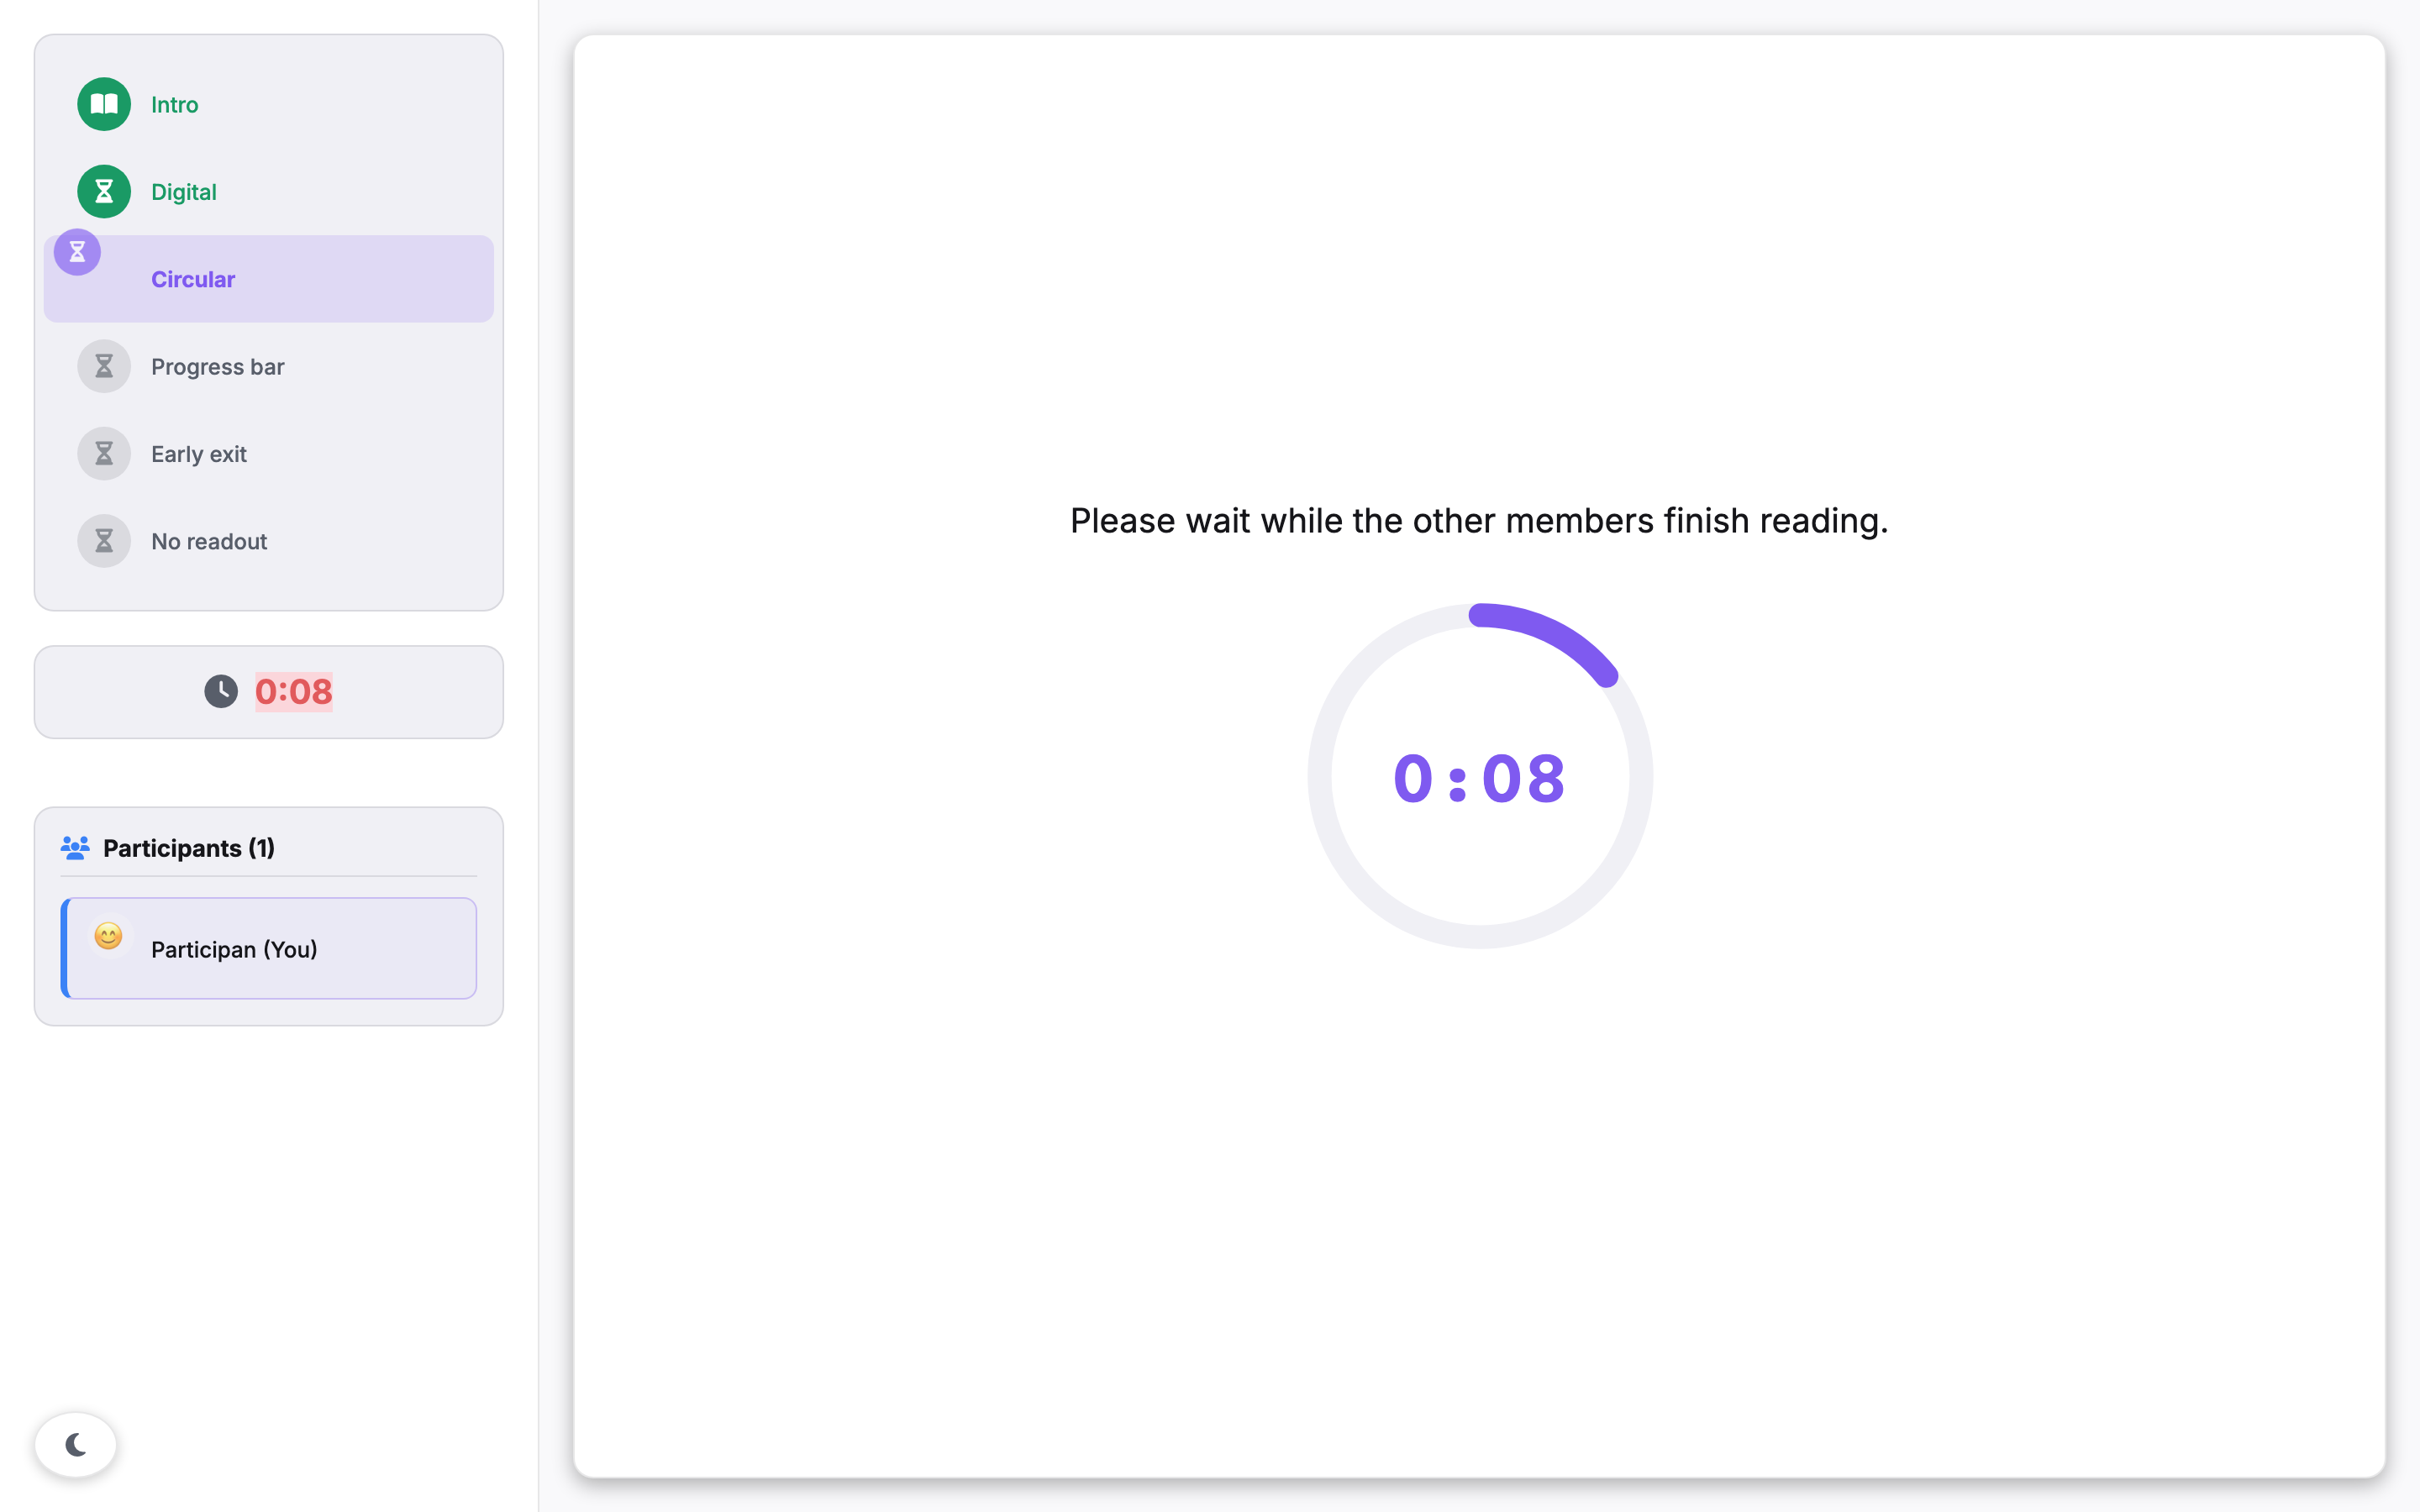
| Parameter | What it controls |
|---|---|
| Display Message | The text above the countdown. The default is “Please wait...”. Carrier shows HTML tags in this text as formatting, not as text. It first removes unsafe content, as for an HTML block on a slide. Carrier does not fill variables in this text, as it does for slide and instruction content. A {{var.name}} token shows on the screen as you typed it. |
| Show countdown | On by default. Shows the countdown and the progress bar. If you clear it, the card shows only the message. This setting changes only the display. The segment ends at the same time. The chamber clock is a different setting. |
| Countdown Format | Sets the form of the countdown. Digital (00:00) is the default: minutes and seconds, with a horizontal bar below. Circular progress puts the same numbers in a ring that fills clockwise from the top. Progress bar shows only the bar, with no numbers. Use it when the participant must not see the exact remaining seconds. |
| Show participant list | The same setting as on the chat segment. Carrier reads this setting at run time. The list shows only when this setting and the participant-list setting of the chamber are both on. (It replaces the old checkbox “Show waiting for others indicators”. That checkbox controlled the same thing, and Carrier did not read it.) |
| Max Duration (Timing panel) — shared field, important here | The length of the wait. On a default Auto timer, it is the only thing that ends the segment. When the time is complete, the segment ends in all transition modes. If the field is empty, the clock shows ∞. Thus give the segment a duration or an advance control. See the note below. |
| Allow early advance (Transition panel) — shared field | Shows a Continue button on a timer that has no button. The participant can then stop the wait early. A Min Duration controls this button in the usual way. The transition mode also controls the button. Manual and Sync show a button. Host shows a note that the researcher moves everyone on. Auto without early advance shows nothing. |
We removed three old controls, because Carrier stored them but did not read them at run time:
- Show “waiting for others” indicators became the Show participant list setting above. Carrier reads that setting.
- Allow participants to end early had the same function as Allow early advance. That setting now shows a real button.
- End Message is removed. The countdown gets to zero at the same moment that the segment ends. Thus the next segment replaced the text before a participant could read it. If you want a last message, put it on the next segment.
2.10.1 Standalone only
You cannot embed a timer. The builder shows no Display & Sharing card for a timer, so there is no Display Mode list. A timer is always standalone. Before, the list had Embedded (overlay on chat). But the embedded card showed the message and a number, and the countdown did not start. Thus the number did not change. Also, Embedded hides the Timing panel, so you could not edit the duration. Thus we removed the mode. Carrier changed all stored embedded timers to standalone.
Do not use a timer for a pause in a running chat. Use an embedded
instruction card with an automatic stop trigger
(§2.7). Its triggers control its pacing.
The embedded timer was always a substitute for this card.
A timer controls pacing. Thus, by default, it gives the participant nothing to click. Make sure that the segment can end:
- A new timer from the segment library has one minute and Auto. We selected both for this type. Auto is the correct mode for a timer. One minute is a good duration for a pilot, and you can change it. (Before, a timer got five minutes and Sync from the general segment defaults. With Sync, participants could not get to the ready state.)
- A timer with no Max Duration and no advance control stops the participant. The clock shows ∞, and the time never ends. The only solution is to end the session of that participant from the dashboard (§6.3). The builder shows a warning for this in the segment panel and in the pre-deploy check. Give the timer a duration, or select Allow early advance to show a button.
- Max Duration ends the segment in all transition modes. If a timer also shows a button, the participant can leave early. When the clock gets to zero, Carrier moves the participant on. If you want a minimum time with no maximum, use Min Duration on the segment of that page (§2.5).
The researcher drags a Timer segment into the timeline of a chamber. They set its Display Message to “Take a moment to think before the discussion begins.” They set the Max Duration to 20 seconds. The timeline card then shows a 20-second wait with an automatic advance. (This recording is from before the type defaults. Thus it also shows a change of the transition mode from Sync to Auto. A new timer now has Auto.)
Input segments
Four segment types collect an answer: a Survey.js questionnaire, a free-text field, a vote, and a list that participants put in order.
§2 · Segments
2.11 The survey segment
A survey segment shows a Survey.js form in the main area. The form has
its own controls: pages, Next and Previous buttons, required-field markers,
validation messages and a Complete button. The form shows inside the usual segment
frame. The chamber settings control the progress indicator, the countdown clock and
the participant list. In standalone display, Carrier adds no advance button. The
participant must click the Survey.js Complete button. This click saves the answers
and starts the next segment.
The experiment-level and chamber-level surveys use the same survey engine. Thus, if you can attach a long questionnaire to the chamber, do not use a segment for it. The segment gives two things: position and consequence.
- Position. The segment has an exact place in the chamber timeline. For example, put a manipulation check between two chat segments, a mood measure just before a discussion, or a confidence rating just after a task.
- Consequence. An answer can end the run or move the participant to a different segment. Thus, use the segment for screeners and exclusion criteria as well as for measures. The global pre-survey can also end the run on an answer, but only at the start of the experiment.
- Variables. Carrier keeps each answer under a key that you choose. Thus, a survey segment is the usual way to make a variable during a run. Use the variable for matching (§4.3) or in a prompt (§4.5).
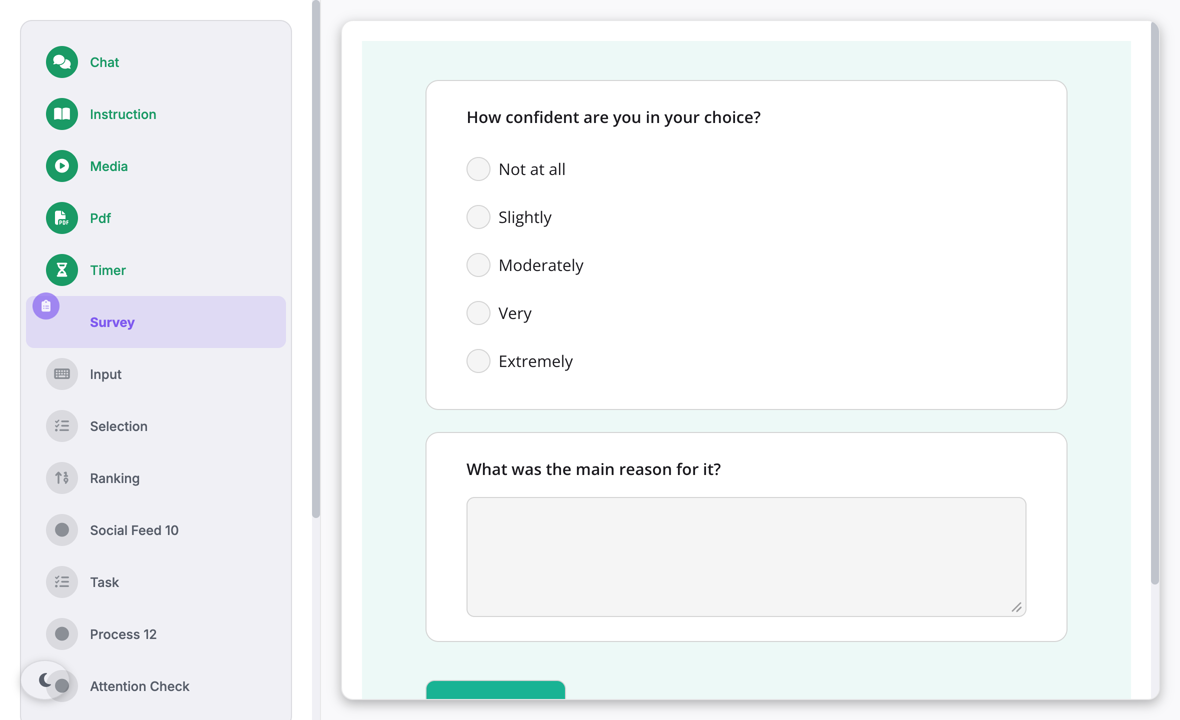
| Parameter | What it controls |
|---|---|
Survey Builder |
The questionnaire. You can edit it in two places. The inspector panel
has a toggle with two buttons in its header: Visual builder
and Raw JSON. Below the toggle are a question list that you can
drag, an Add Question button and a link to the SurveyJS Creator.
A survey with many pages keeps its pages. A strip above the list shows
one tab for each page, with its question count. You can select, add or
delete a page, and the other pages do not change. When you edit a
question, Carrier changes only the fields in the form. Carrier keeps
the properties that the form does not show, for example
visibleIf, validators, description and default value. The
builder cannot edit some question types: matrices, panels and unknown
types. Carrier keeps these questions and shows each one as a read-only
card. If the definition is not valid JSON, the builder shows an error.
It does not show an empty list.
Open editor & preview, at the bottom of the panel, opens the same builder in the full window. The question list and the page tabs are on the left. On the right, Survey.js shows the questionnaire as a participant will see it. The preview updates while you type, and it shows the page that you edit. Conditional questions operate as in a run. Thus, a question with visibleIf stays hidden until
its condition is true. The panel is 360–460 px wide, which
is too narrow for a preview next to the list. All other functions are
the same. A change in one place shows in the other. |
Type (per question) |
One of seven answer formats: Short Text, Long Text, Single Choice, Multiple Choice, Dropdown, Rating, Yes / No. This is a selected part of Survey.js. The library also has matrices, panels, file upload and conditional question visibility. The visual builder has no control for these. To use them, edit Raw JSON or use the SurveyJS Creator. |
Question Title |
The text that the participant reads. This field is mandatory. Add / Update does not save the question while the field is empty. |
Variable Name |
The key for the answer. You use this key in the export, in chamberline
assignment (§1.2), in matching
constraints, in prompts and in the Completion Conditions
below. If you leave it blank, Carrier makes the key
q<timestamp>. This key is difficult to read in the
data, and you cannot easily use it in a rule. The question card shows
the key in a var: badge. |
Required |
Sets isRequired on the question. Survey.js does not
complete the form until the participant answers it. After you close the
question form, a Required badge on the question card shows this
setting. |
Choices (one per line) · Min /
Max |
Answer options. The form shows them for the applicable
Type only. Single Choice, Multiple Choice and Dropdown show
a text box with one option on each line. Rating shows a numeric range.
The default range is 1–5. The arrow controls go from 0 to 10, but
Carrier saves a larger number that you type. Carrier saves a Min of 0
as 1. |
Completion Conditions |
A closed accordion below the type card. Only survey and
attention-check segments have it. Each rule has these
fields:
Each rule that the accordion makes ends the run. The runtime also knows two other actions, but the panel has no control for them. skip-to-segment moves the participant forward to a named
segment. continue matches but does nothing. Use it to test
a rule without an effect. To use these actions, write
action.type into the experiment JSON through the API or an
imported configuration. A rule without action.type ends
the run. All rules from the panel are of this kind.
Carrier refuses a skip-to-segment rule on an embedded
survey card. On a card, the card closes to move on, so the jump has no
destination. If a segment has such a rule, the Completion Conditions
panel shows a warning. |
Display Mode and its embedded controls |
Standalone or embedded. When you select embedded, the panel shows
Start Trigger and Stop Trigger,
Completion Behavior, Embedded Layout
(inline or split) and Show Continue button on the card. It
also shows the size controls for the layout. Inline has
Card width, Card height and
Pin to top while active. Split has
Content pane width. |
Min Duration (Timing) |
This segment has no advance button of its own, so Min Duration operates differently here. Carrier controls the Survey.js Complete button. It disables the button and shows a countdown on it, for example “Continue in 0:42”. When the time ends, the button shows the survey’s own text again. Survey.js makes its buttons again on each page change. Thus, Carrier finds and disables the button again every second. Carrier also refuses completion until the minimum time ends. This stops a click that gets through after a new render. |
Max Duration and Transition Mode |
A new survey segment waits for the participant. It has no duration, no
warning time and the manual transition mode. The standalone
survey shows no Next button in manual mode. Thus, only Survey.js moves
the participant on. You can set a maximum duration. If the time ends
before the participant completes the form, Carrier does these steps:
|
The default display is standalone, but you can embed the survey. An embedded survey shows the same Survey.js form in a card in the chat. The default layout is inline, at 75% of the chat width and 35% of its height. This size is too small for more than one or two questions. The split layout shows the form in the main area, with the live chat at the side. Split needs a chat segment for the chat column. In other positions, the card shows inline and Carrier gives no warning.
Embedding also needs a wide screen. If the viewport is less than 900 px wide, the segment shows standalone. Thus, on a phone, a manipulation check in a conversation fills the screen. For embedding in general, start and stop triggers and completion behaviour, refer to §2.
The researcher drags a Survey segment onto the chamber. In the visual builder, the researcher adds a Single Choice question: “Have you taken part in a study like this before?” The variable name is prior_exposure and the choices are Yes and No. The researcher opens the closed Completion Conditions accordion and writes one rule. If prior_exposure = Yes, the session ends with a thank-you message and a redirect. The panel then shows the question card and its exclusion rule together.
§2 · Segments
2.12 The input segment
An input segment asks one question. It gives one field for the answer:
a box with many lines, a single line, or a number. A Continue button is below the
field. Use it instead of a survey segment when you have only one
question. For example, ask for the reason for a choice, a short explanation or a
numeric estimate.
Carrier records the answer as a segment submission. Later segments and trigger conditions can read it as a variable (§4.2). The answer is also in the export (§6.5). Agents can submit an answer, as humans do (§5.5). The §2 catalogue and Appendix C show this in the Compatible with AI column.
2.12.1 Parameters
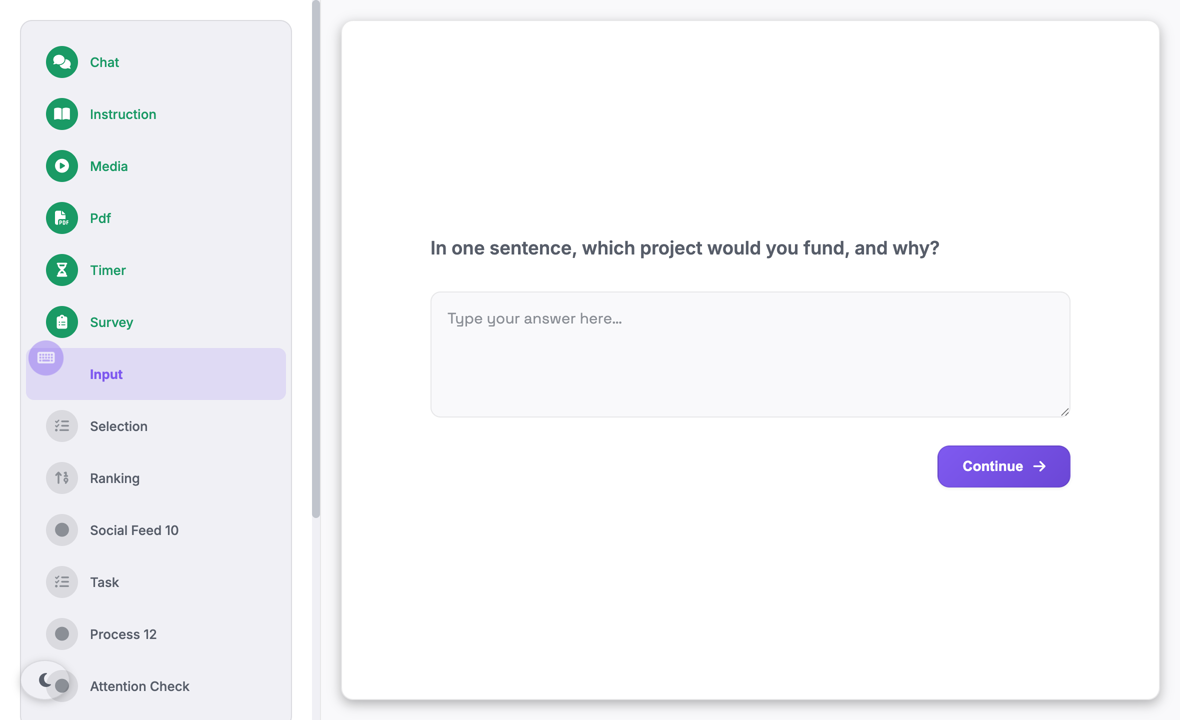
The question and the field. Prompt is the question above
the field. It accepts HTML but not Markdown. Carrier does not replace
{{var.X}} tokens in this field, and the field has no variable picker.
Input Type selects Single line, Multi-line (the default) or Number. The
panel then shows the length settings or the value settings.
Placeholder is the grey hint in the empty field.
The rules for an answer. Carrier accepts a blank answer unless you set a rule.
- Required answer refuses a blank answer. It is off by default.
- For text, Min Length sets the minimum number of characters. Max Length sets the maximum: the participant cannot type more. An empty Max Length means no limit.
- For a number, Min Value and Max Value set the limits. When Input Type is Number, the panel hides Min Length and Max Length, and Carrier ignores them. A value that stays from an earlier type has no effect.
- Validation Pattern is a regular expression that the answer must
match. It is available for all three types. Anchor the pattern, and make it
require one or more characters (
+, or{n,}). A pattern that matches an empty answer refuses nothing.
The builder shows a warning for a pattern that matches an empty answer. It also shows a warning for a pattern that is not valid. The warning is below the field and in the validation check.
How a refusal shows. Continue is disabled and the field has an outline. A message below the field names the rule. Examples are “Minimum 50 characters — 12 so far”, “Must be at most 60” and “An answer is required”. Carrier shows no message until the participant types or leaves the field. But Carrier checks the rules when the segment opens. Thus, a segment with a rule opens with Continue disabled.
The pattern has no message of its own. Write one in Validation Error Message, for example “at least two sentences” or “digits only”. If you do not, a pattern failure shows “This answer is not in the required format”. This message applies to the pattern only.
Sharing the answer. Data Sharing controls whether the other participants in the chamber see the answer. The options are Never (the default), After all submit and Real-time. Be careful with Real-time. The field saves the answer when the participant stops typing for 500 ms. Thus, the others see incomplete sentences, not a final answer. When sharing is on, Anonymous Results shows “Participant 1”, “Participant 2” and so on in place of names.
Results Display has no effect on this type. Carrier always shows free text as one entry for each participant, because there is no useful summary of free text. Anonymous input is an old setting. Carrier uses it only when Anonymous Results is not set. Do not use it in new configurations.
Pacing. input waits for the participant. A new input
segment has no duration, no warning time and a manual transition. The
minimum duration is the one timing field that affects validation. Continue stays
disabled until the minimum duration ends, also for a valid answer.
2.12.2 Standalone and embedded
input shows standalone or embedded. Standalone, it replaces the chat
view for the duration of the segment. Embedded, it is a card on a live chat. The
card belongs to the nearest chat segment before it. Validation, the Continue button
rules and autosave operate the same in the card. Standalone is the default.
When you select Embedded, a start trigger and a stop trigger replace the Timing and
Transition cards. The default layout is inline, a card in the message
list. The other layout is split, a pane next to a chat column.
- Caution: the inline card is 35 per cent of the chat height by default. This is small for a prompt, a box with four rows and a hint line.
- Caution: a stop trigger that uses time can close the card while the participant types. Carrier loses the text that it has not saved.
If the viewport is less than 900 px wide, an embedded input shows standalone. Mediators and observers also see it standalone.
The researcher searches the segment library for Input. The researcher drags it onto the chamber timeline below the discussion. The researcher types the question into Prompt and keeps Input Type at Multi-line. Then the researcher sets Data Sharing to After all submit. The Results Display and Anonymous Results controls then show below it.
§2 · Segments
2.13 The selection segment
A selection segment shows one question. Each participant in the chamber
answers it. Carrier shows the question as Markdown at the top of the segment area.
Below the question is one of these:
- In single mode, a list of options with radio buttons.
- In multiple mode, a list of options with check boxes. A hint below the list tells the participant how many to select, for example “Select 1-3 options”.
- In slider mode, a track with a label at each end and a large display of the current value.
The Continue button below is disabled at the start. It becomes available when the number of selected options is in the Min/Max range. Any minimum duration must also end. Until then, a click on the button does nothing. A slider is different: it always has a value, so its Continue is available from the start.
Use this segment when you need a discrete answer in the data. Examples are a vote at the end of a discussion, a forced choice between two framings and a manipulation check. In slider mode, use it for a Likert or visual-analogue rating.
Later segments can read each submission as
segment-submission:<segId>:selections,
segment-submission:<segId>:optionValues.0 or
segment-submission:<segId>:sliderValue. Thus, a choice in this
segment can control a later chamber, go into an aggregate, or show in an instruction
(§4). A scripted or LLM participant can
also submit an answer with the humans
(§5). Four types allow this:
selection, ranking, input and task.
2.13.1 Parameters
The question and the type of answer. Carrier shows
Question / Prompt as Markdown in the run. Thus, **bold**,
links and images operate. The Preview button shows the result in the builder.
Carrier replaces {{var.X}} tokens for each participant. Thus, a prompt
can show a participant’s condition or an earlier answer. The
Insert variable button lists the variables that are available at
this point in the timeline.
Selection Mode controls all the settings below it. Single choice shows radio buttons. Multiple choices shows check boxes. Slider shows a continuous track in place of the option list.
Options and the number to select. In Options, write one
option on each line. To give an option a numeric or text value, add
| <value> after it. Carrier records the values as
optionValues, with the indexes of the selected options. Use values to
sum or average a five-point scale without a separate table.
Min Selections and Max Selections set the range for Continue. Both are 1 by default. Be careful with this default. When you select Multiple choices, the maximum stays at 1. Thus, a multiple-choice segment with the default records only one answer. The builder shows a warning for this. It also shows a warning when the minimum is more than the maximum, or when the maximum is more than the number of options.
Slider settings. Min Value, Max Value, Step Size and Default Value set the limits, the step and the start position. The defaults are 0, 100, 1 and 50. Step accepts fractions, so you can make a continuous scale from 0 to 1. Left Label and Right Label show at each end. If a label is blank, the number shows. Show current value controls the value display. Turn it off for a true visual-analogue scale, so that participants do not see a number.
A slider always has a value. The handle starts at Default Value, and Continue is
available from the start. Thus, a participant can continue without a move of the
handle. Carrier records the start position when the slider shows. The submission
has a touched flag that tells whether the participant moved the handle.
Thus, you can tell an untouched default from a deliberate answer. In older versions,
Carrier did not record an untouched slider as a submission. Then
segment-submission:<segId>:sliderValue had no value for that
participant, and a later variable or aggregate got nothing.
Sharing the answer. Data Sharing is Never (the default), After all submit, or Real-time. For options, Carrier shows a horizontal bar chart of the answers. For a slider, it shows the number of responses and the average, minimum and maximum. When sharing is on, Results Display selects aggregated or individual results. Anonymous Results shows “Participant 1”, “Participant 2” in place of names.
Read this before you select Real-time. Carrier sends a submission at each click, not at Continue. Thus, the other participants see answers that can still change. Later variables also follow these values. They keep the value of the last click before the segment ends. With After all submit, Carrier shows the results when each participant has clicked one time. This can be before anyone has decided. A slider sends its start position when it shows. Thus, for a slider, Carrier shows the results when all participants have opened the segment.
Display and pacing. Display Mode is Standalone or Embedded. When you select Embedded, the panel removes the Timing and Transition cards. In their place, it shows these controls:
- Start Trigger and Stop Trigger.
- Completion Behavior: dismiss, end the parent chat, lock, or minimize to a pill.
- A Visibility Conditions accordion.
- Embedded Layout. Inline shows a card in the message list. Its size is a percentage of the chat area, and you can pin it to the top. Split shows the poll in a pane next to a chat column.
On an embedded card, Show Continue button on the card is the only control that lets a participant close the card after an answer. You can turn it off for a read-only reference panel. Do not turn it off for a poll.
A new selection segment waits for the participant. It has no duration, no warning
time and a manual transition. If you set a duration, the poll has a
time limit. If you set the mode to sync, the chamber waits until all
participants answer.
2.13.2 Standalone and embedded
Selection shows in both display modes. The usual embedded use is a poll on a live conversation, so that a group can vote and continue the discussion. If the chat has the embedded-complete transition mode, the chat ends when the vote is complete. The default is Standalone, and the default embedded layout is Inline.
The position of the segment, not a setting, controls embedding. An embedded segment
belongs to the nearest chat segment before it in the same chamber. If
no chat is before it, the segment has nothing to show on. Two conditions make it
show standalone in all configurations:
- A viewport that is less than 900 px wide.
- A mediator or a dashboard observer. They see the mediator view, not the interactive control.
The researcher searches the segment library for Select. The researcher drags it onto the chamber timeline below the discussion. The researcher types three options with values into Options and keeps Selection Mode at Single choice. Then the researcher sets Data Sharing to After all submit. The Results Display and Anonymous Results controls then show below it. The clip is older than the removal of the Anonymous voting and Allow changing vote check boxes. These check boxes had no effect. The clip still shows them near the bottom of the panel.
§2 · Segments
2.14 The ranking segment
A ranking segment shows a prompt line and, below it, a vertical list of
items. Each row has a grip handle on the left, its position number and the item
label. The participant drags rows to change the order. When the participant drops a
row, the position numbers change and Carrier records the new order. The usual
Continue button is below the list.
In the run, dragging is the only way to change the order. There is no keyboard or button alternative. The builder playtest preview shows up and down arrows, but only in the preview. Thus, a ranking segment needs a mouse or a touch screen.
Use this segment for three purposes:
- To get a preference order for a fixed set of alternatives.
- To ask a group to set priorities.
- To record a group order at the end of a discussion. This is the most usual purpose. Usually, the ranking is an embedded card on a chat, so that the group can rank and talk at the same time.
As with selection, later segments can read the ranking as a
segment-submission variable (§4.2). A
scripted or LLM participant can also submit an order with the humans
(§5.5).
2.14.1 Parameters
The instruction and the items. Instruction is the prompt
line above the list. Carrier shows it as Markdown and replaces
{{var.X}} for each participant. It has the same
Insert variable picker and Preview button as the other prompt fields.
The participant sees it in standalone display and in embedded display. In older
versions, it showed only in embedded display.
In Items, write one item on each line. To give an item a numeric or text
value, add | <value> after it. Submissions then have
rankedValues in rank order. For example,
segment-submission:<segId>:rankedValues.0 is the value of the
first item in the participant’s order. Each participant sees the items in the
order that you typed them. Carrier does not shuffle them. The builder shows a
warning for a list with no items, a list with one item, or two items with the same
label.
What an order means. Nothing disables the Continue button, and a
ranking never stops the participant. Thus, the typed order is an anchor, not a
neutral start. If the order is your measure, change the typed order across
conditions. Each submission has a reordered flag that tells whether the
participant moved an item. Thus, you can tell an untouched list from a deliberate
agreement with the same order.
Carrier records the start order as a submission when the list shows, with the flag set to false. This has two effects on shared results. With After all submit, Carrier shows the results when all participants have opened the segment. Untouched lists also count in the “Average Rankings”.
The “Average Rankings” summary ignores a submission that does not have exactly one entry for each item. If no submission is correct, the summary shows nothing. Thus, an empty results panel after a reveal means no usable submissions. It does not mean no participants.
Sharing and display. Data Sharing is Never (the default), After all submit, or Real-time. When sharing is on, Results Display selects the “Average Rankings” summary or the full order of each participant. Anonymous Results hides names. Display Mode is Standalone or Embedded. Embedded hides the Timing and Transition cards. In their place, it shows Start Trigger, Stop Trigger, Completion Behavior, Visibility Conditions and Embedded Layout.
For a ranking, use Split. In a short inline card, a long list is difficult to drag. The card scrolls, so the drop area becomes smaller. Keep Show Continue button on the card on for an embedded ranking. The participant has no other way to submit the order.
Pacing. Ranking waits for the participant. A new ranking segment
has no duration limit, no warning time and a manual transition. If you
set a minimum duration, Continue is disabled until it ends. When Display Mode is
Embedded, the panel hides the Timing and Transition cards. The start and stop
triggers control the card.
2.14.2 Display modes
You can embed a ranking. The default is standalone, and the default embedded layout is inline. The builder does not limit where an embedded ranking can be. In the run, the ranking belongs to the nearest chat segment before it in the chamber. If no chat is before it, the ranking has nothing to show on. Two conditions make it show standalone in all configurations: a viewport less than 900 px wide, and a mediator or observer view. In both modes, shared results show below the list.
The researcher drags a Ranking segment onto the chamber timeline below the discussion. The researcher types an instruction and three items with values, and keeps Display Mode at Standalone. The clip is older than the removal of the Ranking Mode and Lock ranking after submit controls. The clip still shows the researcher setting them at the bottom of the panel. These controls had no effect, and the builder does not show them now.
Live segments
This page describes the four segments where participants and agents act on each other: chat, the social feed, the task and the process segment.
§2 · Segments
2.15 The chat segment
A chat segment shows one message stream that scrolls. Below the stream
are a message box and a send button with a paper-plane icon. The message box
becomes taller as the participant types. The usual segment frame is around the
stream: the segment progress, the countdown clock and the participant list in the
left sidebar. The chamber or the segment can turn off these items.
All other members of the chamber write into the same stream. The interface does not show the kind of sender. Another human, an LLM chatbot, a scripted chatbot and an agent all send usual message bubbles. Each sender also shows a typing indicator, unless the segment turns the indicators off. There is one room, all members are in it, and there is no other channel.
A participant with a role other than communicator sees a different screen. A processor sees a read-only column of the conversation next to its draft panel. A mediator sees the broadcast console. §3.1 describes these screens.
Use this segment for deliberation, negotiation, dyadic advice, interviews, and any design where the dependent measure is what people say to each other. Most triggers also monitor this segment. Carrier evaluates keyword, message-count, sequence and after-bot-message triggers (§5.1) against the message stream of a chat segment. Thus the scripted behaviour of a chamber usually depends on its chat segments. A chat segment is also the parent of embedded child segments. With an embedded child, you can show a vote or a ranking to a group and keep the conversation on the screen.
2.15.1 Type configuration
| Parameter | What it controls |
|---|---|
| Communication Channel | Text, Audio, Video, or None (bots/agents only). Only None has an effect. It disables the message box and changes its placeholder to “Chat is disabled in this segment”. The server also rejects human messages in that segment. Audio and Video here have no effect. Carrier starts media capture once per chatroom from the chamber's channel, not from the segment's channel. |
| Show typing indicator | On by default. If you clear it, the segment hides the “is typing” bubbles of all senders: other humans, LLM chatbots and scripted chatbots. The replies then appear without a typing signal. You can use this as a presence manipulation. With the indicator off, the reply delay of a chatbot does not change, but the participant does not see the effort. |
| Agent Think Delay Min / Max (ms) | A random pause from this range (500–2000 ms by default). A scripted chatbot waits for this pause before it starts to type. Carrier adds the pause to the delay of the trigger, so the reply comes later whether or not the indicator shows. It applies only to triggers with a plain number delay of more than 300 ms. It applies only to chatbots with no typing simulation of their own. A chatbot with the newer thinking and typing settings ignores it, and all LLM chatbots ignore it. |
| Show message history from previous segments | Off by default, so each chat segment starts with an empty stream. When it is on, the segment starts with the earlier conversation in this chamber (the last 200 messages). New messages then come in below. Carrier never carries in messages from social-feed segments or from shop segments. The setting also controls a page reload. When it is off, a participant who reloads during the segment gets back only the messages of that segment. |
| Show participant list | Live. This is one of the few segment settings that change the shared frame. The sidebar list shows only when the participant-list setting of the chamber and this checkbox are both on. If you turn it off here, the frame can change from a sidebar to a floating countdown pill. Use it to hide the group composition during a manipulation and show it in other segments of the chamber. |
| Enable emoji reactions Enable message reporting |
The first adds a reaction picker, and the second adds a report flag. Both go in the action row that shows when the participant moves the pointer over a message bubble. A participant cannot report their own messages. Carrier draws the action row only if one or both settings are on. If both are off, the participant cannot act on message bubbles. |
| Enable behavior tracking | Records browser behaviour during the segment: tab switches, scrolling, mouse movement, typing patterns and focus changes. Carrier writes these records to the experiment export. This is one of the few per-event process-tracing records that Carrier makes. Turn it on when attention or hesitation is important to your study. The participant sees no change. |
| Control Events | A list of rules for chat segments only. A rule disables or enables the message box, or ends the segment, when a condition in the conversation is true. Add a rule with the + button. Section 2.15.2 below gives the details. |
| Transition Mode → Embedded complete | For a chat segment, the shared Transition card has a fifth mode. In this mode, the chat ends when all its embedded children are complete. The builder shows this option only when the segment immediately after this chat is an embedded child. A segment that is not embedded between them removes the option. §2.5 describes the general transition behaviour. |
| Fallback timeout (seconds) | Shows under the transition mode only when the mode is Embedded complete. It is a safety limit. The chain of embedded children can stop. For example, a message-count start trigger does not fire, or a visibility condition hides a child from all participants. In these cases, the chat moves on after this number of seconds. If the field is empty, the chat waits with no limit. |
2.15.2 Control events
Only the chat panel has control events. With them, a chat can end because of the state of the conversation, not because of the clock. Each event joins an action to a condition. The + button opens a modal. The modal shows only the sections that the selected action needs.
| Parameter | What it controls |
|---|---|
| Action | Disable Input, Enable Input, or End Section (force advance). This selection controls the remaining modal. The two input actions show Target and the optional agent-script section. End Section shows Activation and the two timeout fields. |
| Target Type Participant Name |
Input actions only. The target is all human participants or one named participant. The name list comes from the participant slots of the chamber. If the chamber has no slots, the list is empty. |
| Activate On | End Section only. This sets when the rule starts to monitor the conversation. The options are at segment start, after a delay in milliseconds, when a named agent trigger fires, or on a matching message. Each option shows its own fields. Message Match adds a Message Source of Any, Human, Agent or a specific participant. |
| Condition Type | Always shown. The options are Message Count, Participant Message, Agent Trigger, Any Response, and All Humans Responded. Message Count has a From filter of anyone, human, agent, or a named participant. Participant Message is true when a selected participant sends a message. Agent Trigger is true when a trigger ID fires. The condition is the part that fires the action. |
| Trigger ID Select from chamber triggers |
A rule can refer to an agent trigger. In that case, the identifier is a free-text field. The dropdown next to it writes the selected ID into the field. The picker can show in three sections of the same modal, so check which section you fill in. Carrier does not compare a typed identifier with the triggers of the chamber. |
| Placeholder text when input is disabled | Disable Input only. The text that shows in the message box while the box is locked. The default is “Please wait...”. |
| Trigger Agent Script (Optional) | Input actions only. Fires a named agent trigger together with the enable or disable action, after its own delay in milliseconds. Use it to make a chatbot tell the participants why the box is locked. If the trigger ID is empty, Carrier does not fire a trigger. |
| Timeout (ms) On Timeout |
End Section only. Timeout is how long the rule waits for the condition. The value 0 means that the rule waits with no limit. On Timeout sets what occurs when the time ends: the section ends, or the rule expires and does nothing. |
2.15.3 Display
The chat segment is the only type with no Display & Sharing card. It has no display-mode dropdown and no data-sharing dropdown, because Carrier never shows a chat on top of a different segment. A chat is always standalone. The participant client does not show a chat in embedded mode, even if the configuration asks for it.
A chat is the background for embedded children. Carrier shows an embedded child as an inline card at the end of the message stream. If the embedded layout of the child is split, Carrier shows the child in a pane next to a docked chat column (§2). When the viewport is less than 900 pixels wide, all embedded children become standalone. Thus on a narrow screen the child replaces the chat and does not show over it. Think about this before you recruit participants on mobile devices.
One more chat setting has no control in the builder. An imported configuration can
set a prompt value on the segment. Carrier shows this value as a
fixed banner above the message stream.
A segment has no message limit. To get a fixed number of turns, add a control
event with the condition Message Count and the action
End Section (2.15.2). Older configurations can have a
maxMessages value. Carrier never applied this value and ignores it.
A chat can stay on Embedded complete after you delete or move its
children. That chat never moves on. The builder shows an amber warning
below the transition dropdown when this occurs. A
Fallback timeout prevents this problem.
The researcher opens the configuration of a chat segment and turns on behaviour tracking. The researcher adds a control event with the action “End Section”, the condition “All Humans Responded” and a sixty-second timeout. The new rule shows in the Control Events list of the segment.
§2 · Segments
2.16 The social feed segment
The social segment shows a mock social-media
platform. It is a feed of posts that the researcher writes, with photos,
captions, like counts and pre-written “crowd” comments. The platform
fills the entire screen during the segment. Participants see only
the top bar and the feed of the mock platform. They do not see the Carrier segment
interface. Participants scroll the feed and can comment, reply, like or vote on
posts and comments. They can also follow authors and click share and save buttons
that have no function.
Each segment can use one of three layouts:
- Instagram-like — cards where the image is the main item. Double-tap the image to like it. The caption is below the image, and the comments are collapsed. Replies go one level deep.
- Facebook-like — cards with the caption first, an action bar with the labels Like · Comment · Share · Save, and comments in bubbles. Replies go one level deep.
- Reddit-like — a forum layout. Each post and comment has an up/down vote gutter with a score. Each post starts with a title. A post can be an image post, a text post, or a link post. Posts can have optional community and flair labels. Comment threads can go to any depth. After every five levels, the indentation starts again behind a “Continue this thread →” link, so long threads stay easy to read.
Do not use the layout as a between-subjects condition without care. The three layouts do not record the same data and do not show the same stimulus. Thus a layout factor is confounded with the response set and with the content that participants see:
- The reddit layout records a dependent variable that
the other two layouts cannot record: vote scores. Carrier records them in
the
_votesvariable and asvote_post/vote_commententries in_actionLog. In the other two layouts this variable is always empty, because they have no vote control. There, an empty_votesmeans “never offered”, not “chose not to vote”. - The reddit layout can show stimulus text that the other layouts
never show:
title,community,flairand a seededscore. A link post (kind,linkUrl) shows in all three layouts. Thus the same feed can show different content in different arms. The Feed Builder warns you when a feed uses the reddit-only fields on a different layout. The warning does not stop the save, so you can still change the layout. - Comment depth is different. If your pre-written comments go more than one level deep, the Instagram and Facebook layouts cannot show them. The Feed Builder then refuses the save until you flatten the threads. You can change the layout in one place only: the control above the preview in the Feed Builder. Thus each layout change goes through this validation. Before the Feed Builder was rebuilt, the segment card had a second Layout dropdown that did not validate. A feed made that way can still have deep threads on a one-level layout. Open the Feed Builder and save to find this problem.
- Instagram and Facebook differ in one gesture. A like
by double-tap (
like_postwithvia: "double_tap") is Instagram only, as on the real platforms. Both layouts record the like, so compare the likes, not the method. Saves (save_post/unsave_post) are available in all three layouts. Facebook got its Save button in September 2026. A Facebook arm from before that date has no saves to compare. - To use the layout as a clean condition, leave the reddit-only post fields empty. Then analyse only the measures that all arms record: comments, replies, likes, saves, follows and dwell time.
| Parameter | What it controls |
|---|---|
| Feed Builder → Layout | You select it above the live preview, so you see the change immediately. The options are Instagram-like (media-first, double-tap like), Facebook-like (caption-first, labeled action bar) and Reddit-like (forum threads, vote scores). The layout sets the frame and the card design of the platform. It also sets whether a vote gutter exists. It sets how deep comment threads can go: one level on instagram and facebook, with no limit on reddit. On reddit, the indentation starts again every five levels behind a “Continue this thread →” link. Thus the layout changes what the feed can do, not only how it looks. Refer to the caution above. |
| Feed Builder → Feed settings → Participant handle | The username that the participant comments with. The default is you. It accepts {{variable}} interpolation from the properties of the participant (§4.5). Use this to show a different identity per condition or per participant. If a token has no value, the token text stays on the screen. Thus you can see a name that has a spelling error. |
| Segment inspector | Read-only, by design. The layout, the handle and the post and account editors are all in the Feed Builder. Two places to change one setting caused problems. The inspector shows a summary card with the layout and the number of posts, accounts, pre-written comments and live agents. It shows an arrival strip that puts each post on the segment clock, with an amber marker at the end. It also shows the readiness checklist and the managed variables that the segment records. The readiness checklist is a ✓/⚠ list with four checks. Agent accounts exist and are bound. Each bound agent has a trigger that sends replies. An API key is stored for each LLM provider in use. The segment has a duration, and no post arrives at or after the end. People often miss this last check. Carrier writes and exports a post that arrives after the end, but no participant sees it. The row for an unbound account has a Set up an agent account button. This button opens the Feed Builder and starts the agent wizard. |
| Open Feed Builder | Opens the editor for the feed. The editor has three tabs. General is the main workspace. On the left is the feed outline: the posts on an arrival timeline, and below them the accounts. Each pane scrolls separately, so a long feed does not hide the accounts. In the middle is an editor for the selected item. On the right is a live preview with the participant stylesheet. Agents and Feed are detail tabs for work that does not fit in a column next to a preview. The rows below describe them. Appendix E gives a full walkthrough of the three tabs. |
| Post → Media → Images | A library of uploaded images (PNG, JPEG, WebP, GIF) that you can collapse. All segments of the experiment share the library. You can upload many images at once, drag and drop them, and delete each image. The server cleans and de-duplicates the filenames, and the confirmation shows the stored name. A CSV must use that stored name, not the local name. If a post still uses an image, Carrier asks you to confirm before it deletes the image. |
| Add post | Adds an empty post at the end, with a generated postId (p1, p2, …). Agent scopes and CSV rows use this ID to identify the post. You cannot edit the ID in the interface. To renumber posts, export the feed, edit it and import it again. |
| Data → Import JSON / CSV…, Export JSON, Export CSV, CSV help, Starter kit, Template JSON | The file actions, in the Data menu of the Feed Builder header. CSV is a flat form of the same feed that you can edit in a spreadsheet. Carrier makes the accounts from the author handles. Existing agent bindings stay after a new import. Thus you can rewrite the content in a spreadsheet and keep the agent connections. The import stops on a file with errors or on a structural validation error. It does not stop on binding problems or layout warnings. You fix these in the interface. The starter kit contains an example CSV, a guide in plain language and sample images. Template JSON downloads an example configuration that you can edit in bulk. |
| Agents tab | Shows all the settings of one agent account at a time. These are the persona prompt, the provider and model, the temperature, the max tokens and the context window. They also include whether the agent replies to every comment or waits for a pause, its reply delay and its post scope. These settings belong to the chamber agent, not to the feed. This tab shows the same agent card as the builder canvas. Thus your changes apply immediately and do not wait for the feed Save. There is only one copy of the persona. An account that is not bound shows the bind control, not a form of empty fields. An account bound to a scripted-rules agent tells you that it has no persona. It refers you to the trigger editor and does not show an empty prompt. |
| Feed tab | Shows all posts in a table that you can sort (id, author, caption, arrival, likes, replies). You can select rows and apply Retime, Reassign author and Delete to many posts at once. When you delete a post, Carrier also removes it from the scope of each agent. Above the table, a time axis shows the arrival in three bands. A linear scale cannot show a backlog post at −2h and a post at +45s well, because the segment itself becomes very narrow. Thus the backlog and the overflow each get a compressed band, and the live segment time keeps the full width. The amber band shows posts that arrive at or after the end of the segment. A rail on the right lists the managed variables that a run makes. Carrier strikes through _votes when the layout cannot record votes. |
| Outline → filter | Finds post IDs, captions and authors, and shows “N of M” while it is active. The filter never renumbers posts, so you can safely filter and then act on the results. With more than eight different arrival times, the timeline stops showing a header for each time. Without this rule, a hundred posts at a hundred times would make a hundred headers. The timeline then makes three groups: Before entry · On entry · After entry. The offset of each post then shows on its row. |
| Post → Author · Caption | The account that writes the post, and the text of the post. You select the author from the accounts of the feed. You cannot use a handle that is not an account. The caption is required. Both fields accept {{variable}}. |
| Post → Title, Community, Flair, Score, Kind, Link URL | The forum fields. The title is a headline above the text. The community is a label such as r/science. The flair is a small label. The score is a starting vote score and can be negative. If it is blank, Carrier uses Base likes, not zero. Kind selects image, text or link. In all layouts, text and link hide the image, and a link post shows its Link URL. A link post without a Link URL fails validation. The instagram and facebook layouts do not show the title, community, flair or score. Thus a feed that uses these fields depends on the layout. |
| Post → Image | A source (preset, url, dataUri, and library after you upload images). The value control changes to match the source: a preset picker, a library picker, or a free-text field. Carrier stores a library image as a usual URL. Thus it shows as library only while the file is still in the library. An unknown preset name is a validation error. |
| Post → Base likes · Time label | Display only. Base likes is the starting count below the post. When a participant likes the post, the count goes up by one on that participant's screen only. Carrier never shares that like with other members of the chamber. Time label is the age that the post shows, for example “3h”. It has no effect on when the post appears. |
| Post → Appears · Offset | When the post comes into the feed. You set a direction and a value in ms, seconds, minutes or hours, not raw milliseconds. Before entry puts the post in the backlog that loads when the participant scrolls. At entry means that the post is already there. After entry makes the post arrive later, behind the “new posts” pill. The stored value does not change: a signed whole-millisecond showAt. Feed order also sorts on this value. The field shows the stored value below it. |
| Post → Thread | The pre-written comments, which you edit as a thread. Each comment has an author account, text, a like count and its own offset on the same clock. Reply adds a child comment below a comment. A pre-written comment never shows before its post, whatever its offset. The layouts set one strict limit: the nesting depth. The interface applies this limit, so the validator does not have to find the error. On instagram and facebook, a comment that is a reply has no Reply button. An empty comment is a validation error. Thus a comment that you add and leave blank stops the save. |
| Account → handle · kind | The handle is the visible username. Two accounts cannot have the same handle; this is a validation error. Carrier makes the avatar colour from the handle text, so a new handle gives a new colour. The kind is crowd or agent. A crowd account only writes posts and pre-written comments and does nothing during the run. An agent account is live and can reply. If you select crowd, the fields below are hidden. |
| Account → Replies as and New agent | Binds the account to one agent of this chamber, by display name. The list shows only chamber agents. One agent can hold only one account. An agent that is bound to a different account shows as disabled, with the name of that account. Thus the builder does not accept the agent and then refuse it at save. An agent account that is not bound is a validation error. The feed does not save and the experiment does not deploy until you bind it or set it back to crowd. The New agent button next to the list starts a guided wizard. The wizard makes an agent with an LLM persona or scripted keyword rules, and a provider, model and personality prompt. It then adds the agent to the chamber and binds it, in one step. Participants never see the agent name, only the account handle. |
| Account → Responds on | All posts (whole feed) or Chosen posts…. Chosen posts… changes the feed timeline into a checklist. You tick the posts in the timeline, so you never have to match post IDs by hand. All and None apply to the posts that the filter shows. Chosen only shows only the ticked posts. An agent with a scope never receives comments on other posts of the feed. An LLM agent also gets an identity block in its system prompt that gives its handle and quotes its posts. Thus several agents can act as different personas on different parts of the feed. If you select Chosen posts… and tick no posts, this is a validation error. |
| Account → Reply delay (ms) min / max | Carrier makes the reply as soon as the comment arrives. It then holds the reply for a random time in this range, so the reply seems human and not instant. If both fields are blank, the reply shows as soon as it is ready. The values must be whole milliseconds, and min must not be more than max. Carrier rejects a delay on a crowd account. |
| Feed settings → Feed order | Newest first, Oldest first or Manual (config order). Newest first and Oldest first sort on the Appears time. Manual (config order) keeps the order of the Posts list. This setting is only in the Feed Builder. |
| Feed settings → Allow likes, Allow replies, Show share/save, Collapse seed comments | Four switches for the actions in the feed. All four are on by default. If you turn off Allow replies, the feed is an exposure stimulus only. Then _comments and _commentCount are always empty. Collapse seed comments sets how the pre-written comments start. They can start folded behind a “View comments” toggle, as on a real feed, or fully open. This is a real manipulation of what participants read without an extra click. |
| Data Sharing | Not available. The feed never shows the state of a different participant. Thus the feed data of each participant stays on the server. Carrier ignores a dataSharing value on an older segment and does not broadcast it to the room. |
Fullscreen. To show a feed without the browser address bar, open Experiment Settings and select Open the study in fullscreen. Carrier then asks the browser for fullscreen when the participant clicks Continue on the name screen. A browser allows fullscreen only after a click, so Carrier cannot start the study in fullscreen before that. If the participant did not see the name screen, or reloaded the page, Carrier asks again at the first tap in the feed. The whole study stays in fullscreen until the participant leaves it or the study ends. The participant can leave fullscreen at any time. iPhone Safari does not allow fullscreen, so iPhone participants see the feed in the normal browser window. The feed records fullscreen_state when it opens, and fullscreen_enter and fullscreen_exit when the mode changes. Use these entries to find the frame that each participant saw.
The researcher opens the chamber, finds Social Feed in the Library and drags it onto the chamber timeline. The researcher opens the Feed Builder and changes the layout above the live preview. The researcher opens the Agents and Feed tabs, then saves and deploys the feed.
The segment moves on by time. A new social segment has a 3-minute timer with auto-advance by default. Change the duration in the Timing panel of the segment. The remaining time shows as a small pill in the top bar of the platform. The pill becomes amber near the end. If you set a manual transition, a small “Continue →” button shows in the platform frame.
The feed connects to the agent system through account binding.
Each account in the feed is crowd or agent. A crowd
account only writes posts and pre-written comments. An agent account is bound to
one of the non-human participants of the chamber, by display name. A participant
comment goes through the same pipeline as chat messages. Thus all trigger types
and LLM configurations work with no change. The reply of the bound agent shows in
the feed as its account, below the comment that started it. At segment
start, the platform writes one hidden context message for each post into the
conversation history. Thus LLM agents know the content of the posts with no
more configuration.
Each agent account also has a scope. By default, the agent replies
on the whole feed. You can limit it to specific posts: tick them on the timeline of
the Feed Builder. An agent with a scope replies only to comments on its posts. A
comment on a different post never gets to it. Agents that are not bound do not reply
in social segments. LLM agents also get an identity block in their system prompt
(“you are commenting as sona.fields; you only take part in these
posts: …”). The block contains the captions and the pre-written
comments of the posts. Thus the replies stay in character and refer to the correct
content. You can run several agents as different personas, and each agent has
different posts.
To set up a persona quickly, use the New agent button next to the bind dropdown of an account:
- Give the agent a name.
- Write a persona prompt.
- Select a provider and a model.
Carrier then makes the agent with an LLM trigger that replies to comments. It adds the agent to the chamber and binds it. You do not need the script builder. After this step, tune the persona in the Agents tab: the prompt, model, temperature, context window and timing. You do not have to leave the Feed Builder to find the agent on the canvas.
A readiness checklist shows four checks. The checks are: accounts bound · triggers present · API key stored · posts on time. The checklist shows in the segment inspector and behind the chip in the Feed Builder header. The config panel of each agent also shows where the agent is bound (“replies as sona.fields on posts p2”). If the agent is not bound, the panel shows a warning.
You edit the feed content in the Feed Builder: posts, pre-written comments, accounts, bindings, scopes, layout and settings. The Data menu in its header contains the file actions. You can import JSON (the full configuration) or CSV (a flat content format for spreadsheets). On a CSV import, Carrier makes the accounts from the author handles, and existing agent bindings stay. You can export in the two formats. A Template JSON download gives an example to start a bulk edit. A starter kit download (an example CSV, a guide in plain language and sample images) helps you write a feed in a spreadsheet.
Carrier makes seven managed variables for each social segment:
social_<segmentId>_comments,
_agentReplies, _likes, _follows,
_actionLog, _commentCount, and _votes.
You can use them in all places where you can use other variables.
Only the reddit layout fills _votes. On the other two layouts it
stays empty, because they have no vote control.
A social segment made before the reddit layout has only the
first six variables. Carrier adds the missing
_votes automatically. The builder shows it when you open the
experiment, and the server adds it at the next save. In the two cases,
_actionLog records the votes.
§2 · Segments
2.17 The task segment
In its plain form, a task segment shows instructions and then a text
box with a label. Below the box is a live character counter, for example
“0 / 500 characters”. A Submit button stays grey
until the response is long enough. When the participant submits, Carrier locks
the box, removes the button and shows “Response submitted”.
If you give the segment an iFrame URL, Carrier loads an external page
in a sandboxed frame between the instructions and the text box. The page can be an
existing web experiment, a game or a reaction-time tool. If you turn on the custom
application, it replaces the segment content. The instructions become a short
Markdown header, and your HTML fills the remaining screen. Carrier does not show
its text box, counter or results panel. An agent in the chamber can also answer
the text box, from a segment action of a trigger
(§5.5.3). An agent cannot make the data
of a custom application.
Use the task segment for activities that no other Carrier segment
supports. It has three levels:
- A free-text response to a prompt, with length limits.
- An external tool that sends a result back when the participant finishes.
- A full custom application whose internal state connects to experiment variables in the two directions.
The third level makes the segment different from an input segment. A
belief slider, a network diagram, an economic game or a drawing canvas can write
its state into variables. Surveys, matching rules, visibility gates and bot prompts
can then read these variables (§4.2). The
application can also get live variables when they change. Thus a custom instrument
becomes part of the experiment, and you do not have to merge its data later. But
you are responsible for the content of the frame. Carrier shows it, sandboxes it
and records the data that it sends back. Carrier does not validate this data.
| Parameter | What it controls |
|---|---|
| Instructions (shown to participants) | The text above the task. If it is empty, Carrier shows “Complete the task below:”. In the plain task, Carrier inserts it as raw HTML, so markup works. With the custom application on, Carrier shows it through the restricted Markdown renderer. Thus one field has two sets of rendering rules. |
| Require text submission | On by default. Shows the prompt, the text box and the Submit button. It keeps the Continue button of the segment disabled until the participant clicks Submit. Thus it is a gate, not only a visibility switch. Refer to the caution below. |
| Text Prompt | The label above the text box. The default is “Enter your response below:”. The placeholder in the box, “Type your response here…”, is fixed. You cannot change it. |
| Min Length · Max Length | Min Length is the number of characters before Submit becomes available. Max Length is a strict maxlength limit on the box (empty = no limit). The counter shows “N / max characters” with a small “(min N)” hint. While Submit is disabled, a line below it gives the reason, for example “Enter at least 20 characters to submit — 7 so far.”. Carrier never accepts a blank answer, even at Min Length 0. At the maximum, the box accepts no more characters. |
| iFrame URL | An external tool in a sandboxed frame. The tool sends its result to the parent window as { type: 'carrier-task-result', payload }. Carrier stores the payload with the text response as iframeData. |
| iFrame Height (px) | The fixed height of that frame in pixels (default 400, minimum 100). This value is in pixels. The height of the custom application is in vh. |
| Enable custom HTML application | Replaces all of the plain task with your HTML and shows the fields below. Carrier then does not show the text box or the iFrame. Thus the panel hides Require text submission, Text Prompt, the length limits and the iFrame fields while this setting is on. If you turn it off, these fields come back with their values. |
| Source · URL · Inline HTML (N chars) | The source of the application. External URL shows a URL field. This field is not the same as iFrame URL above and works differently. Inline HTML shows a character count, Edit HTML… (a full-screen editor) and Insert starter template. |
| Height (vh) | The height of the application frame as a percentage of the viewport: 10–100, default 80. A value of approximately 80–100 fills the segment. |
| Hide advance button | Removes the Continue button. This setting has priority over all transition rules. Thus an application can fill the segment, and the parent chat can control when the segment moves on. |
| Variable bindings | The table of OUT and IN rows that connects the state of the application to experiment variables. Each row has a direction, an html key and a variable. The html key is the field name in the state object of the application. Below the table, a live reference shows the exact messages that the application must send and receive. You can copy these lines directly. Carrier checks each row while you type. It finds a missing or duplicate html key, and an html key that is not a plain identifier. It finds an OUT variable name that the server would refuse. It finds an IN row with no variable. The IN picker starts on Choose a variable…. A deleted variable stays selected and shows as missing. An OUT row with an incorrect name makes no variable. Thus a row that is not complete cannot cause the deploy to fail. |
| Data Sharing | Not available. A task shows no responses of other participants. Thus the text and tool data of each participant stay on the server. Carrier ignores a dataSharing value on an older task and does not broadcast it to the room. The progress of the group still shows as the usual “N of M submitted” indicator. |
| Display Mode | Standalone or embedded, with the usual embedded start, stop, completion and layout controls. If you select embedded, the inspector removes the Timing and Transition cards. |
| Timing · Transition (defaults) | Carrier does not treat a task as user-paced. A new task has a 5-minute duration, a 60-second warning and the transition mode sync. Thus the segment is timed and waits for the full group. Check these values carefully, because they affect the submission gate below. |
The bindings are the main function of the custom application. An OUT row gives the name of a new variable, and Carrier makes it. The variable is a managed alias. It shows as locked in the Variables Manager: you can refer to it everywhere, but you cannot edit it. If you remove the binding row, Carrier removes the variable. If the name is already in use, Carrier refuses it with a warning in the row. Carrier does not overwrite the existing variable.
An IN row uses a dropdown of all variables of the experiment. The list includes variables that do not have a value yet at this point in the timeline. Important IN values often change during the segment, for example an LLM-processed variable or a running peer aggregate.
The application inside the frame uses three messages:
- The application sends
{ type: 'carrier-task-data', state: {…} }each time its state changes. Carrier takes the OUT-bound keys and waits 400 ms to collect more changes. It ignores repeats with no change. When the segment ends, Carrier saves all changes that are waiting. - Carrier sends
carrier-variableswith the changed IN keys. - A variable that has a value before the segment starts never sends a change.
To get these values, the application must send a
carrier-app-readymessage after it attaches its listener. Carrier then sends all values.
Insert starter template writes a working skeleton that does all three. The skeleton uses the bindings that exist at that time. Thus add the bindings first, and make the template after. If the application already has HTML, the builder asks before it replaces the HTML.
A task can be standalone or embedded. Both embedded layouts work fully. The inline card connects the submit, iframe and custom-application listeners in the same way as the standalone segment. The defaults are standalone and inline. In the split layout, the application is in the main pane and a live chat is docked next to it. Use this layout for an instrument during a discussion. The split layout needs a chat segment as its parent. Without a chat parent, it changes to the inline card and shows no message. When the viewport is less than 900 px wide, all embedded segments become standalone. For a task, the application then replaces the conversation and does not show next to it.
Most task segments that fail in a pilot fail in one of these four ways. None of them shows an error to the participant.
- With Require text submission on, Continue stays disabled until the participant submits an answer that is not blank. The default transition mode is sync. In this mode, a participant who never answers holds the full matched group until the 5-minute duration ends.
- With the custom application on, there is no text box to gate on. Thus the only record of the participant actions is the state of the application, sent through OUT bindings. An application with no OUT bindings records nothing.
- Carrier replaces a
carrier-task-resultpayload with a marker if the payload is larger than 1 MB or cannot be serialised. The marker records that the payload was too large. A larger message would be more than the server message limit and would disconnect the participant. Thus Carrier keeps the run and loses the payload. Send IDs, scores and timings. Upload large files separately over HTTP. - Sandboxing is different for each origin, and possibly not as you expect. A tool from a different origin keeps
allow-same-origin. A tool from the Carrier origin loses it on purpose. Inline custom HTML runs in an opaque origin. It has no cookies and nolocalStorage, andevent.originis the string “null”. A tool that needs its own storage does not work from the Carrier origin or as inline HTML.
The researcher changes a segment to task and enables the custom HTML application. The researcher adds an OUT binding and an IN binding to the bindings table, and clicks “Insert starter template”. The researcher opens the HTML editor. The generated skeleton already sends and receives messages on those keys.
§2 · Segments
2.18 The process segment
A process segment shows a turning icon and one line of text in the
center of an empty screen. The default text is “Analyzing your
responses…”. There is no input, no Continue button and no
navigation. The participant waits, and Carrier moves them on when it is ready.
This is the only segment type that asks nothing of the participant.
The segment exists for work that the participant does not see. While the icon
turns, the server runs the llm-processed variables of the segment.
The server sends the sources of these variables to a language model with the
researcher's prompt. A source can be a free-text answer, an earlier submission or
a chat transcript. The server stores the result for each participant.
Thus a process segment connects an earlier activity of the participant to a later segment that needs the result. Examples are a summary of an open answer to show to the participant, a stance classification that gates a chamber, or advice in an instruction. The segment is not an activity. It has one purpose: the timeline must not move on until the derived value exists.
| Parameter | What it controls |
|---|---|
| LLM-processed Variables | One checkbox for each variable of the kind llm-processed in the experiment. The segment runs the ticked variables and waits for them. The list shows all such variables, whatever their Update trigger is. A ticked variable runs here, whatever its trigger says. If the experiment has no such variables, the control shows only the text “No llm-processed variables defined. Create one in the Variables manager first.”. You cannot configure the segment until a variable exists (§4.2). |
| Processing Message | The line of text below the icon. If it is empty, the text is “Analyzing your responses…”. The server sends its own copy again when the segment starts and replaces the text in the browser. Thus the server resolves variable references in the message. The text can change a short time after the icon shows. |
| Timeout (seconds) | How long the server waits for the language model before it applies On Timeout. The default is 30, and the minimum is 1. This value also sets the fallback release for the participant. If the completion signal from the server does not arrive, the browser finishes 5 seconds after this time. Carrier counts this time from when the server starts the call. Before the call starts, Carrier waits up to 60 s more for the remaining group members. If you empty the field, the timeout goes back to 30 s. There is no setting to wait with no limit. This is the only clock on a process segment. The Timing and Transition panels show a note about this. Carrier ignores a stored Max Duration. |
| On Timeout | What occurs to variables that have no value when the timeout ends. Use default values (fallback) writes the default value of each such variable for each participant who has no value. Leave unset (no default values) writes nothing. With the two options, participants move on at the timeout. If a variable stays unset, a later instruction or prompt that uses it shows nothing. Thus fallback is usually the safer option. Before September 2026, this option had the label “Block (keep waiting)”. It never held participants, and stored configurations keep the same behaviour. |
| Auto-advance when processing completes | On by default. When it is on, the completion signal tells the browser to go to the next segment when the variables have values. When it is off, the icon changes to a check mark when processing is complete. The participant then gets a Continue button and moves on when they choose. Use this when the participant must read the processing message. The same button shows if the fallback release occurs. |
The variable definition in the Variables manager (§4.2) contains all settings of the language-model call. These are the provider, model, system and user prompts, sources, output format, and one call per participant or per chamber. The segment does not contain these settings. The segment sets only three things: when the call occurs, how long the study waits for it, and what the participant sees during the wait. Know this before you debug an empty result. A ticked variable can have a capture scope for a different chamber or segment. Then the process segment skips it with no message, and its stored value does not change.
The validation panel of the builder shows a warning for a process segment with no
ticked variables (“nothing will be processed”). It also shows a warning
for a tick that has no related llm-processed variable. If you rename
or delete a variable in the Variables manager, the segment keeps a reference to a
variable that does not exist. The panel shows this problem but does not repair it.
2.18.1 Display and timing
A process segment is standalone only. It has no Display & Sharing card, because it cannot be embedded and has no data to share. Until September 2026, the builder offered an Embedded mode that the participant page could not show. The page showed “Unknown segment type: process” in the chat and did not run the variables. Carrier changed all such segments to standalone.
The timing applies to the full group. The server starts the run only when all participants in the chamber are at the segment. The server sends the completion signal to the full chatroom. Thus a matched group waits together and moves on together. In a chamber with one participant, the wait is the length of the call.
Carrier never holds a participant on a process segment with no limit. The settings control the maximum wait and the values that Carrier writes at the end:
- The timeout always releases. With the two On Timeout options, the server sends the completion signal if the timeout ends before the model call. The option controls only whether variables with no value get their default values or stay empty.
- Carrier times the wait from the call, not from arrival. The server starts the run when the last participant gets to the segment. Carrier then starts the fallback release time of each participant again. Thus a participant who arrives early cannot be released before the call starts. If participants arrive at different times, Carrier waits up to 60 s more before the fallback applies.
- If you change the Type of the segment, Carrier deletes this configuration. The builder warns you first when variables are ticked. The warning does not tell you about a changed message or timeout. Thus if you change the type and change it back, these values go back to their defaults.
The researcher drags Process (LLM) onto the chamber timeline. Its variable list is empty and shows “No llm-processed variables defined”. The researcher opens the Variables manager and adds an llm-processed variable with a source and a prompt. The researcher goes back to the segment. The new key now shows as a checkbox next to the processing message and the timeout.
Attention checks
Use a face check or a question check to make sure that a real person pays attention. This page also tells you what occurs when a participant fails a check.
§2 · Segments
2.19 The attention-check segment
An attention-check segment fills the screen with a panel. The panel
heading is “Attention Verification”. The participant must pass the check
before the timeline continues. The mode sets the type of check:
- survey mode shows a short Survey.js form with questions that you write. Examples are instructional-manipulation checks, catch trials and comprehension questions. The server grades the answers when the participant selects the Survey.js Complete button.
- liveness mode first shows a consent screen: “This step requires camera access to verify your presence” and “No video will be recorded or transmitted”. The participant selects Begin Verification. A live camera preview calibrates. Then the participant holds the face in the frame until a progress bar is full. Then the panel asks for one physical action at a time, for example a blink, a turn to the left or raised eyebrows.
- CAPTCHA mode shows an animated canvas and a countdown. The participant does one of three tasks. The participant counts circles in a phase-coded animation. Or the participant clicks a red dot before it disappears. Or the participant watches a masked ball move on a hidden path, then selects all the matching paths in a grid of thumbnails.
The purpose of the segment is screening. Thus the most important setting is what occurs when a participant fails. Each attempt makes a result record with the mode, the pass or fail, the retry count and details for the mode. Carrier keeps the record on the run. Carrier also adds it to the transcript as a system message, so the export shows the failure at the time it occurred (see §6.5).
You set the policy for a failure. Carrier can end the session with a message and send the participant to a screen-out URL on a recruitment panel. Carrier can give a fixed number of retries. Or Carrier can record the failure and let the participant continue. Then you can use attention as a covariate, not as an exclusion.
The server makes the three CAPTCHA challenges. Thus no person can learn a fixed answer before the study. The server also grades survey questions. The correct answers never go to the participant's browser, so a person cannot read them on the page. Liveness is the only mode that the browser grades, because the camera is in the browser. Carrier records liveness results as client-reported.
2.19.1 Mode
Mode is the first control on the panel. It selects the type of check:
Survey (question-based) (the default),
Liveness (camera-based) or CAPTCHA (perception / reaction).
When you change the mode, the builder draws the remaining panel again. The segment
keeps the settings for all three modes. Thus you can look at a different mode and
not lose the settings that you entered.
2.19.2 Survey mode
| Parameter | What it controls |
|---|---|
Questions / Add Question | The list of graded questions. Each question is a card in the builder that you can open and close. The card heading is “Q1: …”, and a trash button removes the card. You cannot deploy a check with an empty list, because that check passes all participants and asks nothing. |
Question Type | For each question: Radio Group, Checkbox, Dropdown, Text or Rating. Text and Rating have no choices, so the builder does not show the choice list for them. |
Question Title | The question that the participant sees. It is also the card heading in the builder. |
Question Name (unique ID) | The key for this question in the graded answers and in the result record of each attempt. The builder starts with attn_q0, attn_q1, … If two questions have the same name, they use the same key. A completion condition also uses this name to find the answer. |
Choices (one per line) | The answer options, one on each line. Only Radio Group, Checkbox and Dropdown questions show this field. |
Correct Answer and Case sensitive | The correct answer for this question. Carrier compares the answer and the correct answer as text. It changes both to lower case unless you select Case sensitive. Only Text questions show that checkbox. Because the comparison uses text, write the answer to a Checkbox question as a list with commas. Use the order in which the options are stored. You cannot deploy a question with a blank Correct Answer, because no participant can answer it correctly. The correct answer stays on the server. The participant's page never contains it. |
Pass Criteria and Pass Percentage | All correct (the default) or Percentage. When you select Percentage, a threshold from 0 to 100 shows. The default is 100. A participant passes with a score equal to or more than the threshold. Thus a threshold of 100 is the same as All correct. |
Randomize question order | On by default. Each participant sees the questions in a different random order. Carrier grades each answer by its Question Name, so the random order does not change the grade. |
Show feedback on wrong answers | When a participant fails, the form changes to a list of question titles. Each title has a ✓ or a ✗. The participant then selects Try again (when a retry is available) or Continue (the On Fail policy then applies). The list shows which answers were wrong. It never shows the correct answers. |
2.19.3 Liveness mode
Liveness mode has two phases. Each phase has its own accordion, and you can turn each phase on or off. The presence phase makes sure that a face is in front of the camera. The liveness phase makes sure that the face is live: it asks for actions that a photograph cannot do.
| Parameter | What it controls |
|---|---|
Enable presence check | On by default. A face must stay in the frame before the action phase starts. |
Sustained Duration (seconds) | How long Carrier must find a face without a stop to complete the presence phase. The default is 3 s. The phase also has a fixed limit of 60 s that the builder does not show. |
Enable liveness check | On by default. After the presence phase, the participant must do the requested actions. If you turn off both phases, the check has nothing to verify. The participant then continues and Carrier records no result. |
Action Pool | Seven checkboxes select the actions that Carrier can ask for: blink, turn-left, turn-right, raise-eyebrows, open-mouth, nod-up and nod-down. The builder shows them as Blink, Turn left, Turn right, Raise eyebrows, Open mouth, Nod up and Nod down. All are on by default. |
Number of Actions | How many actions Carrier selects at random from the pool. The default is 3. It cannot be more than the number of selected actions. If you clear actions below this number, the builder decreases it to match. |
Time Limit (seconds) | The time for the full action phase. The default is 30 s. The minimum is 5 s. |
Instruction Text | The status line during a phase. Each accordion has a field with this label. The presence phase default is “Please position your face in the camera frame”. The action phase default is “Please perform the following actions”. |
If the participant does not give camera permission, Carrier does not record a
failure. The panel shows a warning and lets the participant try again. Carrier does
not end the run. A liveness check that passes is the only thing that can start
Background Face Monitoring for a chamber. The Start After Segment
dropdown of that setting shows only attention-check segments (see
§1.3).
2.19.4 CAPTCHA mode
CAPTCHA Variant selects one of three challenges. Each challenge has its
own parameters, and the server grades it. When you change the variant, the builder
draws the sub-panel again.
| Parameter | What it controls |
|---|---|
CAPTCHA Variant | Spooky Circle (perception): the participant counts the circles in a phase-coded animation. Red Dot (reaction): the participant clicks a red target before it disappears. Trajectory Recovery (motion): the participant finds the path of a masked ball in a grid of thumbnails. |
Spooky Circle · Minimum Circle Count and Maximum Circle Count | The range of circle counts for a challenge. Each is from 1 to 9. The defaults are 2 and 7. They are also the limits of the participant's number field. Each field limits the other, so the minimum cannot be more than the maximum. |
Spooky Circle · Time Limit (seconds) | The time that the participant has to answer. The default is 35 s. Only this variant has its own time-limit field. Red Dot uses Overall Timeout. Trajectory Recovery has no field and always uses 40 s. |
Spooky Circle · Difficulty | From 1 to 10. The default is 4. With a higher value, it is more difficult to see the rings. |
Spooky Circle · Log answer telemetry (latency / input method) | Off by default. Carrier records some behaviour data with the answer. This data never changes the pass or fail. |
Red Dot · Required Hits | The number of dots that the participant must click correctly. From 1 to 20. The default is 5. The counter on the screen shows “0 / N”. |
Red Dot · Target Lifetime (ms) | How long each dot stays on the screen. From 200 to 5000 ms. The default is 800. Note the unit: this is the only time field on the segment in milliseconds, not seconds. |
Red Dot · Overall Timeout (seconds) | The total time to get the required hits. The default is 60 s. |
Red Dot · Distractor Count | The number of false dots that show with the target. From 0 to 10. The default is 0 (off). The server verifies the position and time of each hit. The browser only sends the click. |
Trajectory Recovery · Grid Columns and Grid Rows | The size of the thumbnail grid. Each is from 2 to 6. The default is 4 × 4. |
Trajectory Recovery · Correct Trajectories | The number of thumbnails that match the path of the ball. The default is 3. The participant must select all of them. The maximum is one less than the number of grid cells. If you make the grid smaller, the builder decreases this number when necessary. |
Trajectory Recovery · Enabled Trajectory Types | The path types for the target and the false paths: Zigzag, Circular, Wave, Cubic and Quadratic. All are on by default. |
Trajectory Recovery · Difficulty | From 1 to 10. The default is 5. With a higher value, it is more difficult to follow the masked movement. This field is not the same as the Spooky Circle Difficulty field, and it has a different meaning. |
2.19.5 What happens on failure
These controls are below the panel for the mode. They apply in the same way to all three modes.
| Parameter | What it controls |
|---|---|
On Fail | Terminate session (the default) ends the run and records the reason attention_check_failed. Allow retry shows the check again from the start. A CAPTCHA retry gets a new challenge. Continue (log only) lets the participant continue as if they passed. The failure stays in the data as a covariate. |
Max Retries | From 1 to 5. The default is 1. The builder shows this field only when On Fail is Allow retry. Carrier counts the retries for each participant and puts the count in the result record. |
Fail Message | The text on the end screen, with the title “Study Ended”. The participant sees it when there is no redirect URL or when a debrief is on. With a redirect URL and no debrief, the participant sees the “Study Complete” redirect notice for three seconds. The participant does not see this message. The default is “You did not pass the attention check.” The builder does not show this field when On Fail is Continue (log only). |
Redirect URL (optional) | The page for a participant who fails, usually the screen-out URL of a recruitment panel. Carrier adds the participant ID to the URL. With no debrief, the redirect occurs immediately after the three-second notice. With a debrief on, the redirect occurs only after the participant clicks through the debrief. A participant who closes the tab before that is not redirected. The builder does not show this field when On Fail is Continue (log only). |
Completion Conditions / Add Condition | A second, separate screen-out path. Only this segment type and survey have it. Each condition has an If field, an operator (=, ≠, in, >, <), a value, its own message and its own redirect URL. The If field must be the same as a Question Name. Thus the conditions apply only in survey mode. Each condition also sets how Carrier records the exit. The options are Screened out (the default for a new condition), Completed early, Failed an attention check or Declined consent. Carrier records conditions saved before this setting as completed early. The conditions apply together with the graded pass or fail. They do not replace it, and Carrier records the attempt first. Use them for exclusions that are not about attention, for example a demographic screen-out on the same form. Before September 2026, the attention check showed these conditions but did not apply them. |
2.19.6 Display mode and timing
The attention check is standalone only. The builder and the runtime both enforce this. The builder does not show a Display Mode dropdown for this type. It does not show a Display & Sharing card, because there is no embedded mode and no data to share. The runtime cannot show the check on top of a chat. This limit is intentional. If a participant could close the check, or answer it during a conversation, the check would not measure attention.
The two usual timing fields operate differently on this segment type. Set both fields carefully.
On all other segment types, the timing fields set the speed. On this segment type, they change the result:
Max Durationexpiry is a failure, not an advance. When the time ends, Carrier records a failure with the reasontimeout. Then theOn Failpolicy applies. With the default policy, the session ends. Thus a new attention check has no Max Duration. When you change a segment to Attention Check, the builder removes the default Max Duration of five minutes. When you set a Max Duration, the panel tells you what occurs at the end of the time. A time limit is a real risk in liveness and CAPTCHA modes. A permission prompt or a retry can use much of the time. Caution: when a survey-mode check ends at its Max Duration, the participant fails, but Carrier does not record the attempt. The Attention Checks sheet does not show it. This is a known bug.Min Durationholds participants who have already passed. After a pass, the participant does not continue until the minimum time ends. The participant waits on a completed check with no task and no explanation. The panel shows a warning when you set a Min Duration. Keep it at zero unless you want the delay.
The server grades survey mode against the deployed experiment. Carrier stores
each attempt with gradedBy: "server", the answer to each question
and the retry number. Two configurations give all participants the same grade,
so you cannot deploy them: an empty question list and a question with a blank
Correct Answer. An older check with no questions still passes all
participants. Carrier marks its record unconfigured, so you can
find it in the export. To ask a question that Carrier does not grade, put it in
a separate survey segment.
The researcher adds a segment and changes its type to Attention Check. The researcher adds two graded questions with their correct answers. The researcher sets On Fail to “Terminate session”, with a fail message and a screen-out redirect. The recording is older than September 2026. In it, the researcher clears the five-minute Max Duration by hand. Now a new check has no Max Duration. The recording also shows an empty Display & Sharing card, which the builder no longer shows.
§2 · Segments
2.20 The shop segment
The shop segment is a mock online store. Participants
search and filter a grid of products. They open product pages with photos and
scripted customer reviews. They put products in a cart and check out to move
on. The store has two layouts for the same catalogue:
Marketplace (detailed, with a focus on ratings) and Bargain (dense,
with a focus on discounts). You set the store name.
Building a store
Drag Shop from the Library. Then open the Store Builder from the inspector. The Store Builder has these tabs:
- Products holds the catalogue. Each product has a title, a brand, a category, a price, an original price, stock, badges, the shown rating, bullet points and images. The images come from the image library of the experiment. Social feeds use the same library.
- Reviews holds the scripted reviews and their reviewers.
- Checkout sets an optional budget and what occurs when a cart is more than the budget. It also sets quantity limits, express delivery and a random grid order for each participant.
When you edit a product or a review, the list and the preview change in place. The
form does not change, so you do not lose the typing focus. Carrier escapes imported
names, so they are safe to show. You can import and export products as
products.csv and reviews as reviews.csv. You can also
import and export the full store as store.json. An import removes each
review whose product does not exist and tells you how many it removed.
For a full procedure, see the tutorial Build a shopping study with a budget and reviews.
The researcher drags Shop from the Library into a chamber that has a welcome page. The researcher selects the new segment. The inspector shows the store summary and its readiness. The researcher clicks Open Store Builder.
Finishing the segment
The segment ends when the participant places an order. The server calculates the cart price again from your configuration. It checks the stock and the budget. It stores a maximum of one order for each participant.
- With a time limit, a participant who has no order at the end of the time moves on with no order.
- With no time limit, the participant must order to continue.
- A shop segment ends only at checkout in the Sync transition mode. In other modes, participants can move on with no order, and the builder shows a warning.
- The server refuses an order after the time of a timed shop ends. It tells the participant that the time is over and that the order was not placed.
If the reply from the server is lost, the participant's page sends the same order again, up to three times. Carrier never charges twice. After three times, the page shows an error, and the participant can try again. When the server accepts an order, the page waits for the end of any minimum duration before it moves on. Checkout never asks for a name, an address or a card. Orders go to a study address and the participant pays with study credit.
Agents in the shop
Two types of chamber agent can take part. You bind each one in the Store Builder by the agent name.
- An agent reviewer is a reviewer of the type Agent. It answers participant questions on product pages and participant replies to reviews. It answers with its reviewer name. You can limit it to selected products. You can also set a delay, and Carrier holds the answer until the delay ends.
- A shop assistant is a chat drawer that the participant can open. If you allow it, the participant can also close it. Its agent gets the catalogue, the product on the screen and the cart, with prices from your store. The participant's page sends only product IDs.
Each agent answers with its own triggers, usually an LLM trigger. Each agent sees only its own conversation. The assistant never sees product questions. A reviewer never sees the assistant chat, or questions on products that are not in its scope. You can bind an agent only once in a shop. Agents that are not bound do not send messages in the shop.
An agent reviewer never shows messages from other triggers, for example a timer or an idle trigger. It only answers a question or a reply to a review. The assistant drawer does show messages from other triggers. Thus, to send a greeting, give the bound agent a salute trigger or a time trigger. If the assistant starts open and the participant cannot close it, Carrier adds space to the page. Then the drawer does not cover any part of the page. If an agent reviewer cannot answer (for example, when the study has no AI credit), it does not show an error. The question then has no answer.
A shop segment needs a chamber with exactly one human participant. Questions and assistant chat go as chatroom messages, so a second shopper would see the messages of the first. The builder does not let you deploy a shop in a chamber with more than one human slot. For a procedure, see the tutorial Add an AI shop assistant and buyers who answer questions.
A participant puts the sport earbuds in the cart. The participant opens the assistant Nora and taps its suggested message. Nora answers with the prices of the store. On the product page, the participant asks a question. Three seconds later, the agent reviewer answers with the reviewer name Marta K. and the label “Verified purchase”.
Agent reviewers are not disclosed. Participants see a name and “Verified purchase”, the same as for a scripted reviewer. An answer from a reviewer shows the configured reviewer name, never the name of the chamber agent. The Store Builder shows a warning about this. Make sure that your ethics approval includes it, and plan a debrief.
Changing the shop while it runs
The Schedule tab lists changes that occur at a time on the segment
clock (m:ss). A change can set the stock, the price or the badges. A price change can
also show a “was” price. A change can also hide or show a product or a
review, or turn the assistant on or off. To show a review later, add it on the Reviews tab as
hidden. Then add a change that shows it. A change that turns on the assistant needs
the assistant bound to an agent. Each row has an Items in carts
column. When you delete a product or a review, or import a CSV or
store.json, the builder removes each scheduled change for it. A toast
tells you about this.
Changing the shop live is done from the dashboard. Open the details of the chatroom, find the shop panel, and use “Change the shop”. A change can be for all participants in the chatroom or for one shopper. It operates only while the chatroom is live and the shop is its current segment. The activity log records each live change.
“Skip shoppers who have it in their cart” applies only to stock, price and hide-product changes. On the Schedule tab, this is the Skip checkbox in each row. On the dashboard, the label is “Skip shoppers with it in their cart”. A skipped shopper keeps the old value in all places. Shop Orders marks the order line of that shopper as locked. Without this option:
- a price change shows in the cart;
- a stock decrease lowers the quantity;
- a sell-out or a hide removes the line, with a notice.
After the participant places an order, the cart does not change. If the participant removes a skipped item from an open cart, the lock ends.
At Checkout, the server checks each order against the shop with all changes, not only the version that the participant saw last. For a procedure, see the tutorial Change prices, stock and reviews while a shop runs.
Two shoppers are side by side. Sam puts the sport earbuds and the budget earbuds in the cart at the start. Alex does not. At 0:20, the price of the sport earbuds increases to £39.99 for Alex. Sam still sees £34.99, because “Skip shoppers who have it in their cart” is on. At 0:40, the budget earbuds sell out for both shoppers. They go out of Sam's cart, with a notice.
What is recorded
Carrier records each order in the Shop Orders export section, with one row for each item. Carrier also records a log with times of what the participant did, in Shop Actions:
- searches, filters and sorts;
- the products that the grid showed, and the grid position of each;
- the product pages that the participant opened, and for how long;
- the images that the participant looked at;
- the reviews that the participant read or voted helpful;
- each change to the cart.
Carrier records questions, review replies and assistant messages in the two
directions, with the time that each answer showed.
_assistantMessages counts the participant's messages to the assistant.
Each shop segment has eight variables:
shop_<segment>_order, _orderTotal, _itemsBought,
_cart, _productViews, _reviewsRead,
_assistantMessages and _actionLog. They make this data
available to later segments, conditions and prompts. The order variables contain
only what the server accepted.
When a scheduled or live change becomes due, Carrier logs it once for each shopper
as saw_change. The log has eventId, type,
productId and reviewId. It also has applied
and, for a skipped shopper, the reason.
When a change makes a cart line change, Carrier logs a separate cart_adjusted
entry with productId, the new qty and eventId.
A quantity of zero means that Carrier removed the line.
The Shop Events export section lists each scheduled and live change. Each
row has the source, the time, the scope and the participant. A live change also shows
who made it. The scheduled rows show the current schedule, not the schedule at the
time of the sessions. Thus be careful when you edit the schedule of a study that has
data. The JSON export has the live changes in shopEvents. The scheduled
changes are in the experiment configuration and in the CSV/Excel
Shop Events section.
Shop Orders has a locked column. It shows each order line that a shopper
kept at the old value.
Roles are the subject of §3. A role tells who fills a slot in a chamber and what that participant can do in these activities.
Roles: Communicator, Mediator, Processor
Carrier has three independent roles. A communicator talks, a mediator guides the discussion, and a processor helps a communicator write. Each role has its own zone on the participant's screen. All types (human, LLM chatbot, scripted chatbot) can fill all roles. A scripted chatbot in the processor role runs as an LLM processor.
§3 · Roles
3.1 Why roles exist
Chapter 1 defined the shape of an experiment. It did not define its cast. A chamber has a list of slots, and a participant fills each slot. This chapter tells what a participant in a slot can do.
Carrier uses two independent properties to describe a participant:
- The type tells what the participant is. There are three types: a real human, an LLM chatbot and a scripted chatbot. A language model writes the messages of an LLM chatbot. Rules write the messages of a scripted chatbot. Both chatbots can take part in chat, selection, ranking, input, task, social feed and shop segments (see §2.2). Carrier stores both chatbots as
participantType: 'agent'. An LLM-driven trigger makes a chatbot an LLM chatbot (see the note on non-human participants). - The role tells how the participant takes part. There are three roles: communicator, mediator and processor.
The three types are different in two ways. They make their messages in different ways, and the messages change by different amounts from session to session:
| Kind | How it produces output | Reproducibility |
|---|---|---|
| Human | The person types the messages. | The messages depend on the person. |
| LLM chatbot | Carrier calls an LLM one time for each turn and sends the conversation history. The result is a chat message or no message. | The messages change from session to session. |
| Scripted chatbot | Rules that you write fire when their trigger conditions match. | The messages are the same in each session only when each trigger has one reply, probability 1 and a fixed delay. Reply variants, probabilities and delay ranges give random results. |
The next table shows which type can fill which role. It is the most important table in this chapter. Almost all design decisions below depend on it or are limited by it:
| Type \ Role | Communicator | Mediator | Processor |
|---|---|---|---|
| Human | ✓ | ✓ | ✓ |
| LLM chatbot | ✓ | ✓ | ✓ |
| Scripted chatbot | ✓ | ✓ | as LLM |
A scripted chatbot cannot work as a scripted processor. A processor reads drafts, writes suggestions and interrupts the writing of a message. Only a human or a language model can do this open-ended language work. Thus, when you select the processor role for a chatbot, the builder hides its trigger script. The chatbot then runs as an LLM processor, and its phases (§3.5) configure it. Carrier does not refuse this combination, but the chatbot is no longer scripted.
All other combinations work. Thus you can write one experimental design and fill the same role with a human in one condition and a language model in another condition. For studies that compare human and machine behaviour, this is the most important feature of Carrier. The type of chatbot can also be the manipulation. The role and the instructions stay the same, but one chatbot uses a language model and the other chatbot uses written rules.
§3 · Roles
3.2 The spatial model: three zones in the interface
During a chat segment, each role has its own zone on the participant's screen. Use the zones to keep the roles separate:
The zones have a function. Mediators broadcast, communicators converse, and processors help a communicator write before a message goes into the conversation. Each role uses a different channel. Thus you can study facilitation, conversation and writing help separately. You can also combine them, and the layers do not affect each other.
§3 · Roles
3.3 Communicator
3.3.1 Framing
The communicator is the primary interactive participant. The communicators do the behaviour that the experiment studies. All communicators (human, LLM chatbot or scripted chatbot) use the same message space. Their messages show in the main chat area in the order that they were sent.
The design principle is interaction parity. A human communicator and a non-human communicator send messages through the same mechanism and show in the same interface. Other participants cannot see a difference between them. Carrier draws a chatbot's message exactly like a human's message, live and after a page reload. The chatbot's name and avatar are the ones that you configure. Thus you can run human–human, human–machine and machine–machine conditions of one design without a new experiment.
3.3.2 The communicator design surface
Three dimensions of configuration apply to all communicators. They are independent: a setting on one dimension does not limit the settings on the other dimensions.
Identity. Who shows in the chat, and with which name?
| Aspect | Choices | What you decide |
|---|---|---|
| Name and avatar | Chosen by the participant · Configured | Each human goes through the identity-setup screen and selects a display name and an avatar. You configure the name and avatar of a chatbot on the chatbot. The Slot Display Name of a slot is only a fallback label in the participant list. |
| Visibility | Visible · Hidden | Whether the communicator shows in the participant list. Set Show in participant list for each slot or as the experiment default. |
No setting tells participants who is human and who is a machine. Blinding is the default. A chatbot gets the name and avatar that you give it, and its messages look exactly like a human's messages. To disclose a chatbot, write this in its name (“Assistant (AI)”) or in the instructions.
Input control. When can the communicator send messages, and who decides? You set this for each human slot in the Chat Input Control section. It applies to the participant that Carrier matches into that slot.
| Aspect | Choices | What you decide |
|---|---|---|
| Initial state | Enabled · Delayed · Conditions only | Set by Enable Delay (ms). The value 0 enables input from the start. A positive value enables input after that delay. The value -1 waits for an enable condition. |
| Enable conditions | Message Count · Agent Message · Participant Message | The event that enables input, in Additional Enable Conditions. Input becomes enabled when the delay ends or when one condition is met. |
| Mediator control | Always available | A human mediator or a scripted mediator in the chamber can disable and enable a human's input during the chat (§3.4.3). You cannot turn this off for a slot. |
Chat input is not only on or off. For example, a communicator can start with input disabled. After three messages from other participants, the input becomes enabled. Or a mediator (see §3.4) can disable and enable input during the chat to enforce turn-taking. Use these settings to make interventions such as simultaneous discussion vs. sequential discussion.
Message capabilities. Which types of message can participants send, and what can they do with a message?
| Aspect | Choices | What you decide |
|---|---|---|
| Content | Text | Chat messages are text. There are no attachments. An audio or video chamber channel asks for the camera and microphone, but it sends no audio or video. |
| Reactions | Enabled · Disabled | Set for each chat segment: whether emoji reactions are available. When reactions are off, the server refuses them. |
| Reporting | Enabled · Disabled | Set for each chat segment: whether a participant can flag a message for the experimenter. When reporting is off, the server refuses reports. |
3.3.3 Communicator subtypes at a glance
The three communicator subtypes agree with the three types in the matrix:
- Human communicator. A real participant who joins through a browser. The participant goes into the matching queue, gets a match into a chamber and joins its chatroom. Carrier monitors the socket connection with a heartbeat. After a disconnection, the participant can come back to the same session during the experiment's grace period (five minutes by default). Carrier records all messages, survey responses, timestamps and activity events.
- LLM-chatbot communicator. You configure the provider, the model, the system prompt, the temperature and the response logic. The providers are OpenAI, Anthropic and Google. An operator can send OpenAI calls to a compatible service with the
OPENAI_BASE_URLsetting. The response logic tells when the chatbot speaks and when it stays silent (see §5.3). For each turn, the model gets the conversation up to that point. It writes a chat message or stays silent. By default, Carrier keeps the chatbot's memory. With Agent (provider-managed), OpenAI or Anthropic keeps the conversation on its servers. In both modes, the chatbot is a plain language-model call with no tools, files or browsing. LLM chatbots do not go into the matching queue. When the human slots of a chamber are full, Carrier adds the LLM chatbots to the chatroom automatically. There are no multi-step LLM chains. The nearest equivalents are trigger chaining (one trigger fires another, §5) and LLM-processed variables that read other variables (§4.2). - Scripted-chatbot communicator. You configure it with a set of triggers (§5). Scripted chatbots also do not go into the matching queue. Carrier adds them to the chatroom when the human slots are full. When each trigger has one reply, probability 1 and a fixed delay, the chatbot is deterministic and replayable. The same input sequence then gives the same outputs in each session. Thus a scripted chatbot is the correct choice for confederate roles and for designs that must give the same conversation each time. Reply variants, probabilities below 1 and delay ranges are random in each session.
3.3.4 Research uses of the communicator role
Some example designs, each with a different communicator configuration:
| Design | Communicator configuration | What it studies |
|---|---|---|
| Group discussion | 2+ human communicators | Opinion formation, group dynamics, polarisation |
| Human–AI dyad | 1 human + 1 LLM communicator | Trust, persuasion, perception of machine partners |
| Confederated AI | 1 human + N LLM communicators, blinded | Conformity, majority influence |
| Turn-taking study | Humans with delayed input control | Sequential vs. simultaneous discussion |
| Chatbot-to-chatbot comparison | 2 LLM communicators with different system prompts | Model behaviour with controlled prompts |
§3 · Roles
3.4 Mediator
3.4.1 Framing
The mediator is a facilitator. A mediator does not take part in the conversation as an equal of the communicators. The mediator controls the conversation. There are four differences:
- Universal visibility. A mediator sees all messages in the chat. A trigger of a scripted mediator can respond to human messages only.
- Distinct delivery. A mediator's messages show as full-width styled announcements in the message stream, in time order. They are not chat bubbles. Important and urgent announcements also show a pop-up.
- Control capabilities. A human mediator or a scripted mediator can also act on the chat. It can disable a communicator's input, enable it again, or send a private prompt to one participant. An LLM mediator can only broadcast.
- Event awareness. A scripted mediator reacts to patterns as well as to single messages. Patterns include message counts, time, silence, and people who arrive and leave.
Together, these four capabilities make the role of a moderator / facilitator / researcher. A plain group chat does not have this role.
3.4.2 The broadcast system
Mediator messages are broadcasts. Two properties set how a broadcast looks:
| Property | Choices | Effect |
|---|---|---|
| Style | Facilitator · Announcement · System | The icon and tone of the announcement. You set the style one time on the mediator. A scripted trigger can set a different style for its broadcasts. Mediator's default keeps the style of the mediator. |
| Priority | Normal · Important · Urgent | For scripted triggers only. Important and urgent broadcasts have emphasis. They also show a pop-up that closes after 15 seconds (important) or 20 seconds (urgent). The announcement stays in the stream. LLM mediators and human mediators always broadcast at normal priority. |
A broadcast always goes to all participants in the chamber. You
cannot send a broadcast to one role or one person. To send a private message to
one participant, a mediator uses prompt_participant (see below). A
human mediator's broadcast is plain text in the Announcement style.
3.4.3 Facilitation actions
The type of the mediator sets which actions it can use:
- A human mediator can disable input, enable input and send a prompt from the mediator panel.
- A scripted mediator can use all five actions in the table. Each action comes from the Mediator action section of a trigger (§5.5.1). The trigger targets the sender of the message that fired it, one slot, or all participants.
- An LLM mediator can only broadcast. The code that lets a language model return actions is not connected to the runtime of LLM chatbots. Thus its reply is always a broadcast.
Only a scripted trigger can send highlight_message and
request_attention. The mediator panel does not have them. To
control input automatically, you can also use the control events of the chat
segment (§2.15.2).
| Action | Target | Description |
|---|---|---|
disable_chat | One participant, by name or id | Stops the target from sending messages for a period. The release conditions below set when the target can send again. |
enable_chat | One participant, by name or id | Removes a disable immediately. |
prompt_participant | One participant | Sends a private prompt or encouragement. Only the target sees it. |
highlight_message | A message id | Highlights a past message (10 seconds by default). A scripted trigger highlights the message that fired it. |
request_attention | One participant | Flashes the tab title and shows an indicator. It plays a sound only when the style is urgent. A scripted trigger always uses the gentle style, so it plays no sound. |
Carrier releases a disable_chat action with release conditions.
An any or all connector combines the conditions in a list.
The available conditions are:
- Timeout — after a fixed time.
- All others responded — when each other human participant has sent a message. You can set a minimum message length.
- Message count — after N messages from other participants since the disable started. You can include or exclude specific senders.
- Keyword mentioned — when a message contains a keyword from a list. The message can come from any participant or from a specific participant.
- Participant message — when a specific participant has sent a set number of messages.
- Mediator release — only when a mediator sends
enable_chat. - Segment change — when the chamber goes to its next segment.
The mediator panel sets one condition for each disable. It has all conditions except Segment change, and it uses the default values for the other options. A scripted trigger sets only a timeout (Pause for, 60 seconds by default).
Carrier checks the message conditions when a human sends a message. Chatbot
messages do not count toward a release. “Wait until all others respond, or
sixty seconds” is one disable_chat action with two conditions and
an any connector. At present, the mediator panel and scripted triggers
cannot make this combination. Carrier stores each action and each release with the
chatroom. The export shows them in Mediator Actions.
3.4.4 Mediator-specific triggers
Scripted mediators use the standard trigger system (§5). They also have five trigger types for facilitation:
| Trigger | When it fires | Typical use |
|---|---|---|
| Periodic | At regular intervals after the chat starts. | Recurring summaries, scheduled check-ins. |
| Aggregate | When Message Threshold messages have arrived in the Time Window. Carrier replaces {{aggregateSummary}} with a list of who said what only when the trigger's response has includeContext set. The builder does not set it. | Batched synthesis. |
| Topic Detection | When a keyword from the list appears in a message. | Topic steering. |
| Idle Detection | When nobody in the chamber has sent a message for the trigger's Idle Threshold (ms). If you leave this field empty, the builder saves 30 000 ms. The trigger fires again after each idle period while the silence continues. | Idle prompts, participation encouragement. |
| Participant Count | When the number of humans in the room starts to satisfy the condition (at least / at most / exactly N). It fires when the number changes, not while the condition stays true. | Reacting to departures, waiting for arrivals. |
With these triggers, a mediator can summarise the discussion every two minutes. It can prompt the room after ninety seconds of silence, or react when a keyword comes up. Carrier measures silence for the full chamber, not for each participant.
3.4.5 Idle detection
A scripted mediator has one chamber-wide Idle Threshold (milliseconds). To set it, select Enable Activity Monitoring on the mediator. It is the fallback idle period for Idle Detection triggers that have no value of their own. A trigger made in the builder always has a value, so this fallback does not apply to it. The triggers send the prompts, and each trigger has its own reply, cooldown and limit. Carrier does not monitor the activity of each participant. Thus there is no idle prompt for one person and no detection of a participant who dominates.
3.4.6 Research uses of the mediator role
| Design | Mediator configuration | What it studies |
|---|---|---|
| Automated facilitator | LLM mediator that broadcasts, or scripted mediator with periodic and topic triggers | Effectiveness of automated facilitation. |
| Turn-taking enforcement | Human mediator who uses disable_chat with all_others_responded, scripted mediator actions, or chat control events | Effects of structured discussion on quality. |
| Participation prompts | Scripted mediator with Idle Detection triggers | Effects of prompts in a quiet room. |
| Discussion steering | Scripted mediator with Topic Detection triggers | Topic-management strategies. |
| Human facilitator | Human in the mediator role, with broadcasts and chat control | Expert facilitation patterns. |
| Timed interventions | Scripted mediator with periodic broadcasts | Effects of new information during the discussion. |
| Batched summaries | Scripted mediator with an aggregate trigger and {{aggregateSummary}} | Effect of summaries during the discussion on deliberation. |
§3 · Roles
3.5 Processor
3.5.1 Framing
The processor is the newest of the three roles. It works in the input composition space, not in the message exchange space. Thus it acts before the text of a communicator becomes a message in the chat. A mediator is above the conversation, and a communicator is in it. A processor is next to the input box. It reviews what the communicator will send, writes drafts on request, or gives live suggestions while the communicator types.
The role exists because the writing of a message is a separate point of intervention. It is different from facilitation of the conversation and from participation in it. Some studies ask “what happens when an AI helps people write what they say?” These studies need a place for that AI, and that place is not the chat.
3.5.2 The design space, in three dimensions
Processors do more than “review” and “generate”. Three independent dimensions describe the design space.
Initiation. Who starts an interaction?
- Communicator-initiated — the communicator asks for help. For example, the communicator sends a draft for review or clicks Ask Processor.
- Processor-initiated — the processor gives help without a request (it sends a suggestion).
- System-initiated — Carrier starts an interaction after an event. For example, the communicator stops typing, or a timer ends.
Control. Who controls the final output?
- Communicator retains control — the communicator always decides what to send. The communicator accepts, rejects or edits the output of the processor.
- Processor retains control — the processor decides what the communicator sees (filtering, rewriting).
- Shared control — both can edit, and they agree on the final version.
Timing. When does the interaction occur?
- Pre-send — before the message goes into the chat (review, approval).
- During composition — while the communicator types (real-time suggestions).
- On-demand — when the communicator asks (the Ask Processor button).
Not all combinations of these dimensions are possible. LLM API latency is too long for true simultaneous co-editing with LLM processors. Processor-controlled rewriting can replace the communicator's voice with the voice of the processor. This can make the results of self-report studies less valid. Thus Carrier uses one principle and gives three modes.
The committed principle: communicator agency. The communicator always has final control over what goes into the chat. The processor never goes around the communicator.
3.5.3 The three modes
The builder shows the modes in the Mode list of each phase as Mandatory Review, On-Demand Assist and Real-time Assist.
Review
Communicator writes draft  →  submits for review  →  processor gives feedback
                                                     ↓
Communicator accepts / edits / rejects → message sent to chat| Dimension | Setting |
|---|---|
| Initiation | Communicator-initiated (On Submit) or system-initiated (Pause Triggered) |
| Control | Communicator |
| Timing | Pre-send |
While a review phase is active, each message from the communicator goes to the processor first. The feedback shows above the input box with two buttons. Send sends the draft as it is now. Re-submit sends the edited draft for a new review. The communicator does not have to change the draft. The settings are as follows (builder labels in parentheses):
- Trigger (Review Trigger) — On Submit or Pause Triggered. With On Submit, the processor reviews the draft when the communicator clicks Send. With Pause Triggered, the draft goes for review automatically when the communicator stops typing.
- Pause timeout (Pause Timeout, seconds) — how long the communicator must stop typing. It applies to Pause Triggered only. The default is 3 s.
- Feedback format (Feedback Format) — one of three formats: Freeform gives free-text feedback. Inline Edit gives the processor's own version of the draft, with the label Suggested version. The Use this version button puts that version in the input box. A human processor edits the draft directly. Carrier asks an LLM to reply with the revised draft only. Approve/Reject gives a verdict (✓ Approved / ✗ Not approved) and an optional reason. A human processor has Approve and Reject buttons. Carrier asks an LLM for a JSON verdict. If the reply is not a JSON verdict, Carrier shows it as text. The verdict is only advice: the communicator can still send.
- Max rounds (Max Rounds) — the maximum number of reviews for one message, with the first submission included. On the last round, a note replaces Re-submit. Carrier sends a draft that goes past the limit as it is. The count starts again after each sent message. If the field is empty, there is no limit.
The export shows each request, the feedback and the result in Processor Interactions. The result is what the communicator did: sent or re-submitted, and for suggestions, accepted or dismissed.
Research applications include better writing quality, self-reflection, metacognitive scaffolding and peer-review dynamics.
Generate
Communicator clicks Ask Processor  →  processor creates a draft
                                        ↓
Communicator accepts (into the input box) or dismisses → edits → sends| Dimension | Setting |
|---|---|
| Initiation | Communicator-initiated (the communicator asks) |
| Control | Communicator (the communicator edits before sending) |
| Timing | On-demand |
Research applications include the perception of AI ghostwriting, co-authoring dynamics, and the balance between draft quality and editing effort.
Real-time assist
Communicator types  →  a human processor watches the draft  /  an LLM fires on a schedule
                       ↓
Processor sends ephemeral suggestions → communicator accepts or dismisses| Dimension | Setting |
|---|---|
| Initiation | System-initiated (continuous) |
| Control | Communicator (suggestions are temporary) |
| Timing | During composition |
A human processor sees the draft of the communicator live, one keystroke at a time. The human processor can send suggestions at any time, for peer coaching or live mentoring. An LLM processor is too slow for keystrokes, so it fires on a schedule. It fires every N chamber messages, every N milliseconds, or both. A minimum interval between suggestions and a maximum number of suggestions in a phase apply. When the communicator accepts a suggestion, Carrier adds it to the end of the text in the input box. Carrier does not send a message for the communicator.
3.5.4 Phase scripts: dynamic processor behaviour
A processor can change its behaviour during a chamber. For this, Carrier uses phase scripts. A phase script is an ordered list of phases. Each phase has a mode and a transition trigger that starts the next phase.
phases: [
    { id: "warmup",     mode: "disabled", transition: { on-start } }
    { id: "review",     mode: "review",   transition: { message-count: 5 } }
    { id: "generate",   mode: "generate", transition: { time-elapsed: 180000 } }
]
In this example, the processor starts disabled. After five messages, it changes to review mode. Three minutes after the segment starts, it changes to generate mode. Phases always go in sequence: Carrier monitors only the trigger of the next phase. The transition trigger types (Transition Trigger) are:
| Trigger | When the next phase activates |
|---|---|
| On-start | When the segment starts. You can limit it to one segment. |
| Message-count | After N messages in the chatroom since the segment started. |
| Time-elapsed | N milliseconds after the segment started. This also applies to a first phase. If that time has already passed when the previous phase activates, the phase activates immediately. |
| Keyword | When a specified keyword appears in a message. |
| Participant-event | When a participant joins the room or leaves it (disconnects). You select which event. |
| Manual | When you click Next phase in the chatroom view of the experiment dashboard. That control can move any running processor to its next phase. |
| On-end | When the segment ends. You can name one segment. The phase then continues into the next segment, unless that segment has its own on-start phase. |
Use phase scripts for designs such as progressive scaffolding. In this design, the processor starts with much review and then gives less help over time. Another design is adaptive intervention, which changes the mode after a quality threshold.
3.5.5 Context configuration
You can configure how much of the conversation a processor sees (Context Level):
| Level | What the processor sees |
|---|---|
| None | Only the current draft. No chat history. |
| Partial | The last N messages. You set N. |
| Full | All of the chamber's chat history up to that point. |
For LLM processors, the context level sets what Carrier sends to the model with each call. In Agent (provider-managed) memory mode, the provider keeps the conversation, and Carrier attaches no context. Human processors have no context level. For a human, the Chat Observation setting of the role shows or hides a read-only live chat next to the suggestion interface. To keep earlier conversation away from the processor, set the context to none. For a human processor, turn off Chat Observation.
3.5.6 Research uses of the processor role
| Design | Processor configuration | What it studies |
|---|---|---|
| AI writing coach | LLM processor, review mode, freeform feedback | Better writing quality through AI feedback. |
| Gatekeeper review | LLM processor, review mode, approve / reject, Max Rounds 2 | Effects of a verdict on what people send. |
| AI ghostwriter | LLM processor, generate mode | Perception of authorship, AI-assisted communication. |
| Peer review | Human processor, review mode | Peer-feedback dynamics. |
| Live coaching | Human processor, real-time assist mode | Expert scaffolding during composition. |
| Progressive scaffolding | Phase script: disabled → review → generate | Effects of less help over time. |
| Mode comparison | Two chamberlines: one review, one generate | Comparison of review and generation. |
§3 · Roles
3.6 How the roles interact
The three roles are independent. Each role works in a different zone, on different inputs, with a different output channel. But you can put all three roles in the same chamber and combine them.
Communicator ↔ mediator. Asymmetric. The mediator sees all messages, but the communicator does not see the view of the mediator. The mediator can broadcast to all participants. A human or scripted mediator can also disable or enable the input of a communicator and send a private prompt to one communicator. This asymmetry is intentional: it is a model of a moderator.
Communicator ↔ processor. Collaborative, but the communicator has control. The processor sees drafts and sends feedback, suggestions or generated text. The communicator decides what to send. The processor never goes around the communicator.
Mediator ↔ processor. Independent. Mediators act in the broadcast and control layer. Processors act in the composition layer. They do not interact directly, but you can align their effects. For example, a mediator can broadcast “the next message will be reviewed” at the same trigger point. At that point, a processor changes from disabled to review mode.
Four example configurations:
| Configuration | Roles present | Research scenario |
|---|---|---|
| Communicators only | 2+ communicators | Standard group discussion. |
| Communicators + mediator | N communicators + 1 mediator | Facilitated discussion. |
| Communicators + processor | N communicators + 1 processor | Help with writing. |
| Full setup | N communicators + mediator + processor | Facilitated discussion with help with writing. |
§3 · Roles
3.7 Design principles, distilled
Six principles apply to the role system. This list gives a summary for reference.
- Separation of concerns. Each role has its own zone (chat, broadcast, input) and its own function (communicate, facilitate, assist). This separation gives clear experimental contrasts.
- Communicator agency. The communicator always has final control over what they say. No mediator or processor can speak in their name.
- Type orthogonality. Any participant type that is compatible with a role can fill it. Thus human–AI comparisons are easy to set up.
- Phase-based dynamism. Mediators (with triggers) and processors (with phase scripts) can change their behaviour during a session. Thus you can make manipulations within a session and progressive designs.
- Comprehensive logging. The experiment export contains all of these records, with timestamps. Messages and broadcasts are in Chat History. Mediator actions and their releases are in Mediator Actions. Processor requests, feedback and results are in Processor Interactions.
- Scoped configuration. Settings are on the experiment, on the chamber and its slots, and on the segment. You can also limit triggers and processor phases to specific segments. There is no other override mechanism.
§3 · Roles
3.8 Builder walkthroughs
The researcher clicks “Create New Agent” and names the agent Facilitator. The researcher expands the LLM Response section and selects a provider, a model and a system prompt. The researcher clicks “Add Agent”, and the agent goes into the Library. The researcher opens the chamber and drags the agent into the Mediators lane. The lane that you drop an agent into sets its role in the chamber. You write the triggers for each chamber later, in the Script Builder (see §5.7).
The researcher creates an agent with the name Draft Reviewer and selects it in the Library. The researcher changes its Agent Role to Processor. The phase editor then replaces the trigger-script part of the configuration. The researcher clicks “Add Phase” three times. Each phase has its own mode (Mandatory Review, On-Demand Assist, Real-time Assist or Disabled). Each phase also has its own transition trigger, context level, feedback format and AI settings.
The next chapter, §4, tells about variables. Variables are the attributes that go with each participant. They decide which slots a participant can fill, which chambers the participant sees, and what each activity says to the participant.
Variables
Variables make a Carrier experiment personal. They constrain matching, control which chambers a participant sees, put context into prompts, and add conditions to triggers.
§4 · Variables
4.1 Why variables exist
Chapter 2 gives a design that puts a mix of humans, LLM chatbots, scripted chatbots and agents into a sequence of chambers. Each role in the design does what the design expects. But this design treats all participants in the same way. Each person gets the same chamberline, the same slots, the same instructions and the same prompts.
Variables make a Carrier experiment personal. A variable is an attribute of a participant. Examples are their reported expertise, their political party, their pre-survey score, or the option that they ranked first in the last chamber. The rest of the experiment can then read this value. With variables, you can:
- Constrain matching. For example, require one self-identified novice and one self-identified expert in the matched group. Or require that all members have different values for an attribute.
- Gate visibility. Show a remedial chamber only to participants with a pre-test score below a threshold. All other participants skip the chamber.
- Inject context into instructions, surveys and prompts. Tell each participant what their partner said on the pre-survey. Give an LLM mediator the political identification of each person in the room.
- Qualify triggers (§5). Let a bot respond only when a variable of a participant meets a condition.
In methodological terms, variables are the measured and manipulated characteristics of each participant that are relevant to the experiment. After Carrier records a variable, the participant keeps it for the rest of the run.
§4 · Variables
4.2 The anatomy of a variable
You define a variable one time, at the experiment level, in Variables in the builder header. Then you can refer to it from all parts of the experiment. Each definition has these parts:
| Part | What it specifies |
|---|---|
| Key | The short name that you use to refer to the variable (for example expertise, party_id, pretest_score). Start the key with a lowercase letter. Use only lowercase letters, digits and underscores. Deploy refuses an incorrect key. |
| Kind | How Carrier makes the value. It is one of the eight kinds below. The kind sets which fields the rest of the editor shows. |
| Configuration | The settings that the kind needs. Examples are the sources of an alias, the values of a random-pick, and the formula of an expression. |
| Data type | string, number, boolean or array. This is a label for the pickers of the builder. Carrier does not convert values to this type at runtime. Conditions compare the value that the variable has (see §4.3.2). |
| Default value | The value that Carrier uses when the variable gets no value. All kinds use it, except constant and concat. A constant always has its value. A concat joins the values that are present. You type the default value as text. |
| Kind | What it does |
|---|---|
| constant | A fixed value. It is the same for all participants, for all of the study. |
| alias | A friendly name for a source (§4.2.1). You can list more than one source. Carrier uses the first source that has a value for the participant. Use this to cover the equivalent source in each chamberline. Carrier reads the value each time it is necessary. |
| aggregate | The sum, average, min, max or count of numeric sources. The scope is the participant, the room or the run (§4.2.3). |
| concat | Joins text from more than one source into one block, with a separator, a prefix and a suffix. A typical use is a context block for an LLM. |
| expression | A formula on other variables and sources. It can use arithmetic, comparisons, boolean operators, and text and list helpers. For if / then / else, use the Conditional (rules) shape, because the Formula shape has no if. Carrier calculates the value again when the participant saves an answer. A missing answer gives NaN. |
| random-pick | A random value from a list. Each value can have a weight. Carrier draws the value one time for each participant, before the first chamber, and then does not change it. Each draw is independent, so the groups are not balanced. |
| counterbalance | The value that Carrier gave least often so far, with a random choice when values tie. Carrier draws it one time for each participant and then does not change it, so the cells fill evenly. When the variable is a condition on match slots, the draw prefers the value that the waiting room needs. With Balance within, Carrier balances the values separately for each value of a different variable, for example a band of a pre-survey rating. That variable must have a value when Carrier assigns the chamberline. |
| llm-processed | Carrier sends the source values and your prompt to an LLM, and stores the reply. You choose when Carrier updates the value: from a process segment, on activity, periodically, or after a delay. The scope is each participant, or one call for the room. |
You refer to a variable in three ways. The way depends on the location:
- In text (instructions, slides, survey wording, prompts, bot replies), write
{{var.expertise}}(§4.5). - In conditions (slot requirements, visibility conditions, group composition, trigger variable filters), select the variable from a list. The builder shows
var.expertiseand stores only the key. - As a source of a different variable, write
var:expertise.
4.2.1 Where variable values come from
Some kinds read data from the study: alias, aggregate, concat, and the inputs of an expression or an llm-processed variable. These kinds name one or more sources. “Pick source…” shows all the sources in the experiment. The source families are:
| Source | Reads |
|---|---|
Survey answersurvey:… | The answer to a question in the global pre- or post-survey, a chamber pre- or post-survey, or a survey segment. Carrier saves the answer when the participant submits the survey. Thus a global pre-survey answer is available for chamberline assignment, matching, visibility and text after that point. The survey-label: variant gives the label of the choice, not its stored value. Use it for questions whose choices have both. At present, chamber pre- and post-surveys do not work in the participant browser, so do not use them as sources. |
Segment submissionsegment-submission:… | What the participant submitted in a segment: the option chosen in a selection, the order made in a ranking, or the text typed in an input. The Whole chamber and whole chamberline wildcards give all matching submissions as a list. A segment embedded in a chat runs at the same time as that chat. Triggers and prompts in the parent chat can read its submission. But the value is empty until the participant submits, and the pickers tell you this (“runs alongside this segment; empty until the participant submits”). |
Segment datasegment-data:… | The data that a segment saved about itself: its startTime, its endTime, and a data object. The contents of the object depend on the segment type. There is no time-spent field. To get the time spent, subtract the two times in an expression. An attention check stores its result on the run, not here (§2.19). |
Chatchat:… | Messages from the room. You can get all messages, the first or last n, the messages of one segment, or the messages near a bot trigger. The format can be a transcript, JSON, plain text, a count, or one field. |
Identityidentity:displayName | The display name that the participant chose. |
Assigned by the platformsystem:… | The ID of the participant (system:participantId), the ID of their run (system:runId), and the ID of the chamberline that Carrier assigned to them (system:chamberline). |
Another variablevar:… | The current value of a defined variable. |
A source reads the participant whose value Carrier calculates, unless the source
names a different participant. slot:2: reads the participant in the
second slot of the chamber. Slots count from 1, in the order of the participant
list of the chamber, bots included. A role name, such as
slot:mediator:, reads the participant with that role.
room: reads the full room. A survey or system source with a slot
prefix reads the run of that participant.
4.2.2 Labels and numeric values
A variable has no list of options, so it has no separate label and numeric value. The label and the value come from the place where you define the options:
- Survey choices. A choice stores its value and shows its text. An alias on
survey:gets the value. An alias onsurvey-label:gets the text. For example, a five-point scale stores 1–5 and shows Very low … Very high. Use the first alias for numeric comparisons, and the second alias to show the text to participants. - Selection and ranking options. If you write an option as
Label | valuein the builder, the submission records the value with the label (optionValues,rankedValues).
Conditions compare the value of the variable. =, ≠ and in compare text. >, ≥, < and ≤ compare numbers. Thus the condition “This chamber only appears if expertise is ≥ 3” needs a variable whose value is the number, not the label.
4.2.3 Aggregate variables across participants
An aggregate combines numeric values with one of five operators: sum, average, min, max or count. The participant scope sets whose values Carrier uses:
- self (the default): the sources of the participant. An example is the average of their three ratings.
- chatroom: all participants in their room. An example is the mean pretest score of the room.
- run: all participants in their run.
When the scope includes other participants, each member gives their own value: their own survey answers and their own variables. A participant filter sets who counts: all (the default), humans only, or bots only. You can also filter by slot or role. This slot filter counts from 0, but slot references count from 1. Group by gives a separate result for each value of a different variable. Carrier skips missing values, unless you clear “Ignore missing sources”; then a missing value gives the Default value.
The choice between humans and all is important in two designs. In a confederate design (one human and several non-human communicators), you usually want humans only, because the other members are confederates. In a group-property analysis (for example, the mean expertise of the room), you decide if bots have a value. The operators are numeric, so you cannot average a category such as party. To count a category, use an expression, or constrain the make-up of the group directly (§4.3.4).
§4 · Variables
4.3 Variables as matching constraints
Variables first have an effect during assignment and matching. A variable can control who goes into which chamberline or chamber at three places in the configuration:
4.3.1 Chamberline assignment by a variable
Set the assignment method of the experiment to Variables-based (§1.2.2). Then one variable selects the chamberline. A table of rules maps each exact value to a chamberline:
Variable: party_id
  "Democrat"    →  Chamberline "Pro-disclosure"
  "Republican"  →  Chamberline "Anti-disclosure"
Usually the variable is a global pre-survey answer, or a random-pick or
counterbalance draw. Carrier gets this value before assignment. Carrier assigns a
chamberline at random in three cases: no rule matches the value,
there is no value, or the rule names a missing chamberline. Carrier
records this. The assignment reason of the run and the
chamberLineAssignmentReason column of the export show
random-fallback: and the cause (for example
"party_id" = "Independent" matches no row).
At deploy, the builder warns you when a random assignment can occur. The causes are a random-pick or counterbalance value that no rule covers, a rule that points to a missing chamberline, no variable, or no rules. The Fixed method also uses a random chamberline when its chamberline is missing.
4.3.2 Slot requirements
In a chamber, each human slot can have Required Properties (Matching). These are conditions that the participant in the slot must meet. Each condition has a variable, an operator (=, ≠, in, >, ≥, <, ≤) and a value. The slot can require all of its conditions or any one of them. For example, a two-slot chamber can have these slot requirements:
Slot 1   human communicator   requires:  expertise ≤ 2
Slot 2   human communicator   requires:  expertise ≥ 4
This chamber puts one novice and one expert in each session. Matching for this chamber starts only when the waiting participants include a set that fills all slots. A participant with expertise 2 can go into Slot 1. A participant with expertise 5 can go into Slot 2. But two novices cannot fill the chamber.
The search tries participants in this order: first the participants who wait for this chamber, then the participants who waited longest. If a choice leaves a different slot with no possible participant, the search goes back and tries a different choice. Example: slot A takes c1 or c2, slot B takes c2 or c3, and slot C takes c1 or c2. The oldest candidate for one slot can be the only fit for a different slot. The search still seats c1 · c3 · c2 and does not stop.
Slot requirements can use any variable that has a value when the participant waits for matching. Examples are global pre-survey answers, random-pick and counterbalance draws, and values from earlier chambers in the run. The key field lists the variables that are available at that position. It also gives the reason that other variables are not available.
4.3.3 Building one: a variable that assigns the pairing
This is the full procedure in the builder, from start to end. You define a counterbalance variable with two values. Then each of the two human slots of the chamber requires one of the values. After that, matching seats a participant only in a slot that fits their value, so each pair has one of each value. The variable is counterbalance, not random-pick, so the draw prefers the value that matching needs.
e2e/matching-variable.spec.js. The test uses a real
browser, a real server and a real database. Then it checks the data that reached
the API. Thus this recording cannot show a walkthrough that does not work.
The recording shows three important items:
- You choose one of the eight kinds in the kind picker. Each card shows a one-line description of its kind, so the help is on the control itself.
- The Required Properties key field of the slot is a picker of the variables that have a value at that position. It is not a free-text field. A variable that is not available there shows the reason.
- After you set the slots, the Used in panel of the variable shows gates 2 match slots in 1 chamber. Thus you can see the dependency from the variable and from the slot.
To do the walkthrough yourself, run npm run demo:matching. This
command seeds the fixture and starts the app. Then run
npx playwright test e2e/matching-variable.spec.js. This command does
the walkthrough in a browser, checks the data in the database, and makes the clip
above again.
4.3.4 Group-composition constraints
Sometimes slot requirements cannot express a necessary group property. Slot requirements apply to the participant in each slot. The Group Composition (Matching) constraints of a chamber apply to all the matched humans together. Each constraint has a variable and a rule:
| Rule | Holds when | Example |
|---|---|---|
| at least N have value | At least N members have the value. | A trio with gender balance: at least 1 has gender = f, and at least 1 has gender = m. |
| at most N have value | Not more than N members have the value. | Not more than 1 member from the control arm. |
| majority have value | More than half of the members have the value. | Most members of the trio identify as Democrat. |
| all different | No two members have the same value. | No two members report the same expertise level. |
| all the same | All members have the same value. | A room in which all members have the same native language. |
The matching search (§4.3.2) checks all constraints on each candidate set. It seats only a set that meets all the constraints and the requirements of each slot. Carrier counts only humans. A participant who cannot be in a valid set yet continues to wait, until the matching timeout of the chamber.
§4 · Variables
4.4 Variables as visibility gates
Variables can also control what a participant sees, not only who they see it with. A chamber can have Visibility Conditions on one or more variables. With all (the default), every condition must be true. With any, one true condition is sufficient. The chamber is in the run of the participant only if the conditions are true when the chamberline gets to that chamber.
This is the standard method for designs with branches:
- A practice chamber that only participants with a pre-test score below a threshold see.
- A debriefing chamber that exists in the high-anonymity condition but not in the low-anonymity condition. This is an alternative to two parallel chamberlines. It is useful when most of the experiment is the same in the two conditions.
- A follow-up chamber that only participants who chose option B in an earlier selection segment see.
- A refresher for all participants who scored below 50 or said that they take the course again. This chamber uses two conditions, matched any.
Visibility conditions have the same form as slot requirements. Important: Carrier checks visibility just before the chamber would begin, not one time at the start of the run. Thus you can use variables from earlier in the run as conditions for later chambers. An example is a segment submission or a survey segment answer in an earlier chamber.
When the conditions hide a chamber from a participant, the participant goes directly to the next chamber in their chamberline. The run records the chamber as skipped. The chamberline does not change. The server makes the decision. It checks the conditions (and the implicit rule below) again on its own copy of the variables of the participant. If the participant must see the chamber, the server refuses a skip of it or a jump past it. Then it sends the participant into it.
4.4.1 Slot requirements vs visibility conditions
You can ask a question at this point. Every slot of a chamber can have a requires constraint. Then participants who cannot fill a slot are never matched into the chamber. Why does Carrier also have a separate visibility condition for the chamber? Do the two not do the same thing?
They are the same in one specific case and different in the other cases. This rule controls the shared case:
Implicit skip rule. This rule applies when every human slot in a chamber has a requires constraint that is not empty. If the participant meets the constraint of no slot, Carrier skips the chamber for that participant and shows no message. Each slot uses its own all / any setting. The result is the same as a visibility condition that fails.
The skip is implicit: you do not write a separate visibility condition. Carrier removes the chamber from the run of the participant, and the participant goes to the next chamber.
Three scenarios show the difference.
Scenario A — Single fully-constrained slot. A chamber for one
participant has one human slot. The slot requires
condition = "treatment". A participant in the control condition cannot
fill it. Thus the implicit skip rule applies, and the participant goes to the next
chamber. Here, slot requirements are sufficient, and a visibility condition on the
chamber adds nothing.
Scenario B — Mixed open and constrained slots. A chamber has
two slots. One slot requires role = "expert", and the other slot has
no constraint:
Slot 1   human communicator   requires:  role = "expert"
Slot 2   human communicator   requires:  (none)
A novice can fill Slot 2, so the implicit skip rule does not apply. The novice sees the chamber and joins it with an expert. Maybe you want this: “novices and experts meet here, and the expert always sits in Slot 1”. Then this behaviour is correct, and you add nothing.
But maybe you want only experts in the chamber. Then the implicit skip rule does not
help you, and a novice can enter with no message. For a real gate here, add the
visibility condition role = "expert" to the chamber. Slot requirements
alone cannot do this.
Scenario C — Chamber-level gate plus slot-level role assignment. A debriefing chamber is only for participants who completed an earlier treatment chamber. In this chamber, a “writer” participant and a “reviewer” participant must be a pair:
Chamber "Debrief"
  visible if:  completed_treatment = true
  Slot 1   human communicator   requires:  debrief_role = "writer"
  Slot 2   human communicator   requires:  debrief_role = "reviewer"
You need both layers. The visibility condition of the chamber tells who belongs in this chamber. The slot requirements tell which slot each participant takes in the chamber.
You can put the gate into the slots, for example with
completed_treatment = true in the requires of both slots. But
this works only by chance, because the implicit skip rule applies when every slot
has a constraint. It also mixes two different intentions. A later edit can remove
the requires of Slot 2 to let any participant in. Then participants
who did not complete the treatment can see the chamber. Then the gate is gone, and
Carrier shows no message.
This is the main reason that Carrier keeps the two systems separate. Visibility conditions state the intention explicitly; slot requirements give the same result only as a side effect. Sometimes a chamber is skipped only because all its slots have constraints and the participant meets none of them. Then the skip is a side effect of a configuration that has a different purpose. Edits to the slots can remove the gate with no warning: for example, a new slot, an open slot, or a changed role name. An explicit visibility condition stays after these edits, and you can audit it as a routing rule.
A short guide to the choice:
| You want… | Use |
|---|---|
| A chamber where slot requirements alone keep out the wrong participants, and you do not expect slot edits to remove those requirements. | Slot requirements only. |
| A chamber that some participants must not see, although other participants can find an open slot in it. | A visibility condition on the chamber. |
| A chamber that admits one population and assigns roles in that population. | Both: a visibility condition for the gate, and slot requirements for the slots. |
| A routing rule that is clear to all readers and does not change when you edit slots. | A visibility condition on the chamber, plus the slot requirements that you also need. |
In short: when slot requirements act as a gate, this is a side effect. Do not use it as the gate. If a chamber must depend on a property of the participant, use a visibility condition.
§4 · Variables
4.5 Variables in instructions, surveys and prompts
The third use of variables is the most frequent: interpolation. Carrier puts variable values into the text that participants see or that bots use. Two tokens do this:
{{var.<key>}}— the value of the variable for the participant who reads the text. In a bot reply, it is the participant whose message started the trigger.{{slot:<n>:var:<key>}}or{{slot:<role>:var:<key>}}— the value for a different participant in the room. This is the participant in slot n (count from 1, as in §4.2.1), or the participant with that role. Note the colon before the key.
| Where | {{var.key}} | {{slot:n:var:key}} | Rendered |
|---|---|---|---|
| Instruction content, slide text, headings and HTML blocks, selection and ranking prompts | Yes | Yes | When the segment starts, for each participant, and again when the participant reloads the page |
| Survey wording (titles, descriptions, choice labels, placeholders) in all surveys: global surveys, chamber surveys and survey segments | Yes | — | When the survey opens |
| Scripted bot replies | Yes | Yes | Each time the bot sends the reply |
| LLM chatbot system prompts | Yes | Yes | One time, when the LLM session starts |
| Processor prompts | Yes | — | At each call |
Some examples:
Instruction segment text
Welcome. In the next ten minutes you will discuss climate policy with
another participant. On the pre-survey, you rated your expertise
{{var.expertise}} out of 5; your partner rated theirs
{{slot:2:var:expertise}}.
System prompt for an LLM mediator
You are facilitating a discussion among three participants. Their
self-identified political positions are: {{slot:1:var:party_label}},
{{slot:2:var:party_label}}, and {{slot:3:var:party_label}}. Adjust
your tone to be welcoming to all three positions; do not take sides.
Survey question
Earlier you said your most important consideration was
"{{var.top_value}}". On the slider below, indicate how strongly you
still feel that this is your most important consideration.
Note these points:
- Carrier fills in the text when the text is necessary (see the last column of the table). The text of a segment does not change during that segment. If a chamber with the same instruction occurs two times, Carrier fills in the text again each time, with the latest values.
- An answer from the same chamber can arrive too late for the text of the next segment. To show an answer in text, ask the question in an earlier chamber.
- An undefined variable shows as nothing. If empty text does not read well, set the Default value of the definition.
- Carrier shows numbers with decimals to two decimal places. The stored value keeps its full precision.
- Carrier changes survey wording only on the screen. Question names and answer values stay as you wrote them, so Carrier stores the responses under the same keys for all participants.
- The variable menu of the instruction editor gives
{{var.key}}. For each human slot in the chamber, it also gives{{slot:n:var:key}}.
4.5.1 Showing a label rather than a value
Interpolation gives only the value of a variable. There are no
_label or _value companion variables. To show a survey
choice label to participants and use its value in conditions, define two variables.
Make an alias on survey: for the value, and an alias on
survey-label: for the label (§4.2.2). Then interpolate the second
alias. For instructions to participants, the label is usually better. For an LLM
prompt, use the value or the label, as the prompt needs.
§4 · Variables
4.6 Variables in trigger conditions
The fourth use of variables is in trigger conditions (§5). All triggers except LLM-driven triggers can have a Variable filter. A filter has conditions on the variables of one participant, matched all or any. The trigger fires only when the filter is true. The filter can use the variables of:
- Sender of the message — for triggers that a message or action of a participant starts. These are keyword, pattern, message count, per-participant count, sequence and participant action. For example, a bot answers the keyword “X” only when the writer has
condition = "treatment". A bot message has no participant as its sender, so an after-agent-message trigger must filter on a slot. - A slot — for all trigger types, timed and count triggers included. For example: “send this nudge at 2 minutes only if slot 1 is in the treatment arm”.
Carrier checks the filter of a message trigger before the bot selects which matching trigger fires. Thus, if the filter blocks the match with the highest priority, a match with a lower priority can still answer. §5.3.2 tells how the filters of the triggers of one bot work together.
§4 · Variables
4.7 Builder walkthroughs
e2e/variables-walkthroughs.spec.js recorded these clips. The test uses
the builder in a real browser, deploys, and checks the data that reached the
database. Thus these recordings cannot show a walkthrough that does not work.
The researcher opens Variables and clicks “+ New variable”. They type the key expertise and a description. In the kind cards, they select alias, a friendly name for a source. They set the data type to number. “Pick source…” shows all sources in the experiment, including the values that the platform assigns. They select the global pre-survey question expertise. “Apply changes” keeps the edit in the builder. Deploy saves it as an alias of survey:global-pre:expertise.
In a chamber with two human slots, the researcher clicks Participant A. Under Required Properties (Matching), they add the condition var.expertise ≤ 2. They click Participant B and add var.expertise ≥ 4. By default, each slot requires all of its conditions. The switch above the list gives any. The chamber now makes pairs of one novice and one expert.
The researcher selects a chamber and changes its name to “Remedial Explainer”. They open its Visibility Conditions panel and add two conditions: var.pretest < 0.5 and var.expertise ≤ 2. They set the list to Match ANY condition. Now the chamber appears for a participant who meets one or both conditions. If the list is empty, all participants see the chamber.
Triggers are the rule system that controls the behaviour of all non-human participants in the experiment. They are the last of the four systems. §5 describes them.
Triggers
Triggers are the rules that control each non-human participant. A trigger has a condition, a response and, optionally, an action.
§5 · Triggers
5.1 Why triggers exist
The last three chapters answer: what shape is the experiment, who is in it, and what do we know about them. One question remains: how do the non-human participants behave? A scripted chatbot, an LLM chatbot and an agent are only slots in a chamber. They need rules that tell them when to speak and what to say.
The trigger system gives these rules. A trigger is a rule with these parts:
- A condition — what must be true before the trigger fires.
- A response — what the bot says when the trigger fires.
- Optionally, an action — what else the bot does when the trigger fires. For example, the bot submits an answer in a selection, ranking or input segment. A mediator can also pause the input of a participant or send a private prompt (§5.5).
The configuration of a non-human participant is a list of triggers. Each trigger has a condition, a response and an optional action. When a message arrives, Carrier finds the triggers whose conditions match. For each agent, Carrier fires one trigger: the match with the highest priority that its modifiers let through (§5.6.3). If no match passes, Carrier uses the fallback of the agent.
Timed and counting triggers fire on their own schedule. These rules apply to scripted chatbots, whose responses are pre-written sentences. They also apply to LLM chatbots, whose replies a language model writes while an LLM-mode trigger is active.
In the methods literature, a confederate script gives a human confederate rules of the form “when X happens, do Y”. A list of triggers does the same for an interactive bot. With Carrier, you can write the conditions that occur in real conversations. Carrier applies the same rules in the same way in each session.
§5 · Triggers
5.2 The trigger model: condition → response → action
A trigger has this structure:
The next three sections describe the three parts. §5.6 describes the modifiers.
§5 · Triggers
5.3 Conditions: when a trigger fires
The condition decides if the trigger runs. For this reason, it is the most important part to know. Carrier has many condition types. They are in groups by the events that they monitor: message content, time, message counts, participant events, and the state of the room.
5.3.1 The catalogue of condition types
| Type | Listens for | Typical use |
|---|---|---|
keyword | A word or phrase that you set, in a chat message | Reply when a participant writes “climate”. Send a greeting when a participant writes “hello”. |
regex | A chat message that matches a regular expression | Find URLs, bad language, or statements such as “I disagree with X”. |
time | A delay (ms) from the start of the segment | Send an opening prompt after 5 s. Tell participants the time after 8 min. |
message-count | The segment message count gets to N (once, at N) or to a multiple of N (every N). Messages from participants and from agents both count. Caution: if message N is from the agent itself, the trigger does not fire at that count. In once mode, it then never fires. | Start a summary at message 20. Intervene after each 10 messages. |
participant-message-count | The number of messages from one participant (any participant, a human, an agent, or a named participant). The count is the total, the consecutive messages, or the messages since the trigger last fired. | Find a participant who controls the discussion. Encourage a participant who writes little. |
participant-action | A participant event: join, leave, a submission (submitted, submission replaced), all participants submitted or completed, or a participant did not submit before a deadline | Greet a participant who joins. Mark a participant who leaves. React to a vote. |
after-bot-message | A message from a named agent (any message, or a message from specified triggers) | Chain agents to each other. Make interactions between many agents in stages. |
event-monitor | A watch period on the chat. It starts at segment start, after a delay, on a matching message, or from a chain. It succeeds on a response, a message count, or matching content (keywords or an LLM check). It chains to other triggers on success or on failure. | “Ask a question. Then react if the answer mentions X, or if it does not.” |
chain-only | (Passive) Fires only when another trigger chains to it | Make responses with many steps. |
llm-driven | Starts an LLM mode for the agent. The mode starts at segment start, after a delay, on a matching message, on a message from another agent, or from a chain. Until the mode stops, a language model writes the replies of the agent. | Natural conversation. See §5.4.2. |
periodic | (Mediator only) Fires at a fixed interval | Regular check-ins. Repeated summaries. |
aggregate | (Mediator only) Fires when N messages collect in a time window | A summary of a group of messages. |
topic-detected | (Mediator only) Fires when Carrier finds a topic pattern | Control the topic of the discussion. |
activity-timeout | (Mediator only) Fires after a period with no messages | Prompt participants when the chat is quiet. |
participant-count | (Mediator only) Fires when the number of active participants goes above or below a threshold | React when participants leave or join. |
Two practical notes:
- Agents work only in some segments. They work in chat, social, shop, selection, ranking, input and task segments. In a slide, survey or other segment, all triggers are silent, timed triggers too. A trigger that only replies works in chat, social and shop segments. A trigger with a segment action also works in the segments that it submits to.
- The mediator-only types (
periodic,aggregate,topic-detected,activity-timeout,participant-count) work only for mediator agents. The trigger editor shows them only for a mediator. The rail of the Script Builder shows them for all agents. Where they cannot work, the rail shows them dimmed, with the tag MED. If you drop one on an agent that is not a mediator, the builder refuses it and shows a note.
5.3.2 Modifiers shared by all condition types
Some modifiers make a condition narrower. The firing modifiers (priority, cooldown, max fires, probability, chaining) are in §5.6.3.
| Modifier | Meaning |
|---|---|
| Case sensitivity | For keyword and regex conditions: whether upper case and lower case must match. The default is no. |
| Match mode | For keyword conditions: any keyword is sufficient (the default), or all keywords are necessary. |
| Sender filter | For triggers that a message or action of a participant starts. Set it in the Only messages from field: Anyone (the default), Participants only (not agents), or the participant in one slot. A participant-action trigger also has its own slot selector. |
| Variable filter | Conditions on the variables of one participant: the sender of the message, or the participant in a slot. You select if all conditions or any condition must be true. If they are not true, the trigger does not fire. Use this filter to make a trigger depend on the experimental condition. For example: “fire this prompt only if the condition of the sender is treatment” (§4.6). LLM-driven triggers do not have this filter. |
The variable filter is very useful with variables (§4). One set of triggers on one bot template can give different behaviour in different chamberlines. The difference comes only from the variables of the participants in the chamber.
5.3.3 An aside: triggers, segments, and the “active segment” filter
Most triggers have an active-segments filter (Active in segments in the trigger editor). This filter is a list of segment IDs in the chamber. The trigger can fire only during these segments. An empty list means that the trigger can fire in all segments. Usually you limit the trigger to one segment, for example a chat segment. Then the rule applies during the discussion, but not during the survey at the end.
The filter also accepts embedded child segments. Use them to make a trigger fire only while a specific embedded vote overlay is open.
This detail causes a common problem. If a trigger does not fire, examine its active-segments filter first. Often the filter does not include the segment that the chamber is in.
The filter has a second important effect: the clock of a time trigger starts again at each segment entry. There is no clock for the full chamber. When the chamber starts a segment, Carrier arms each time trigger for that segment from zero. When the segment ends, Carrier removes each timer that has not fired. This has three results:
- A delay that is longer than the segment never fires. For example, a trigger set to 12:00 in a segment that auto-advances at 10:00 waits and then Carrier removes it. Carrier shows no error at run time.
- A trigger with an empty active-segments list is armed in every compatible segment. Its countdown starts again in each segment. Thus “fire once at 30 seconds” fires at 30 seconds in each of three segments, unless you set Max fires.
- You can compare two delays only in one segment. Ten seconds into a late segment comes after forty-five seconds into an early segment, although 10 is less than 45.
Idle detection uses a different clock. Its value starts from the last message, not from segment entry. Thus the value is the earliest time that the trigger can fire, not the time that it fires. In a busy chat, it can never fire. The Timeline view (§5.6.2) shows all of this. It also shows the triggers that cannot work.
§5 · Triggers
5.4 Responses: what the bot says
When the condition of a trigger is true, the response tells Carrier which message to send. There are two very different types of response.
5.4.1 Scripted responses
A scripted response is a pre-written sentence, or a list of sentences. From a list, Carrier selects one sentence at random. A scripted chatbot can use only scripted responses. LLM chatbots and agents can also use them when you want control of the exact text.
The configuration is small:
- Message — a fixed text, or a list from which Carrier selects one text at random.
- Delay (Thinking Delay) — the time before Carrier sends the message. It is a fixed delay, a random delay in a range, or a delay that Carrier calculates from the message length. The agent settings set the delay. A value in the trigger editor replaces it for that trigger. After the delay, a typing indicator can show. Its time comes from the message length, or it is a fixed time.
- Probability — the chance that the trigger fires when its condition is true (default 1.0). See §5.6.3.
A message can include data from the room: {{var.key}} and
{{slot:N:var:key}} (§4.5),
{{sender.name}} (the participant who started the trigger), {{bot.name}},
{{participantCount}}, {{messageCount}},
{{elapsedTime}}, {{lastSpeaker}},
{{topParticipant}} and {{participants}}. It can also include
{{participant.NAME.messageCount}} or a survey answer of a named participant.
A mediator broadcast can also use {{triggeringKeyword}},
{{triggeringMessage}} and {{aggregateSummary}}.
Scripted responses are fixed text. You write each sentence that the agent can say, so the set of possible messages is finite and visible. Between sessions, only the random settings change: the selection from a list, a delay range, and a probability. Use scripted responses when experimental control is more important than natural conversation. Examples are confederate-AI conformity studies, attention-check probes, and scripted “noise” messages.
5.4.2 LLM-generated responses
The other type is a language model that writes the replies of the agent. An
LLM mode trigger (llm-driven) starts a period. In this
period, the agent sends a request to OpenAI or Anthropic for each message that it
monitors. Google is in the list, but Carrier does not support it yet. An agent that
uses Google fails its pre-flight check. The request has these parts:
- The system prompt (personality, role, instructions). Carrier fills in
{{var.key}}/{{slot:N:var:key}}one time, when the mode starts (§4.5). - Optionally, the chat history: the last N messages (Context Window, default 20). Optionally, the survey answers of the participants.
These settings control the period and the messages that the agent answers:
- Activate On — segment start, after a delay, a matching message, a message from another agent, or only from a chain.
- Respond To — the messages that the agent answers: from anyone, from participants only, from agents only, or from one named sender. Idle Detection makes the agent wait for a pause before it answers (default 4000 ms). A value of 0 makes it answer each message immediately.
- Deactivation Mode — after a silence (each message starts the timer again), after a number of replies, on a keyword, or only from a chain. When the mode stops, it can chain to another trigger.
- Memory — the Conversation memory setting of the agent sets this, not the trigger. With One-shot, each reply is a new call with the history above. With Agent, the provider keeps the conversation (OpenAI Responses, or an Anthropic agent). This conversation continues after a page refresh.
The reply is plain text. Carrier sends it as a message from the agent. An empty reply means that the agent stays silent.
Each chatroom has an LLM token ceiling. You set it in the settings of the experiment. The server default is 500,000 tokens. When the room uses all of its tokens, its agents stop replying. Carrier shows no error message.
Thus the response of an LLM-mode trigger is open-ended. The model can write any text that agrees with its prompt. The conversation changes the text each time. Scripted responses give control but little variation. LLM responses give natural conversation but less control. Use LLM responses when the realism of the agent is part of the test.
5.4.3 Choosing between scripted and LLM responses
This guide applies to most studies:
| If you want… | Prefer… | Because… |
|---|---|---|
| The same words in each session | Scripted | You write each possible sentence before the study. |
| Natural bot behaviour that changes | LLM | The model adapts to what the participant said. |
| A confederate that always stays in its role | Scripted | The behaviour of an LLM can change over time. Scripted text does not change. |
| A facilitator that replies to topics in a real conversation | LLM | You cannot write a response for each possible topic. |
| A strict audit of bot messages | Scripted | The set of possible messages is finite and visible. |
One bot can use the two types together. A bot template can have scripted triggers for greetings, attention checks and exit messages. It can also have LLM triggers for most of the discussion. Use the response type that is best for each situation.
5.4.4 Response logic and silence
The settings of its LLM-mode trigger control when an LLM agent speaks (§5.4.2): activation, target, idle time and deactivation. A quiet facilitator answers only participants, after a pause, for a limited number of replies. An active facilitator answers anyone, immediately, until the segment ends. To make the agent speak first, add a timed scripted trigger for the greeting. To make an agent speak after a silence, give a mediator an idle detection trigger.
Older configurations. Older versions had five
response-logic switches on the agent (triggerOnFirstMessage,
respondToEveryMessage, respondOnMention /
mentionKeywords, initialSalute, timeoutTrigger).
Carrier does not read them now. When the builder opens such an experiment, it changes
the agent into an LLM-mode trigger and a greeting trigger. The builder does not show
the switches. It also does not show the Trigger Mode select that replaced them.
§5 · Triggers
5.5 Actions: what else the bot does
A trigger can also do something to the chamber, not only in the chat. It can do this with a reply or without a reply. There are two types of action. A third type has a design, but Carrier does not have it yet:
| Mechanism | Available to | What it does | Decided when? |
|---|---|---|---|
| Mediator actions (5.5.1) | Mediator agents | Pause or open again the chat input of a participant, send a private prompt, ask for attention, highlight the triggering message | In the trigger configuration |
| LLM-chosen actions (5.5.2) | — | A model selects interventions turn by turn | Not available |
| Segment submissions (5.5.3) | Any agent | Submit a vote, a ranking or a text answer with the participants | In the trigger configuration. In each session, the value is fixed, random, copied, or written by a model. |
After a trigger fires (it sends its reply or does its action), it can also chain to another trigger (§5.6.3).
5.5.1 Mediator actions
The trigger of a mediator agent can do the interventions that a human mediator does (§3.4.3). In the Mediator action section of the trigger editor, select one action:
- Disable chat input — pause the input of the target for a set time (default 60 s). Then Carrier opens the input again and shows your message.
- Re-enable chat input — stop a pause before its end.
- Send a private prompt — a message that only the target sees.
- Request attention — a visual signal to the target.
- Highlight the triggering message — a short highlight that all participants see.
The target is the sender of the message that started the trigger, a
slot, or all participants. The message can use {{var.key}} and
{{sender.name}}. Carrier writes each action to the action log of the
chatroom and to the mediator-actions rows of the export. Each row shows the agent and
the trigger. A re-enable action closes the row of the pause. Only mediator agents can
do these actions; for other roles, the section does not show.
Mediator actions make a confederate-chatbot conformity study the same for all participants. For example, a rule says “pause the input of the participant for 30 s when they reply first”. Another rule says “prompt the quiet participant after two minutes”. The chat then has the same structure in each session. There are no chamber-level actions (advance the segment, end the chamber, set a variable).
5.5.2 LLM-chosen actions
Not currently available. The reply of an LLM agent is plain text (§5.4.2). The model cannot select an intervention. Thus an LLM mediator can only broadcast (§3.4.3). For interventions, give the mediator scripted triggers with mediator actions (5.5.1) in addition to its LLM mode. For example, use a keyword or participant-count trigger that pauses or prompts.
5.5.3 Segment submissions
The interactive segments in §2.2
(selection, ranking, input and
task) collect an answer from each participant in the chamber. An agent
can also submit an answer with the humans, as a confederate does in a
behavioural lab study. To do this, use the Segment Action section of
the trigger editor, on a trigger that you limit to that segment. Carrier attaches the
submission to the agent. Carrier keeps and exports it in the same format as a human
answer. Thus aggregates and variables (§4)
read agent answers and human answers in the same way.
The answer depends on the segment type. For a selection, it is one or
more option indices (in slider mode, a value in the slider range). For a
ranking, it is a full order of the items. For an input or a
task, it is a text answer, which Carrier cuts to the maximum length of the
segment. The custom app data of a task belongs only to the participant; an agent
submits only the text. The value comes from one of four data modes:
- Static — the value that you set: the options, the order, or the answer text. The agent submits that value in each session.
- Random — a one-answer selection selects a random option, optionally with weights. A multiple-answer selection, a slider and a ranking use a uniform random value. An input or task selects one answer from a list that you write (one answer for each line).
- Referenced — the value comes from the human answers: match the first human, match the majority, oppose the majority, or a different option at random. On an input or task segment, the agent copies the answer of the first participant. If there is no human answer yet, the agent uses a random value.
- LLM-generated (LLM / Agentic in the editor) — the agent asks a model. The request has the question of the segment, optionally the chat, and a JSON format for the answer. The format is an index, an order, or a text in the length limits of the segment. If the answer does not fit, the agent tries again one time. If it fails again, the agent uses a random value or submits nothing, as you set in On failure. Carrier keeps the raw reply of the model with the submission for audit.
Three settings change how Carrier uses the answer of the agent.
countTowardTotal (Count toward “all submitted”)
controls if the answer counts in the check that moves the chamber on. Clear it for a
passive confederate that must not stop progress. showInResults controls
if the answer shows in the results that participants see after a selection or ranking.
tagAsBot marks the answer as an agent answer in the stored data; the
default is off. A delay (none, fixed, or a random range) makes the submission come
later than the start of the segment.
input segments need a special note. Free text causes more
measurement-validity problems than a selected option. It is harder to compare the
text of an agent across sessions, and small differences in words can be important.
Input segments do not show the answers of other participants. Thus participants see
the answer of an agent only where you quote it. You can quote it through a variable on
its submission, in a later segment or in the chat. With LLM-generated answers, keep the prompt narrow.
The export has the raw output of the model for audit.
Example: a confederate study has a selection segment (“Which
option do you find more compelling?”). Then it has an input segment
(“In one sentence, why?”). Two agents use static mode in
the selection segment and select option A in each session. Thus the results screen
shows two humans and two agents, and the agents always select option A.
In the input segment, the agents use LLM-generated mode. Their prompt tells them to explain option A in plain words, as a peer does. A later chat segment quotes those answers through variables. Across sessions, the selections of the agents are the same. Their explanations use different words but have the same content.
5.5.4 Choosing among them
| If you want… | Prefer… |
|---|---|
| The same turn-taking control in each session | Mediator actions (5.5.1) on fixed conditions. |
| To study the effect of one intervention pattern | Mediator actions. The intervention is the manipulation, so it must be the same for all participants. |
| A facilitator that talks naturally and intervenes | An LLM mode for its replies. Scripted triggers with mediator actions for its interventions. |
| An agent that votes, ranks, or writes with humans | Segment submissions (5.5.3). Select the data mode that gives the reproducibility that you need. |
| A confederate condition where the agents submit identical answers in each session | Segment submissions in static mode (5.5.3). |
§5 · Triggers
5.6 Composing triggers
5.6.1 Reading a script: the three views
You write all agents of a chamber together in the Script Builder. It shows the same triggers in three views. A fourth button, Sort, puts the triggers of each agent in the order of when they can fire. Each view answers a question that the other views cannot answer.
| View | Answers |
|---|---|
| Flow | What does each agent have? There is one column for each agent in the chamber. Each column shows the triggers in order and the fallback. The panel on the right shows the selected trigger. To add a trigger, drag a type from the rail onto a column. To open the full editor, double-click a node. |
| Storyboard | What does a participant see? The full chamber as one sequence, with one chapter for each segment. Chained triggers and follower triggers show after the event that starts them. In each chapter, triggers without a fixed time show after the timed triggers. |
| Timeline | When does each event occur? See below. |
5.6.2 The Timeline view, and what it catches
The Timeline shows the segments of the chamber as bands, with one lane for each agent. It shows a mark for each segment in which a trigger is armed (ready to fire). Each band has its own ruler that starts at 0:00, because the runtime uses this clock (§5.3.3). Thus a trigger with no segment scope shows one time in each compatible band. This is what occurs at run time.
- A filled pin is a scheduled time, from the delay of the trigger.
- A hatched bar is a reactive trigger (keyword, regex, after-agent-message). It has no position in time. It has only a window in which it is armed.
- A bar with an open right edge is an idle timeout. It fires at that time at the earliest, or later, or never.
- A dashed violet bar is a chain-only trigger. It has no condition of its own. It runs when another trigger chains to it.
- A grey pin in an amber hatch is armed after the end of its segment. It does not run.
Below the bands, a panel shows the problems in the schedule. Carrier calculates each row from the configuration only; you do not have to run the experiment. Without this panel, you see each of these failures only in a pilot:
- a time trigger that is armed after the end of the segment that it runs in;
- a trigger with no segment scope that is armed again in each segment, without a warning;
- a chain-only trigger that no agent chains to (the check counts chain targets, event-monitor success and failure targets, content branches, and LLM-mode deactivation targets);
- a trigger limited to a segment type that cannot run it, for example a response trigger on an instruction segment.
The same checks run when you select Deploy. Thus Carrier shows a script that cannot work before participants see it.
5.6.3 Composition modifiers
Most agents have more than one trigger. The modifiers below control how the rules interact. All trigger types obey them, whatever starts the trigger. They are in the Firing section of the trigger editor, but Probability is in the Response section:
- Enabled. A disabled trigger stays in the script but never fires.
- Priority. Sometimes more than one trigger of an agent matches the same message. Carrier tries them in order of priority, highest first. The first trigger that its modifiers let through fires. Only one trigger fires for each agent and each message. If its probability, cooldown or max fires stops the top match, Carrier tries the next match, and then the fallback of the agent. Use priority for exceptions: a high-priority attention-check trigger fires before a greeting that also matches.
- Cooldown. The minimum time between two firings of the trigger, in seconds. Thus a condition that stays true does not make the agent repeat itself.
- Max fires. The maximum number of times that the trigger can fire in a chamber (Max fires per chamber), timed triggers included. For example, an introduction that fires one time.
- Probability. The chance that the trigger fires when its condition is true (default 1.0). Use it for random interventions.
- Then chain to. Caution: a trigger that you add in the open Script Builder is not in this list until you select Apply changes. Before that, type its ID in the Or type ID manually field. The chain target fires after this trigger sends its reply or does its action. It fires after a delay that you set. Use chains to make behaviour with many steps. For example, trigger A sends a message and chains to trigger B. Trigger B asks a follow-up question two seconds later and chains to C. The target is often a
chain-onlytrigger, which can fire only from a chain. Carrier looks for the chain target on all agents in the chamber. A scripted target fires on its own agent. An event monitor or an LLM-mode target starts on its own agent. For this reason, the Script Builder shows all agents of a chamber together, with the chains between them. Event monitors and LLM modes also chain on success, failure or deactivation.
With these modifiers, a list of triggers becomes a directed graph of conditional behaviour. Most experiments need only simple lists. Use the modifiers for designs that need them.
5.6.4 Variable conditions in triggers (again)
The variable filter from §5.3.2 is also important when you combine triggers. Examine this list of triggers with variable filters:
TRIGGER 1   keyword "help", variable filter: sender's condition = "treatment"  → respond with X
TRIGGER 2   keyword "help", variable filter: sender's condition = "control"    → respond with Y
This list has the same effect as two bots, one for each condition, with one trigger each. You can write the contrast as “one bot with two filtered triggers” or as “two bots, one for each condition”. This is a design decision. One bot makes the experiment shorter and easier to read. Two bots are sometimes clearer when the two conditions are different in many small ways.
§5 · Triggers
5.7 Builder walkthroughs
e2e/triggers-walkthroughs.spec.js records these clips. It uses the
Script Builder in a real browser, deploys the experiment, and examines the data in the
database. Thus the recordings always show the current builder.
Triggers belong to a chamber. Thus the researcher first puts the agent in a chamber and opens its Script Builder. They drag Keyword match from the rail onto the column of the agent, and the trigger editor opens. They set the keyword climate, a response message, a 1500 ms delay and a probability of 0.7. When they save, the trigger shows in the flow between Segment start and the fallback of the agent. The label of the trigger is its condition. The panel on the right shows when the trigger fires, its limits and its reply.
In the Script Builder, the researcher drags Chain only onto the agent. This trigger never fires on its own. They give it the response “Thanks for sharing.” Then they double-click the keyword trigger of the agent. In its Firing section, they set Then chain to the new trigger, with a 2000 ms delay. Now only the keyword trigger can start the chain-only trigger. Each time the keyword trigger fires, the follow-up message comes two seconds later.
The researcher drags LLM mode onto an agent in the Script Builder. The trigger editor asks when the agent starts LLM mode (Activate On; here, Segment Start). It asks for the system prompt (“You facilitate a balanced discussion…”), the provider and the model. It asks which messages the agent answers (Respond To; here, humans only). It also asks how the agent stops LLM mode (Deactivation Mode; here, after a silence). LLM mode can also chain to another trigger when it stops. The saved node shows llm-driven: segment-start.
This is the end of Part I. Four systems define all that a Carrier experiment can express: chamberlines/chambers/segments, roles, variables, and triggers. Part II tells you how to run an experiment that you build with them.
Running and monitoring experiments
Part II is short. Most of the useful information about Carrier is in Part I. This part tells you how to run a study that uses the four systems of Part I.
§6 · Running
6.1 The experiment lifecycle
Each experiment has a status. The dashboard shows the status, and the builder shows it in the chip next to the experiment name. The status has one of five values:
| Status | Meaning |
|---|---|
| Draft | You build the experiment in this status. The participant link shows the page “Experiment Not Available”. New experiments start in this status. |
| Active | The experiment is open. A person with the link starts a run. |
| Paused | No new participant can start. A participant who is already in a run continues, also after a reload or a lost connection. Use this status to stop enrolment during a pilot. No participant loses their run. |
| Completed | The experiment is closed permanently. No new run can start. You can export the data. |
| Archived | The experiment is closed. The dashboard list does not show it until you select Show archived. You can export the data. |
The status button on each dashboard card changes the status:
- Activate opens a draft.
- Pause pauses an active experiment.
- Resume opens a paused experiment again.
- Reactivate opens a completed or archived experiment again.
The Archive action is in the More actions menu of the card.
When you activate an experiment, Carrier does the same checks as a deploy from the builder. Carrier also does three more checks. The experiment must have a chamber line. Each chamber line must have a chamber. Each chamber must have a segment.
If a check fails, Carrier does not activate the experiment and shows a list of the problems. For example, Carrier refuses an experiment without a chamber line, with an empty line, or with an agent whose bot template is missing. These checks find structural errors only. They do not find a bad design. Thus, do a pilot of each experiment yourself (if possible, with a colleague) before real participants use it (§6.6).
When the builder is offline. The builder keeps your experiment in the browser tab. Only Deploy sends it to the server. The builder checks the connection every 30 seconds. When the builder cannot connect to the server, a banner at the top says “The builder is offline”. The line under the experiment name reads “Offline — Deploy does not work”.
Click Export JSON on the banner to save your work as a file. The export needs no server. When the connection returns, the banner closes and a message says that Deploy works again. You can then deploy. If you closed the tab, import the file into a new experiment.
§6 · Running
6.2 The dashboard at a glance
The main dashboard shows your experiments, the sessions in them, the matching queue and an alert bell. When you open an experiment, its page shows the same panels for that experiment only. The page also shows the chatrooms of the experiment. The sessions, the queue and the alerts refresh every ten seconds. The chatroom list loads one time, when the page opens.
Sessions and participants. This panel shows each participant who is in a run now. It also shows the position of the participant in the run. Examples are identity setup, a pre-survey, or Chamber N in a chamber. On the experiment page, the participant table also shows the assigned chamber line and the outcome of the run. Select a participant to see the details.
Matching queue. This panel shows each participant who waits for a match. It shows the chamber that the participant waits for, and how long the participant waited. If the queue continues to grow, the slot requirements (§4.3) are too strict to fill.
Alerts. This panel shows the items that need your attention. The most severe item is first:
- A participant disconnected.
- A participant waited a long time in the queue.
- A participant dropped out.
- An active experiment has no participant online.
- A participant limit is reached.
- The Carrier credit is low or finished.
- A model provider fails.
Chatrooms. This panel shows each chatroom (a matched chamber) of the experiment. Open a chatroom to see its transcript by segment, its action log (mediator interventions) and its processor interactions. While the chatroom is open, Carrier reads it again every few seconds. Use this view to monitor a chamber. The researcher controls of §6.3 are in this view.
For a live chatroom, Observe live opens the chatroom as its participants see it. You can only read the chatroom. You do not become a participant. Carrier writes each observation to the activity log.
§6 · Running
6.3 Live monitoring and intervention
You can use three interventions while a study runs.
End a participant's session. Use the participant table. You can give a reason. The participant sees the reason on a Session Interrupted screen (“The researcher ended your session: …”). This action is not a completion. The participant gets no completion link and no redirect to the completion URL. Carrier marks the run as terminated, with the outcome Ended by Researcher.
If the participant opens the link again, the page says that the session has ended. Use this action for a participant who cannot continue. Examples are a connection that does not recover, or a request to withdraw from the study.
Move everyone on from a Host segment. A segment with the transition mode Host (§2.5) shows no Continue button. The participants see the text “The researcher will move everyone on.” The chatroom view lists the Host segments of the chamber. Each Host segment has a Move everyone on button. This button moves each participant of the chatroom who is on the segment to the next segment.
Carrier writes this event in the transcript. Use this button when all participants must leave a briefing at the same time. You can also use it to move a pilot through its timeline manually.
Post an announcement. The chatroom view has a box for a message to all participants in the chatroom. The message arrives as a broadcast from Researcher. Carrier keeps the message in the transcript, so it becomes part of the data. Use announcements only when necessary.
The test e2e/running.spec.js tests all three interventions from start to
end. It also tests the status rules of §6.1.
§6 · Running
6.4 Exporting data
To export, select Export data in the More actions menu of the experiment on the dashboard. You can also select Export Data on the experiment page. Three choices control the file:
| Choice | Options | Effect |
|---|---|---|
| Format | Excel (.xlsx) · JSON · CSV | Excel is the default. Excel puts each section on a separate sheet. CSV writes all sections in one file, one after the other, each under its title. JSON keeps the nested structure. In Excel and CSV, Carrier writes a nested value (a list or an object) as JSON in its cell. |
| Data type | All Data · Participants Only · Chatrooms Only · Responses Only | The part of the experiment that the file contains. |
| Include test data in export | off · on | This option is off by default. When it is off, the file does not contain the runs that Carrier recorded while the experiment was in testing mode. |
The data types:
- Participants. One row for each participant. Each row has the participant id, the assigned chamber line and the reason, the chatrooms and the status. It also has the status, phase and outcome of the run, the timing (§6.5.3), and one
var.<key>column for each variable. There are no demographic fields other than the variables that you define. - Chatrooms. One row for each chatroom. Then there are sections for the members, the segment timeline, the segment starts and the chat history. More sections contain the segment submissions, the segment data, the PDF annotations, the processor interactions and the mediator actions.
- Responses. Each survey answer: one row for each question for each participant (§6.5.1).
- All. The experiment, then all the data above. It also contains the attention checks, the face monitoring, the message reports and the behavioural events. In JSON, the experiment part is the full configuration. In Excel and CSV, the experiment part has only the id, the name, the description and the export time.
For a quantitative analysis, start with Responses and Participants. For a qualitative analysis of conversations, use All in JSON, because JSON keeps the structure. Carrier makes each export when you request it. Each export contains the whole experiment. You cannot filter the export by chamber line or by date. Filter the data after you download it.
§6 · Running
6.5 What's in your data
An export shows a run from several views: surveys, conversation, timing and more. Most analysis questions use two or three of these views together. This section tells you what Carrier records and what it does not record. It also tells you which export type contains each kind of data.
| Data category | Participants | Chatrooms | Responses | All |
|---|---|---|---|---|
| Identity, assignment, status | • | • | ||
| Survey responses | •¹ | • | • | |
| Chat transcripts | • | • | ||
| Timing and pacing | • | • | • | |
| AI / processor interactions | • | • | ||
| Behavioural events | • | |||
| Attention checks and face monitoring | •² | •³ | • | |
| Assignment | • | • |
¹ The raw answers of survey segments, in the segment data of the chatroom. ² In JSON, as lists on each participant. In Excel and CSV, All gives them separate sections. ³ As notices in the transcript.
6.5.1 Survey responses
For most studies, the survey responses are the primary data. Carrier keeps the answers from four kinds of survey:
- The global pre-survey, before the first chamber, one time for each run.
- The global post-survey, after the last chamber, one time for each run.
- The chamber pre- and post-surveys, at the start and at the end of each chamber.
- The survey segments, in the timeline of a chamber.
Responses gives one row for each question for each participant. Each row has these columns:
surveyId: the title of the global survey,<chamberId>:preor:post, or the segment id.questionId.questionText: the wording of the question, from the current experiment.response.responseType: the Survey.js question type, for example rating or text.timestamp.stage: pre_survey for the global pre-survey, or global_post_survey, chamber_pre_survey, chamber_post_survey or segment_survey.- The chamber and the segment.
A matrix answer or other nested answer is one row. The response of this row is the nested value. If you delete a question after the run, the row shows the name of the question instead of its wording.
6.5.2 Chat transcripts
Carrier keeps each message in each chatroom exactly as the sender wrote it. Each message has its sender, an ISO timestamp and a message type. senderType has these values:
- participant: a human.
- agent: each scripted agent or LLM agent.
- mediator_bot: a broadcast from a mediator agent.
- mediator: a human mediator or the researcher.
- system: a notice.
An agent message also identifies the agent that sent it (agentId,
agentRole). An LLM-mode reply also gives the provider and the
model. In Excel and CSV, these values are columns.
The notices are in the conversation in time order. Thus, when you read the transcript in order, you see each notice in its position. Notices show segment advances, each “move everyone on” by the researcher, broadcasts, attention-check results and face-monitoring events. Joins, leaves and disconnects are not messages in the transcript. The member rows of the chatroom show when each participant joined and left.
Chatrooms and All contain the transcripts. Participants has only a message count.
6.5.3 Timing and pacing
- Run. When the participant started, when the participant was last active, and the total time between the two. How many times the participant reconnected. When the run started, when it completed or terminated, and why it terminated. Carrier records the current phase, not the time of each phase change.
- Chatroom. When each member joined and left. When the chatroom started each segment (Segment Starts). When each participant moved between segments (Segment Timeline). The start, end and duration of the chatroom. The first participant who finishes sets the end time, so use the member times for the stay of one participant.
- Message. Each chat message has an ISO timestamp.
With these data, you can calculate the time to the first message, the time between segments and the time in each chamber. You do not need custom instrumentation.
6.5.4 AI and processor interactions
If a chamber uses the processor role, each assist is a row with its full text:
- A review request contains the draft.
- A review reply contains the feedback.
- A generate request and its response contain the generated text.
- A real-time suggestion contains its content.
The next action of the communicator is a separate row. For a review, the action is sent (without changes) or resubmitted. For a generated suggestion or a real-time suggestion, the action is accepted or dismissed.
The replies of an agent are in the chat transcript with the human messages. Each reply identifies the agent and the model (§6.5.2). Some agents use memory that the provider manages. For these agents, Carrier keeps the conversation handle of the provider on the chatroom, but does not export it.
6.5.5 Behavioural events
Carrier records two streams of events. First, Carrier records the tab visibility of each participant during the full run. Second, in a chat segment with Enable behavior tracking set, Carrier records the activity in the chat:
- Scroll events.
- Pointer movements and clicks in the chat area.
- Focus on the message box.
- Key presses (the kind of key, not the text).
- Copy and paste events.
- Window resizes.
- Idle periods.
In All, the export gives a summary for each participant in each segment: batches, events, tab-away count and total tab-away time. JSON also contains the raw events, for replay or sequence analysis. Excel and CSV contain only the summary.
6.5.6 Attention checks and face monitoring
Carrier records each attention-check attempt on the run. The record has the segment, the mode (survey, face or captcha), the result, the retry count, the time and the details. For a survey check, the details show which answers were correct. The server grades these answers. In Excel and CSV, All has an Attention Checks section. JSON puts the attempts on each participant.
If the participant is in a chatroom, the result also shows in the transcript, without the details.
Face monitoring on a chat segment records its events in the same way. The events are warning-shown, face-returned, grace-expired, paused, resumed and terminated. Each event has its segment and its time. The events are in a Face Monitoring section and in the transcript.
6.5.7 Assignment
To find why a participant saw a condition, use these data in the export:
- The chamber line of each participant, and the reason. The reason is random, counterbalance, variables-based, fixed, single_line or no_lines. It can also be random-fallback: with the reason that the method could not assign the participant (§4.3.1).
- The value of each variable for the participant, including the variables that controlled the assignment.
- The chatrooms of the participant, and the slot and role of the participant in each chatroom. The export does not show which chambers the participant completed: that column is always empty.
The export shows the experiment as it is at the time of the export. The configuration in All and the question wording in Responses are the current versions. Carrier keeps no version history of the configuration and no randomisation seed. Thus, if you change a live study, record the time of the change. Export the data before and after the change.
6.5.8 What's conditional
Some data is in the export only when the experiment requests it. Thus, a missing section does not mean a missing value:
- Chat activity events need Enable behavior tracking on the chat segment. Carrier always records tab visibility.
- Attention-check rows need an attention-check segment.
- Face-monitoring rows need face monitoring on a chat segment.
- Processor interactions need a processor in a chamber.
- The agent, model and provider fields have values only for agent messages. For human messages, these fields are empty by design.
- Variable columns show only for the variables that the experiment defines. Carrier has no system demographic variables.
If you expect one of these data and it is missing, examine the configuration of the experiment, not the export.
§6 · Running
6.6 Pilot first, ramp second
This note does not fit in other parts of this guide, but it is important. Before you open an experiment to a large sample, do a small pilot. Use three to five participants. If possible, include yourself. A pilot is the only reliable method to find the problems that the builder cannot check. Examples of these problems:
- A slot requirement that you cannot fill in practice.
- A chamber time that is too short to read the instructions.
- An LLM mediator whose system prompt causes unexpected behaviour in real conversations.
- A survey question that has more than one meaning for real participants.
For a pilot, set the experiment status to active and keep testing mode. Keep the dashboard open. Monitor the matching queue. Open each chatroom to monitor its transcript and action log during the pilot.
Most experiments need at least one revision after the first pilot. This is normal. Plan time for it.
Your account
This part is about your account: the people who work on your studies, your participant limits, the security of your sign-in, and the backups of your data.
§7 · Your account
7.1 Owners and collaborators
An experiment has one owner and any number of collaborators:
- Both can edit the configuration, and open, pause and archive the study. They can also take it live, monitor and intervene in sessions (§6.3), and export its data.
- Only the owner adds and removes collaborators, clears test data and deletes the experiment.
- The owner can give the experiment to a collaborator. In the collaborators dialog, select Make owner (the crown) next to the collaborator. Then confirm with a code or your password (§7.3). The previous owner stays as a collaborator.
This simple model supports a usual lab pattern: one PI owns each study, and some lab members help to configure and run it.
§7 · Your account
7.2 Participant limits
Your account can have participant limits. One limit controls how many participants your experiments can run at the same time. Other limits control how many participants can complete in each UTC week, month and year.
Why the limits exist: the platform has limited server capacity, and all accounts share it. The limits keep the platform fast and stable for all studies.
To get a higher limit: send an email to the Carrier team at admin@carrierlab.org. Tell us the experiment, the number of participants and the dates of your data collection. Send the email before your data collection starts.
- The weekly, monthly and yearly limits apply only to experiments in live data-collection mode.
- The limit on participants at the same time also applies to experiments in testing mode.
- Carrier charges the limits to the owner of the experiment. Thus, the participants of a collaborator count against the limits of the owner. When the owner gives an experiment to a collaborator, its usage moves to the new owner.
If your account has limits, your dashboard shows a usage strip, and each experiment page shows a row with the limits of the owner.
When a limit is reached, a new participant who opens the study link sees a refusal page instead of the study:
- “The Study Is Busy Right Now”, when too many participants are in the study at the same time. The page tells the participant to wait and refresh.
- “This Study Is Not Accepting New Participants”, when a weekly, monthly or yearly limit is used.
Carrier never refuses a participant who is already in a study. Carrier also never refuses the owner or a collaborator who previews the study. On the dashboard, the rows at the limit say “new participants are being turned away”.
§7 · Your account
7.3 Account security
You can add a second factor in Account Settings → Security (/security). Do these steps:
- Scan the QR code with an authenticator app.
- Enter one code.
- Keep the eight backup codes in a safe place. Each backup code works one time.
After this, sign-in has two steps: first the password, then the current code (or a backup code). After too many wrong codes, the sign-in attempt ends. You can turn the second factor off on the same page. Carrier asks for a current code first.
Some actions ask you to confirm again with a current code, or with your password if you have no second factor. Examples are the transfer of an experiment to a collaborator, new backup codes, and the consent to connect an AI assistant. The confirmation stays valid for five minutes. After too many wrong codes, Carrier stops checking codes for some time.
A change to your password or your second factor signs you out on all other devices. The session that you used stays signed in.
Connect an AI assistant to Carrier (preview). With this feature, claude.ai, Claude Code, Codex CLI and ChatGPT sign in to Carrier as an OAuth connector. They do not need a pasted key.
When you add the connector, Carrier sends you through its normal login. Then a consent screen opens. The screen names the app and labels its redirect address Verified, local (an app on your computer) or unverified. Before you approve, enter a code or your password again.
Only continue if you started the connection yourself in the last few minutes. A link that another person forwards from their session can look the same. If the request started from a network address that is not yours, the consent page shows a warning.
After you connect, the assistant can work on your studies as this section describes. A connection lasts 30 days. These events revoke a connection automatically:
- A password change or reset.
- The deactivation or deletion of the account.
- A reset of your second factor.
An account can have a maximum of ten connections.
To end a connection, select Disconnect on the Account security page
(/security). A password change also disconnects all apps at the same time.
What a connected assistant can do. The assistant can list and read the experiments that you own or share, in all statuses. It can create a draft: blank, from a shared template, or as a copy of a study. It reads the full design of a study one time and changes the design in its own context. Then it checks the change. This check saves nothing. Then it saves the experiment in one step.
For small fixes, it changes parts of an experiment by path. A change can add or remove chamberlines, chambers, segments, human slots, agents, triggers and surveys. A change can also change settings. The assistant can upload images that you give it to the image library of a draft. At the end, it always gives you the builder link, so you can review the draft.
It cannot do these things:
- Delete a study or an image.
- Take a study live, or change the status of a live study.
- See or set API keys.
- Add collaborators.
- See participants, runs or exports.
- Restore revisions.
- Change a participant redirect. These are the completion and not-matched redirect URLs, the fail redirect of an attention check and the terminate redirect of face monitoring. They also include completion-condition redirects and redirects in surveys.
- Point a survey at the SurveyJS service (
surveyId). - Change the token ceiling, the data collection mode, the data retention or the content filter.
You change those items in the builder. Carrier sanitises HTML in a survey (an
html question) or a slide before participants see it, whoever wrote it.
Carrier removes unsafe content, for example scripts. Carrier does not show SurveyJS
completion pages (completedHtml and similar), so each save removes them.
Carrier adds the prefix user-content- to authored ids.
The connector's tools. The connector has 14 tools:
list_experiments, list_templates, get_experiment_overview,
get_experiment, validate_experiment, create_experiment,
create_experiment_from_template, duplicate_experiment_as_draft,
update_experiment, patch_experiment, set_experiment_status,
upload_image,
get_reference and ping. Carrier sends a maximum of 256 KB of
a design in one read. Thus, the assistant reads a large study in parts. One patch has a
maximum of 50 changes. Carrier saves all of them or none of them. Carrier does not send
the values of builder-only settings to the assistant, and a save keeps the values that
you set.
Changes before Go live. An assistant can change a draft. It can also change an active or paused experiment in testing mode. It can start a draft, pause an active experiment and resume a paused experiment. A change to an active experiment can reach participants who are in a session. After you select Go live, the assistant cannot change the experiment or its status. The assistant cannot select Go live.
Each change needs the version that the assistant read last. Thus, it cannot overwrite your edits or the edits of a collaborator. If the study changed, the assistant must read it again. If the builder is open while the assistant works, your next Deploy reports that the experiment changed in another place. Reload the builder to see the changes.
History keeps one revision before each working session of an assistant. A session ends after 15 minutes without activity (a rolling window). The revision shows the name of the app and how Carrier verified the app. Thus, you can restore the design from before the session. Image uploads make no History entry. History restores only a draft.
History also shows Changes by AI assistants. Each row shows the change, the app, and how many other studies the app read in the ten minutes before. Owners and collaborators see this list.
Carrier gives the text in your studies to the assistant as data, and tells the assistant not to obey it. But a collaborator can write instructions into a shared draft. Thus, before you go live, review what the assistant did.
Image limits:
- 5 MB for each image (JPEG, PNG, GIF, WebP).
- For each connection: 10 uploads a minute, and 100 images or 200 MB a day.
- For all your connections together: 300 images or 600 MB a day.
- For each study: 300 images or 500 MB. This limit also applies to uploads in the builder.
An assistant can create a maximum of 50 studies a day for you. A study that it creates always starts in testing mode. When it starts from a template, Carrier does not copy the builder-only settings of the template. The assistant tells you which settings to set.
See and end your connections. The Account security page
(/security) lists each connected app. For each app, the page shows how
Carrier verified the app and where access goes. It also shows the connected date, the
end date, the last use, and the changes and images. Select Disconnect
to end a connection immediately. The app must then ask you to connect again.
Three days before a connection ends, Carrier sends you one notice in the app and by email. In the builder, a study that an assistant created shows “Created with AI assistant”. An image that an assistant uploaded shows “added by” and the name of the app.
Preview. This feature is in preview. If the connection steps above do not work, the connector is not yet turned on for your Carrier server.
§7 · Your account
7.4 Backups
Carrier backs up its full database every night. The backup includes your experiments, runs, chat transcripts, survey answers and the security audit history.
- Carrier encrypts each backup and keeps it in cloud storage that is separate from the server.
- Carrier keeps each backup for 90 days. Then the storage deletes it automatically.
- Every month, Carrier restores a backup into a test database and compares it with the live data.
- If a backup or a test restore fails, the platform team gets an alert.
If the server fails completely, Carrier restores the most recent backup. You can lose the data of a maximum of 24 hours: the data that participants gave after the last backup. A restore can take some hours.
The backups protect the platform. They do not let you undo your own changes. For example, Carrier cannot restore one deleted experiment for you. Thus, do these steps:
- Export your data (§6.5) after each data collection session.
- Keep the exports in your institution's research data storage.
- Delete an experiment only when you have its export.
Appendices
A glossary, the type × role matrix, and quick references for segment types and trigger types.
Appendices
Appendix A · Glossary
| Term | Definition |
|---|---|
| Aggregate variable | A variable that Carrier calculates from a set of values. The set is the values of the participant, of all participants in the chatroom, or of all participants in the run. You can include or exclude agents. |
| Active-segment filter | The list of segments in which a trigger can fire. The builder label is Active in segments. If the list is empty, a reply trigger can fire in chat, social and shop segments. A trigger with a segment action can fire in all the agent-compatible types. |
| Chain target | The ID of a different trigger that fires after this trigger is complete. Use chain targets to make agent behaviour that has more than one step. |
| Chamber | A group of matched participants who do the same segments together. They stay together until the chamber ends. The timing and transitions of its segments set the speed of the chamber. |
| Chamberline | A sequence of chambers in a fixed order. One chamberline is one experimental condition. Carrier assigns each participant to one chamberline only. |
| Variables-based assignment | A method that assigns a chamberline from the value of one variable. A table of rules gives one chamberline for each value. If no rule covers a value, Carrier assigns a random chamberline and records it as a fallback. |
| Chatroom | The live instance of a chamber for one matched group. |
| Communicator | The role of a participant who talks in the conversation. It is the default role in all chambers. |
| Embedded segment | A segment that shows inside a chat segment. Participants do the activity and stay in the conversation. All types can be embedded, except chat, attention-check, timer, process and shop (Appendix C). |
| Global pre-survey / post-survey | The surveys at the start and at the end of a run. They are different from the chamber surveys. At present, chamber surveys do not work in the browser client. |
| Agent | The builder word for a non-human participant (participantType: 'agent'). An agent is an LLM chatbot or a scripted chatbot. Separately, Agent (provider-managed) is an option of Conversation memory for an LLM. With this option, OpenAI or Anthropic keeps the conversation. |
| LLM chatbot | A non-human participant that writes chat messages with a language model. It has no tools and no scripted rules. Its messages are open and change from session to session. |
| LLM-chosen Carrier action | An intervention action (disable_chat, prompt_participant, …) that an LLM-driven participant selects in its structured response. This function is designed but not connected at present. An LLM mediator can only broadcast (§3.4.3). |
| LLM-driven response | A response that a language model writes at the time of the message. It does not come from a script. |
| Match | The event when Carrier has sufficient participants of the correct types to fill the slots of a chamber. |
| Mediator | The role of a participant who sees all messages and broadcasts. A human mediator can also pause, prompt and enable participants again. A scripted mediator can do these actions through the mediator actions of its triggers. An LLM mediator cannot select these actions. |
| Non-human participant | A participant that is not a person. It is an agent: an LLM chatbot or a scripted chatbot. |
| Phase script | The list of phases of a processor, in order. Each phase has a mode and a transition trigger. |
| Priority | A number that sets the order of the triggers of an agent. If more than one trigger matches a message, only one trigger fires. It is the trigger with the highest priority that passes its probability, cooldown and max fires (§5.6.3). |
| Processor | The role that helps a communicator write text before the text becomes a message. A processor has three modes: review, generate and real-time assist. |
| Response | The message that a trigger sends when it fires. A response is scripted or LLM-driven. |
| Run | The full path of one participant through the experiment, from arrival to completion. |
| Scripted chatbot | A non-human participant that follows rules and always gives the same output for the same input. You configure it with triggers, and it sends pre-written messages. It can be a communicator or a mediator. As a processor, it runs as an LLM processor and does not use its script. |
| Scripted response | A pre-written message that a trigger sends when it fires. It can also be a random message from a list. |
| Segment | One activity in a chamber, for example a chat, a slide, a survey, a timer or a vote. |
| Slot | A position in a chamber. A slot has a type and a role. The type is human or agent (LLM chatbot or scripted chatbot). The role is communicator, mediator or processor. |
| Standalone segment | A segment that uses the full screen of the participant. It is the opposite of an embedded segment. |
| Trigger | A rule with a condition, a response and an action. It sets when a non-human participant speaks or acts. |
| Variable | A value that stays with a participant. Use it for matching, visibility, text interpolation and trigger conditions. |
| Visibility condition | A condition that skips an item for the participant when it is false. The item is a chamber, or a segment embedded in a chat. On a standalone segment it has no effect, and the builder shows a warning. |
Appendices
Appendix B · Type × Role compatibility matrix
| Type \ Role | Communicator | Mediator | Processor |
|---|---|---|---|
| Human | ✓ | ✓ | ✓ |
| LLM chatbot | ✓ | ✓ | ✓ |
| Scripted chatbot | ✓ | ✓ | as LLM |
This table is a copy of the table in §3.1. All combinations are permitted. A scripted chatbot in the processor role runs as an LLM processor. It does not use its script.
Appendices
Appendix C · Segment types — quick index
This index gives all fifteen segment types and the section for each type. The descriptions are in §2.2. This index only refers to them. It does not repeat them.
| Type | Reference | Compatible with AI | Embeddable |
|---|---|---|---|
slide | §2.6 | — | ✓ |
instruction | §2.7 | — | ✓ |
media | §2.8 | — | ✓ |
pdf | §2.9 | — | ✓ |
timer | §2.10 | — | — |
survey | §2.11 | — | ✓ |
input | §2.12 | ✓ | ✓ |
selection | §2.13 | ✓ | ✓ |
ranking | §2.14 | ✓ | ✓ |
chat | §2.15 | ✓ | — |
social | §2.16 | ✓ | ✓ |
task | §2.17 | ✓ | ✓ |
process | §2.18 | — | — |
attention-check | §2.19 | — | — |
shop | §2.20 | ✓ | — |
Appendices
Appendix D · Trigger types — quick index
| Type | Listens for | Notes |
|---|---|---|
keyword | A word or a phrase that you set | The type that researchers use most. |
regex | A match to a regular expression | Use it for structured patterns. |
time | A delay from the start of the segment | Fires when the delay ends. Chat activity has no effect. |
message-count | The messages in the segment, from participants and agents | Fires one time at N, or at each N. |
participant-message-count | The messages from one participant | Counts total, consecutive or since-reset messages. |
participant-action | A join, a leave, a submission, or no submission by a deadline | A slot filter is optional. |
after-bot-message | A message from a different agent | Chains one agent to a different agent. |
event-monitor | A time window on the chat, with a success result and a failure result | Chains to a different trigger for each result. |
chain-only | Nothing. It fires only from a chain. | Use it for agent behaviour that has more than one step. |
llm-driven | Starts an LLM mode: a model writes the replies of the agent | Most natural. Least replicable. |
periodic | A fixed interval | Mediator only. |
aggregate | N messages in a time window | Mediator only. |
topic-detected | A topic or a keyword pattern | Mediator only. |
activity-timeout | A period with no activity | Mediator only. |
participant-count | A limit for the number of active participants | Mediator only. |
Appendix
Appendix E · Walkthrough — building a social feed
This walkthrough shows the Feed Builder. It starts with the seeded demo experiment and ends with a feed in the database. It has the same content as §2.16, in the order that you use the Feed Builder.
The test e2e/social-feed-builder.spec.js does each step below and
checks it, on a real server and a real database. The screenshots come from a
passing run of the test, on the demo with twelve posts. If the walkthrough and the
product are different, the test fails. This is the purpose of the test. To run it:
npx playwright test e2e/social-feed-builder.spec.js does this page in
a browser and checks it. With E2E_PUBLISH_ASSETS=1, it also replaces
these figures. npm run demo:social seeds a larger demo feed and starts
the app, so that you can examine it yourself.
1 · General — the workspace
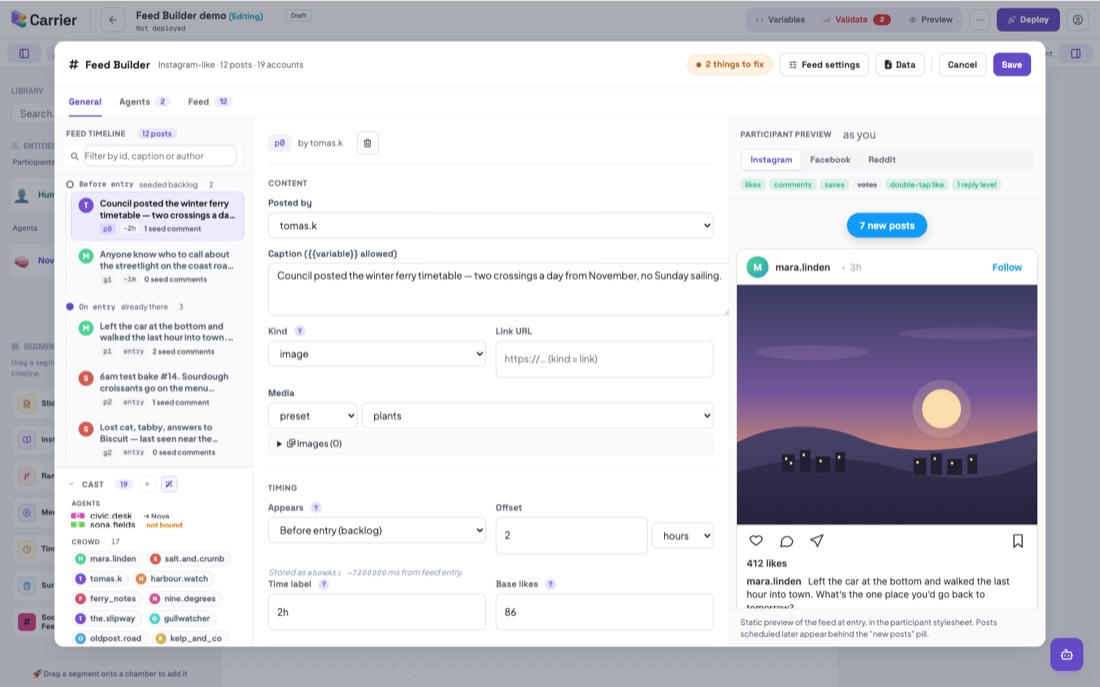
The workspace has three columns. You do all the work in them:
- The outline on the left shows the feed as a timeline of arrivals. The accounts are below the timeline. The two panes scroll separately, so a feed of a hundred posts does not hide the accounts. Each agent account has a row, with its binding on the row. Crowd accounts show as chips. A CSV import makes one crowd account for each handle. Crowd accounts do nothing at run time.
- The editor in the middle shows the item that you select.
- The preview on the right shows the feed as the participant sees it at entry. It uses the participant stylesheet and the shape of each layout.
2 · Layout is not presentation-only
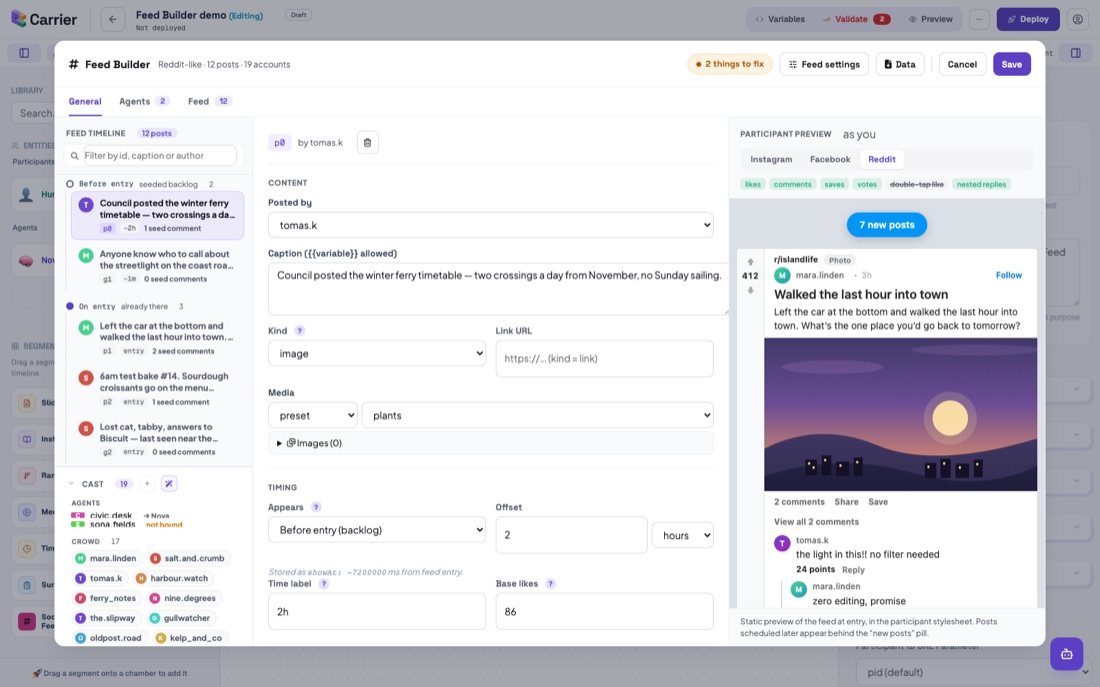
Change the layout above the preview. Three things change at the same time:
- The preview shows the new layout.
- The affordance chips change. The votes chip is on only for Reddit.
- The Forum fields group opens.
On the other two layouts, this group is dim and shows its condition. These layouts show none of these fields, and they cannot collect a vote. Make sure that you understand this setting before you run participants. Refer to the validity note in §2.16.
3 · Edit a post, and see it as a participant would
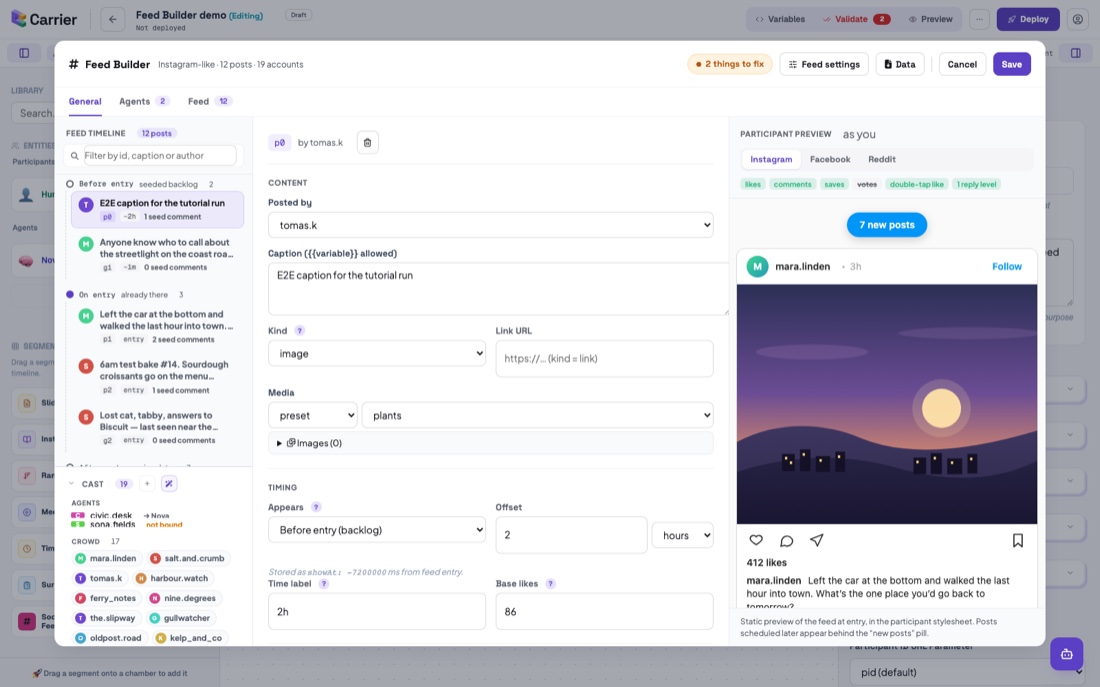
Select a post in the timeline. The middle column shows that post. The preview changes when you leave the field. You set the time of a post as a direction and a unit, not in milliseconds. The directions are before entry, at entry and after entry. The time of a seed comment is in milliseconds from entry.
You edit seed comments as a thread. Reply adds a child comment. On Instagram and Facebook, a comment that is a reply has no Reply button. These layouts show one level of replies only.
4 · Save refuses an invalid feed, and says why
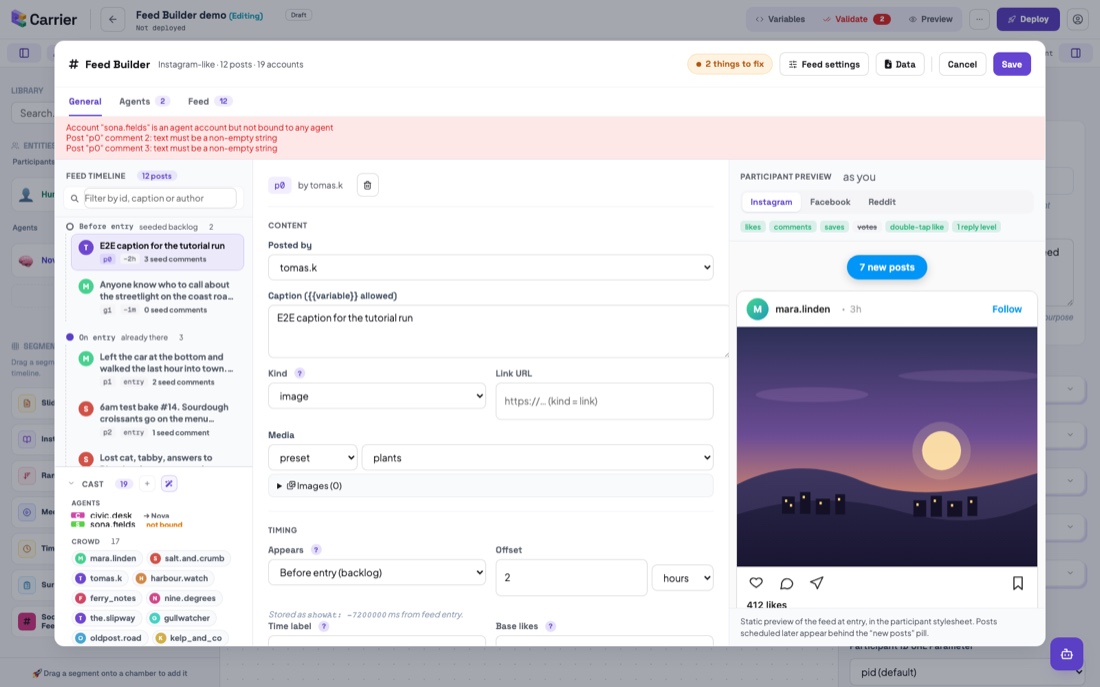
A new seed comment is empty, and a feed with an empty comment is not valid. A post with no caption also makes the feed not valid. An agent account with no bound agent also makes the feed not valid. Note: an agent account with no bound agent is an error, not a warning. You cannot save the feed or deploy the experiment. First bind the account, or change it back to a crowd account.
5 · Find things in a long feed
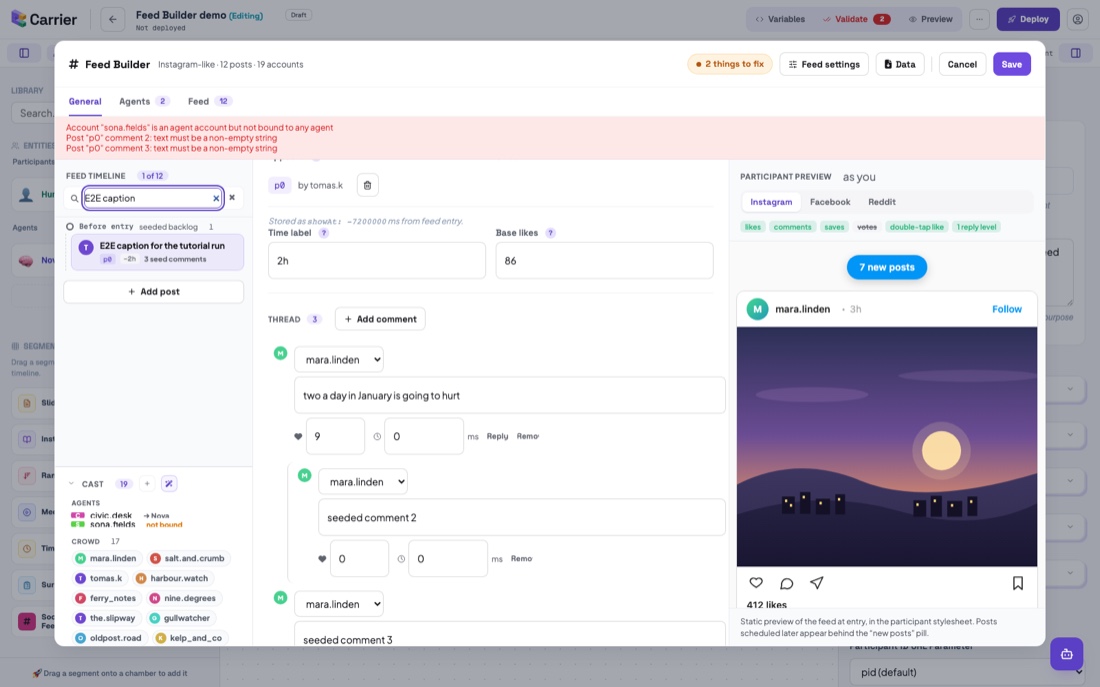
The filter finds the post id, the caption and the author. It does not change the numbers of the posts. Thus you can filter the posts and then work on the posts that show. Add post adds a new post at entry and selects it. A new post must have a caption before you can save the feed, as a comment must.
If the feed has more than eight different arrival times, the timeline makes three groups: Before entry · On entry · After entry. Each row then shows the time of its post.
6 · Agents — who replies, and how
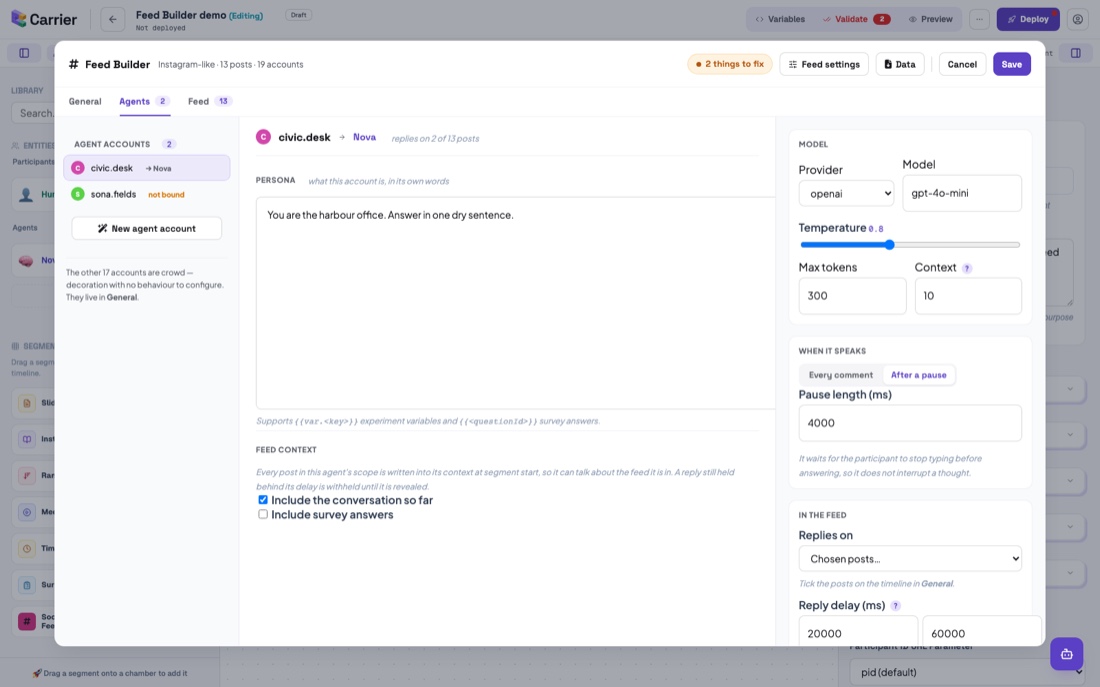
You can set these items of an agent account in the Feed Builder:
- The persona prompt.
- The provider and the model.
- The temperature, the maximum tokens and the context window.
- The feed context that it reads: the conversation and the survey answers.
- When it speaks, and its reply delay.
These fields are part of the chamber agent, not of this feed. It is the same agent card that is on the builder canvas. Thus your changes apply immediately. They do not wait for Save in the feed.
7 · An account with nothing behind it
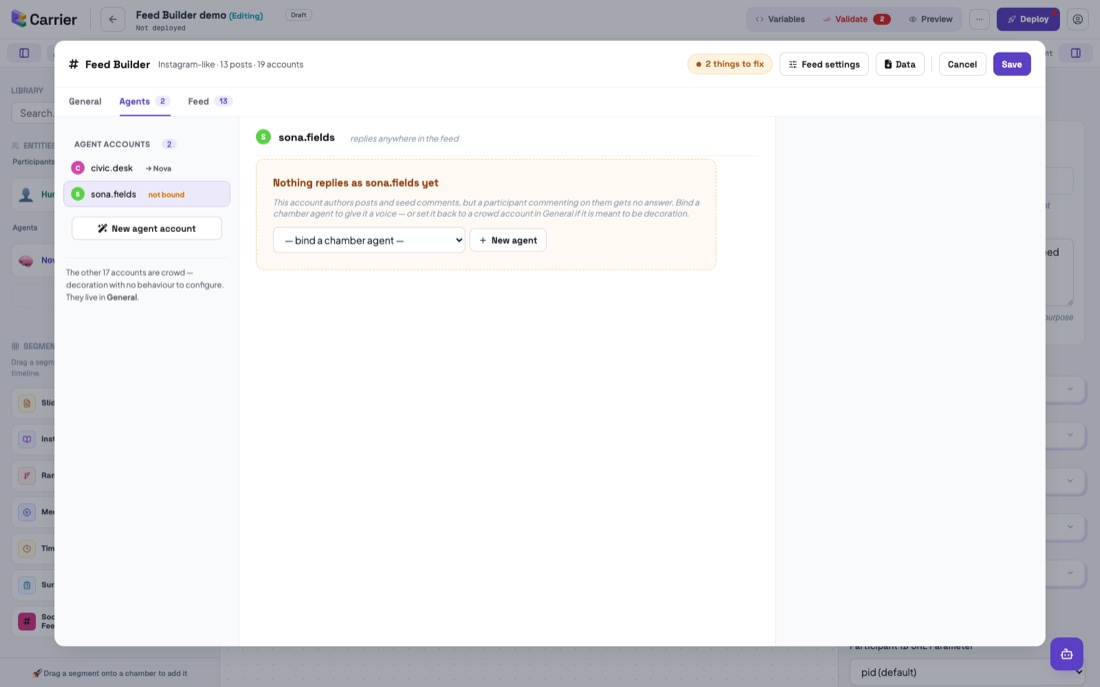
Select an account with no bound agent. The tab shows no form, because no agent replies as this account. The tab shows the bind control. The readiness chip in the header counts this account as an item to correct. An agent that is bound to a different account shows as disabled, with the reason. One chamber agent replies as one account only.
8 · Closing the readiness loop
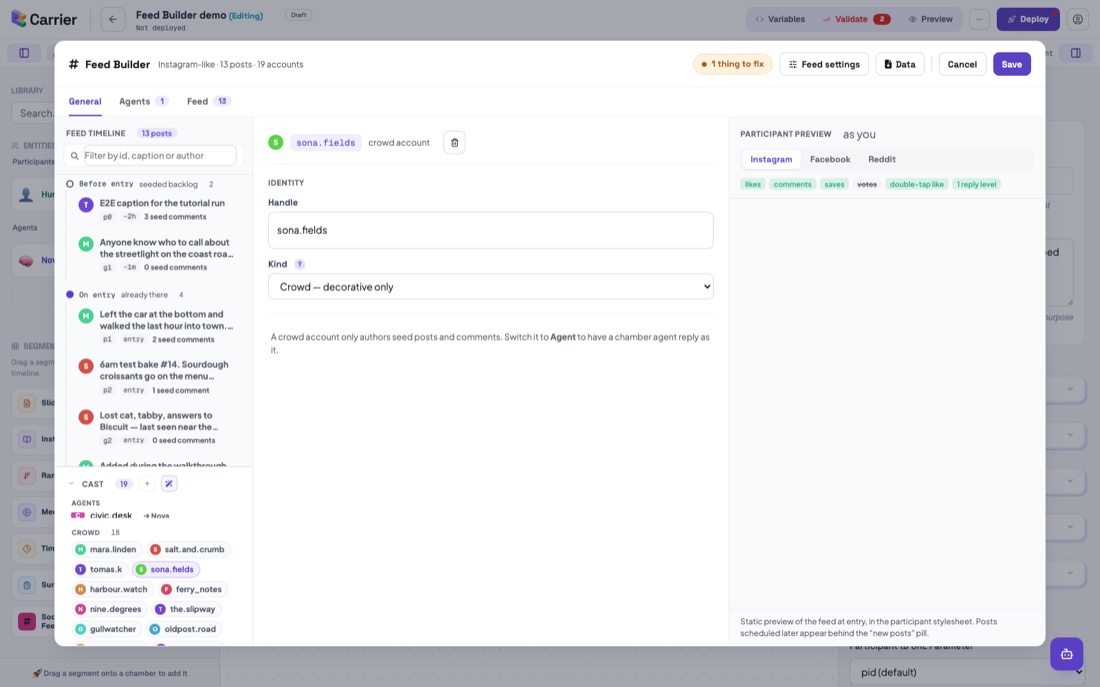
The other solution is to make the account a crowd account. In General, select the account and set its kind to Crowd. The account keeps its posts and seed comments, but it does not reply. Carrier removes the fields for agents only: binding, scope and reply delay. The readiness count decreases.
9 · Feed — every post at once
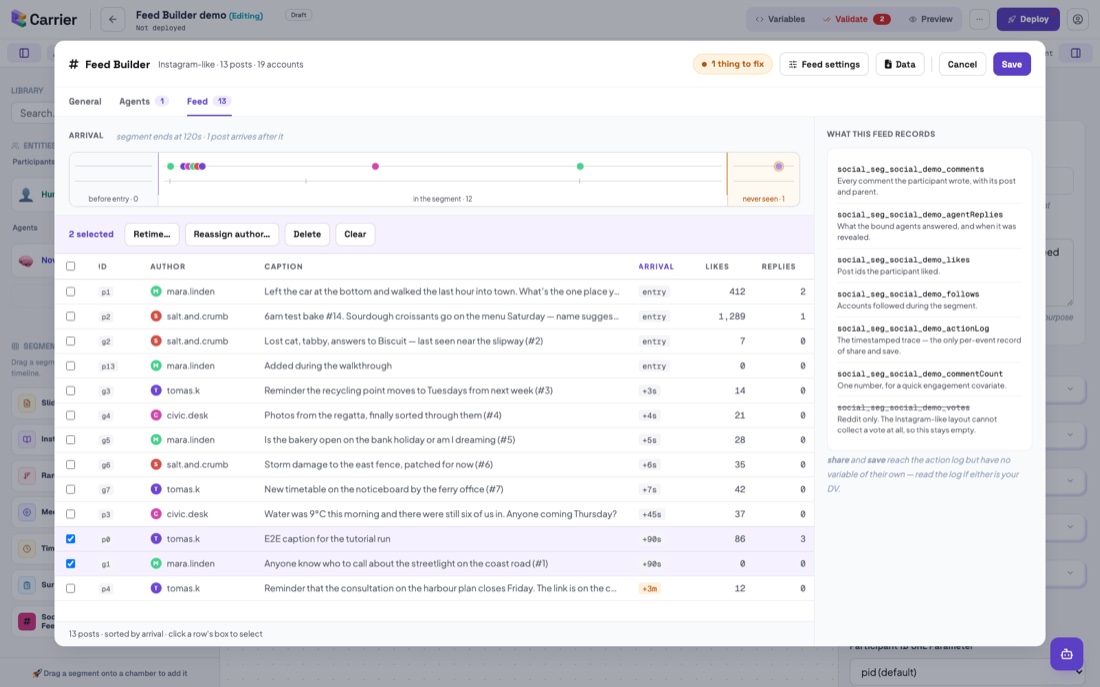
This tab shows all the feed in a table that you can sort. You can select rows. The bulk actions are Retime, Reassign author and Delete.
Above the table, an axis shows the arrival times in three bands. One linear scale cannot show a backlog post at −2h and a post at +45s. On one scale, the segment becomes too small to see. The amber band shows the posts with a time after the end of the segment. These posts are in the configuration and in the export, but participants do not see them.
10 · Deploy
Save closes the Feed Builder and writes the feed to the builder. The builder Deploy writes the experiment to the database. For an experiment that is already saved, use the Update button in the dialog. Deploy validates all segments again. Errors stop the deploy, and warnings pause it.
In this example, the warning is correct. The first post of the demo has Reddit-only fields: a title, a community, a flair and a score. The layout is Instagram. The kind of a post and the URL of a link post are not in this warning, because all layouts show them. The Reddit-only fields stay in the data, and they come back if you change the layout. Instagram does not show them.
Two persons who edit the same study cannot overwrite the changes of the other person. This is also true for two tabs. The builder sends the version that it loaded. If the study changed after that, Carrier refuses the save with This experiment was changed elsewhere. Reload, examine the change, and save again. After a save, Carrier shows warnings about possible mistakes, but they never stop the save.
Examples of these warnings are a reasoning model with a small token budget, durations in seconds, and no completion redirect.
History (in the overflow menu) shows the earlier designs of the study. It keeps the newest fifty and all go-live revisions. Each Deploy and each go-live keeps the design that it replaced. When an AI assistant is connected, each AI working session also keeps the design that it replaced. On a draft, Restore writes that design back as a new revision, after the same checks as a Deploy. Carrier also keeps the design that you replace.
You cannot restore a study that is running. Duplicate it first. A paused study is not a draft. A revision does not include uploaded images.
The test checks the data on the server, not the screen:
- The caption from step 3 is in the saved configuration.
- The two posts from step 9 have the new time
showAt: 90000. - The post from step 5 is in the configuration, and the layout is
instagramagain. - The account that changed to crowd has no
boundAgentand noscopePostIds. - The persona from step 6 is in the llm-driven trigger of the chamber agent. It is not in a copy in the feed configuration.
Annotator Documentation
The Annotator uses LLMs to annotate a large set of text data in one run. You upload a CSV file, set up LLM annotators, and download the results as a table.
Getting Started
What is the Annotator?
The Annotator sends each row of a CSV file to one or more LLMs and keeps the answers. You set up each LLM annotator with a prompt template. Then you run the task on all rows and download the results as a table. Researchers use the Annotator for these tasks:
- Text classification.
- Sentiment analysis.
- Content coding.
- Replication of annotation schemes from peer-reviewed research.
Getting Started
Key Concepts
| Concept | Description |
|---|---|
| Task | The top-level container. It holds the CSV data, the LLM configs, and the processing settings. |
| Row | One CSV record. The Annotator processes each row separately. |
| LLM Config | One provider, one model, and one prompt template, used together |
| Repetition | One more run of each row through each config. More repetitions let you measure reliability. |
| Template | A saved annotation configuration that you can use again and share |
| Work Unit | One row × one config × one repetition = one API call |
Getting Started
Your First Annotation Task
Do these four steps:
Make sure that the CSV file contains the text to annotate. Each column name becomes a template variable.
Select a provider and a model. Then write a prompt template. To insert data from a
column, use the {{columnName}} syntax.
Start the task. The Annotator sends each row through each LLM config and keeps the results.
Select Download on the task card to get the results as an Excel file. The download address also gives the results as CSV or JSON.
Getting Started
Providing API Keys
Each LLM call needs an API key for its provider: OpenAI, Anthropic, or Google. On the API Keys step of a new task, select one of these key sources:
- Platform credit (default) — the calls use Carrier's provider keys, and Carrier charges your Carrier credit. This option shows only when Carrier has a platform key. Batch mode does not accept this option.
- Use my saved keys — the calls use the keys in the API Keys panel of your account settings. You can use these keys again for all of your tasks.
- Enter manually — you type keys for this task only. You can give them when you create or edit a task.
Task Setup
Upload & Preview CSV Data
Upload a CSV file. The maximum file size is 10 MB. After the upload, a preview shows the
column headers and the first five rows. Each column name becomes a
{{columnName}} template variable that you can use in your prompt templates.
Task Setup
Configure LLM Annotators
Add one or more LLM configurations to a task. Each configuration has a provider (OpenAI, Anthropic, or Google), a model, and prompt templates. To compare models or prompt designs, add more than one config.
Each config has a temperature setting and a maxTokens setting.
Temperature controls how much the responses change from run to run. The token limit
controls the length of a response.
Task Setup
Write Prompt Templates
Each LLM config has a Prompt Template and a System Prompt
(optional). To insert a value from each CSV row into a prompt, use the
{{columnName}} syntax.
- Ask for structured output, for example JSON or a single label.
- Define clear categories, and give a description of each category.
- Give examples of correct classifications in the system prompt.
Task Setup
Set Repetitions
Set between 1 and 20 repetitions per row per config. With more than one repetition, you can measure reliability. You can also use a majority vote to find the final label.
The total number of work units (API calls) is:
rows × configs × repetitions.
Processing
Estimate Costs
Before you run a full task, select Estimate Cost on the task card. This button shows only for a task that has not started. The estimator runs a sample of 1 to 10 rows (5 by default) and measures the tokens. Then it calculates an estimated cost for the full task.
Processing
Standard Processing
In standard mode, results show as each call completes. The Annotator sends 1–20 requests at the same time. If a request fails, the Annotator tries it again automatically. The wait before each new try is two times longer than the wait before. A server failure does not cause a loss of results. The Annotator saves the result of each row when it completes.
Processing
Batch Processing
Batch mode uses the OpenAI and Anthropic batch APIs. It costs approximately 50% less, but the results can take up to 24 hours. Google does not have a batch API, so Google configs use standard processing automatically.
Processing
Pause, Resume & Cancel
- Pause — in standard mode, you can pause a task at any time. The Annotator keeps all completed results.
- Resume — the task continues from the point where it stopped.
- Cancel — the task stops permanently. The Annotator keeps all results that completed before you cancelled the task.
Templates
Use Research Templates
The Annotator has 24 built-in annotation presets from peer-reviewed research. When you select a template, it fills your LLM configs with the prompt designs from the study.
| Authors | Configs | Domain |
|---|---|---|
| Gilardi et al. (2023) | 6 annotators | Text classification |
| Rathje et al. (2024) | 6 annotators | Psychological text analysis |
| Bhatia et al. (2025) | 3 annotators | Choice dilemma annotation |
| Bojic et al. (2025) | 5 annotators | Latent content analysis |
| Kumar et al. (2026) | 4 annotators | Empathic communication evaluation |
Templates
Create Custom Templates
To keep a task configuration as a template, select Save as Template on the task card. A custom template is private by default, and only you can use it. The template keeps the full LLM config: the prompts, the model settings, and the number of repetitions.
Results
Monitor Progress
A progress bar shows how much of the task is complete. The task status changes in this
sequence: pending → processing →
completed or cancelled. In standard mode, a task can also have
the paused status. Before the sequence starts, a new task has the status
“preparing” while Carrier stores its rows. If an error stops the task, the
status changes to “failed”.
Results
Download Results
The Download button gives the results as an Excel file. The button shows when a task is completed, cancelled, or failed, and has at least one completed result. The download address also gives CSV and JSON files. The download address gives the results that are complete at that time, also while the task runs. Use these partial results to examine the quality before the full run completes.
Results
Understanding Output Format
The results table has one row for each input record. The columns contain all of the original input data and the prompt that the Annotator sent for each config. There is also one response column for each config and each repetition.
read.csv().
In Python, use pandas.read_csv(). In
Excel, open the Excel file: it has a bold header row and set column widths.
The name of a response column has this pattern:
[provider]_[model]_cfg[N]_run[N]. The config part (cfg) shows only when
the task has more than one config. The repetition part (run) shows only when the task has
more than one repetition.